Monday, July 30, 2012

Three Bean and Grilled Corn Salad


This salad is so good, I made it Saturday for dinner and couldn't stop eating it all weekend. We had leftovers for lunch after church Sunday, then I took a nap and when I woke up, all I could think about was eating more salad and granita. I think I practically had a dream about it. Sad, right?
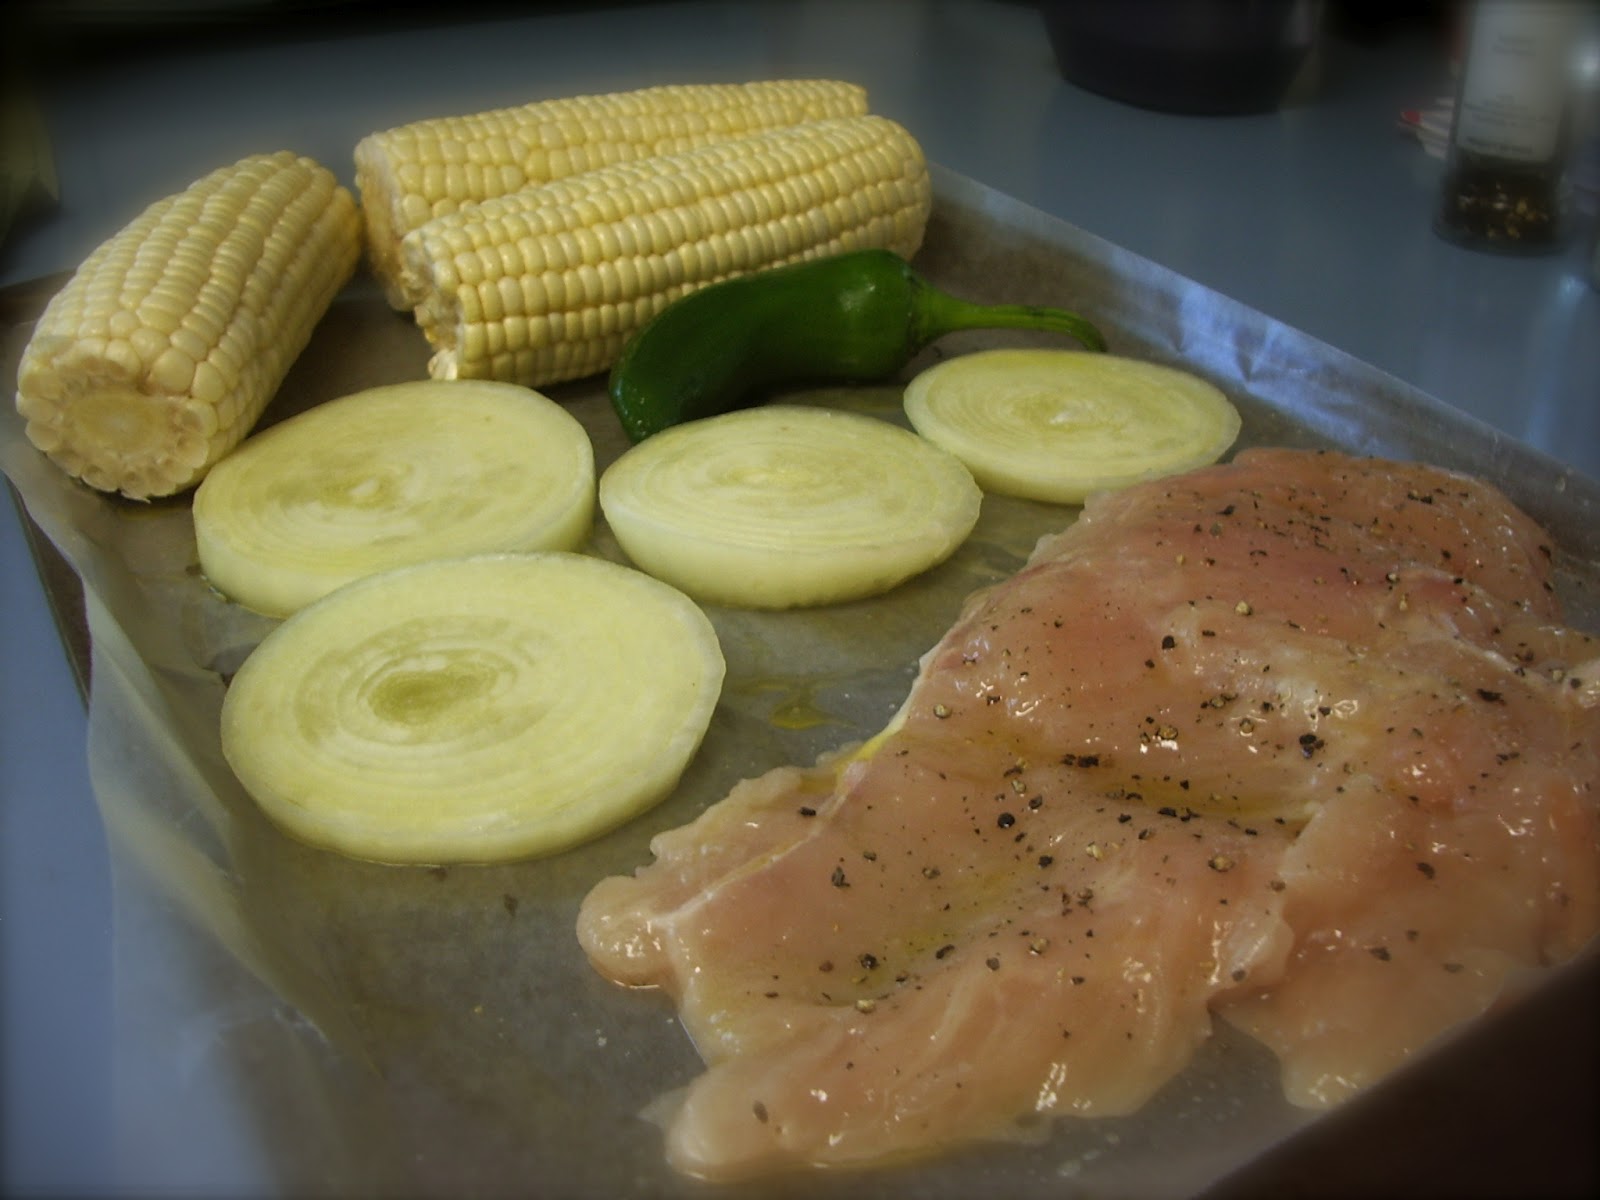
Pre-grilling...

Post-grilling...

But seriously- this is so amazing! I think it just took up residence in the top slot of my "Favorite Summer Salads" list. The grilled vegetables and the abundance of lime juice take the flavors to a whole new level and the addition of creamy avocado is to die for. I went a step further and added a grilled chicken breast to "make it a meal" (the recipe was for a side dish), but it really isn't absolutely necessary. The beans are quite filling and there is plenty to go around.


Fresh, crisp veggies infused with smoky grilled flavor, colorful beans, juicy tomatoes, topped with buttery avocado and sparkling with zesty lime...

Is your mouth watering yet?

Three Bean and Grilled Corn Salad
adapted slightly from Myrecipes
serves 12 as a side dish, 6 as a main dish

1 cup halved grape tomatoes
1 tsp salt, divided
3 ears shucked corn
1 med. yellow onion, cut into 1/4 in. thick slices
1 jalapeño pepper
2 chicken breasts (optional)
about 1 TB olive oil
1/3 cup chopped fresh cilantro
1/3 cup fresh lime juice
1 can pinto beans
1 can black beans
1 can kidney beans
2 diced, peeled avocados

Preheat the grill to med.-high heat.
Place tomatoes in a large bowl and sprinkle with 1/2 tsp salt. Let stand 10 min. Drain and rinse beans.
Brush corn, onion, jalapeño and chicken evenly with olive oil. Place on grill rack. Grill chicken until cooked through, turning once. Grill onion and jalapeño 8 min. or until lightly charred, turning halfway through. Grill corn 12 min. or until lightly charred, turning halfway through. Let vegetables stand 5 min. 
Cut kernels from cobs. Coarsely chop onion. Finely chop jalapeño, discarding stem and seeds. Dice chicken.
Add corn, onion, jalapeño and chicken to tomato mixture; toss well. Add remaining salt, cilantro, lime juice and beans to corn mixture; toss well.
Top with avocado.

Saturday, July 28, 2012

Hasselback Potatoes

When I first saw Hasselback potatoes on Pinterest, I was intrigued! They are a beautiful, flavor-filled version of the baked potato (and I guess the name originated in Sweden).

The method of slicing the potato almost all the way through and then baking produces a texture that is crispy toward the top (almost like chips) and soft nearer to the bottom of the potato. Drizzle a little olive oil on top and stuff some garlic in the cracks...mmmm...

What a great new way to serve potatoes!


Hasselback Potatoes
adapted slightly from Seasaltwithfood
makes as many as you want!

potatoes (I used golden), 1 per person
1 clove garlic per potato, peeled and thinly sliced
olive oil
butter
sea salt
pepper

Preheat oven to 425.
Wash each potato and thinly slice almost, but not all the way, through. 


Stuff slices of garlic in the crevices.


 Place potatoes on a baking sheet and top each one with little bits of butter. Drizzle with a small amount of olive oil and sprinkle with salt and pepper.


Bake about 40 min. or until skin is crispy and flesh is soft.


Thursday, July 26, 2012

{Skinny} Grilled Chicken and Roasted Broccoli Alfredo

You want to know what really makes this recipe fantastic?

No, not the juicy grilled chicken.

No, not even the amazingly rich and creamy sauce that harbors no such lurking fats like cream or butter (well, ok, if I'm going to be serious, the sauce is pretty darn fantastic. But I digress...).

What, then??

The broccoli. Oh my.

If you have never tasted roasted broccoli in your life before, please take a few minutes and treat yourself. Yes, I mean, go now, to the store and buy a head of broccoli (are they called heads?), chop it up, throw some oil on that baby and start it roasting.

Ok, where were we? While your broccoli is roasting we can finish our discussion. About what? Oh, yes. Roasted broccoli. By they time I have you drooling your own roasted broccoli will be done and then you'll thank me, ok?

SO.

My husband is a self-proclaimed broccoli disliker (he is so sweet, he would never use the word "hate"). So, even though I like it, I usually forgo it to make other veggies we both like.

Asparagus, for example.

Anyway, when he bit into a piece of the roasted broccoli included in this fabulous meal, he said something to the effect that if everyone made broccoli like that, no one would be a hater. Well, maybe not in those words. But you get the idea. He loved it! I told him that the blogger on the site where I learned how to work such magic said it was better than biting into a steak and he actually said, "I could see why she would say that..."

!!!

Something about the roasting really brings out the good side of broccoli and gives it that oh-so-yummy sort of crispiness. And doused in a fair amount of Alfredo? Don't get me started.

So, SO different than steamed broccoli. K?

Seriously, there's no way you'd know this was a "skinny" recipe if I didn't tell you.  The sauce is rich and creamy and melty like any good Alfredo. I kept having to remind myself that there was no butter and no cream involved. Crazy! I guess the Greek yogurt must be the secret weapon, because there's hardly even any milk!

So go ahead. Pretend like you're indulging.


{Skinny} Grilled Chicken and Roasted Broccoli Alfredo
makes 4 servings

2-3 chicken breasts, grilled and cut into chunks (about 2 cups)
2 cups broccoli florets
8 oz. fettuccine
2 TB olive oil
2 tsp minced garlic
2 TB flour
1 cup chicken broth
1/4 cup nonfat Greek yogurt
1/4 cup skim milk
1/4 tsp pepper
pinch of nutmeg
3/4 cup fresh Parmesan cheese, grated

To roast broccoli, preheat oven to 425. Toss florets with a small amount of olive oil, salt and pepper. Roast on foil lined cookie sheet 15-20 min. or until crisp-tender. Set aside.
Cook pasta according to package directions.
To make sauce, heat olive oil in a medium saucepan over med-low heat. Add garlic and cook, stirring frequently, until garlic is golden, about 2 min. Whisk in flour until smooth, about 2 min. Gradually whisk in the chicken broth, yogurt, milk, pepper and nutmeg. Bring to a low boil, stirring constantly. Lower the heat and simmer about 3 min. or until the mixture thickens, stirring gently. Stir in cheese until melted.
Toss pasta, chicken, broccoli and sauce to combine and evenly coat.

Tuesday, July 24, 2012

BLT Sliders with Avocado and Chipotle Camp Sauce

Some days don't you just love a simple recipe?

There's something so satisfying about the combination of flavors in a BLT. Each ingredient compliments the other in delicious, mouth-watering simplicity. Juicy tomatoes, crunchy lettuce, crisp, smoky bacon...add a little creamy avocado and a zingy sauce and you've got it made!

Is "zingy" a word? Well, since spellcheck isn't putting up a fit, I guess it must be! It's the best word I can think of to describe the yummy chipotle sauce that pairs so well with these adorable little sandwiches!


BLT Sliders with Avocado and Chipotle Camp Sauce
adapted slightly from Catz in the Kitchen
makes about 6 small sandwiches (feeds 2-3 people for a meal)

Rhodes (or other brand) frozen dinner roll dough
1 egg white
2 TB water
sesame seeds

approx. 9 slices bacon, cooked until crisp and broken into halves
approx. 2 roma tomatoes, sliced.
several lettuce leaves
1/2 an avocado, sliced

3 TB mayonnaise
2 TB Sweet Baby Ray's Honey BBQ Sauce
1/2 tsp adobo sauce (can be found in a can of chipotle chili peppers), or to taste

Follow directions on roll package, placing dough on greased cookie sheet, several inches apart instead of in a baking pan. After the first hour of thawing (before dough begins to rise), flatten each dough ball with the palm of your hand. Cover again with plastic wrap and allow rising to complete (about 3 more hours). Once dough has risen, prepare egg wash by whisking egg white and water. Brush tops of buns with egg wash, then sprinkle with sesame seeds. Bake according to package directions.
Make sauce by combining mayonnaise, BBQ sauce and adobo sauce.
When buns are cooked and cooled, slice and toast lightly. Spread sauce evenly on each side. Layer bacon, tomato slices, lettuce and avocado in each sandwich. Enjoy!

Note: You can also use regular pre-made dinner rolls or slider buns or your own favorite roll recipe! Catz in the Kitchen suggests King's Hawaiian Dinner Rolls which are also tasty!

Sunday, July 22, 2012

Tex-Mex Chicken and White Cheddar Spaghetti

You know how some dishes are better the second day?

Like, after the spices and things have had some time to chill out together in the fridge overnight (or longer)?

Well, it's a good thing this recipe makes enough for an army because it's one of those. Every time we reheated it (which, I think, was about 4 or 5 times), it seemed to taste better to me!

Maybe it was the chicken absorbing the spice of the jalapeños.

Or the noodles soaking in the sharpness of the aged white cheddar sauce.

Or the cilantro working it's way into everything else.

However it happens, this spaghetti is delicious at first bite, and even better with every subsequent taste.


Tex-Mex Chicken and White Cheddar Spaghetti
serves about  6

12 oz. thin spaghetti (I used whole wheat)
3 TB butter
1 cup diced yellow onion
2 TB flour
1 cup chicken stock
1 cup milk
1/2 lb. grated sharp white cheddar cheese
1 TB chopped pickled jalapeños + 1/2 TB juice
1/2 tsp cumin
salt & pepper to taste
2 cups cooked, shredded chicken
3 TB chopped cilantro

Cook noodles according to package directions.
In another large saucepan, melt butter and saute onions until softened, about 5 min. Stir in flour and cook 2 more minutes. Slowly whisk in chicken broth and milk to prevent lumps. Increase heat and cook until sauce has thickened. Sprinkle in grated cheese and stir to melt into sauce evenly. Stir in cumin, salt and pepper, jalapeños, jalapeño juice, chicken, cooked spaghetti and cilantro. Toss to coast everything evenly in sauce. Taste and adjust seasonings if desired. Top with more cilantro.

Friday, July 20, 2012

Berry-Lime Granita

So, this is seriously my new favorite thing about summer.


My wheels are turning with all sorts of ideas for different flavors. I can't wait to try them! With all the fresh fruits available during the summer, the possibilities are endless.

The first flavor combo I have tried for a granita is strawberry-blueberry. The inspiration came from the fresh fruit I have and the recipe came from the web, of course. I sort of tweaked it a little and it was fabulous! The icy treat was so refreshing after a hot day and it fairly burst with fruit flavor- most noticeably, the fresh lime. In addition to the deliciousness of this treat, other added benefits are that it's crazy easy and it's  actually good for you! Full of fresh fruit, lightly sweetened, this is the guilt-free summer dessert I've been searching for!

Berry-Lime Granita
adapted from HMH Designs
serves 4-6

2 cups fresh strawberries
1 cup fresh blueberries
Zest and juice from 1 lime
1/2 cup water
1/2 cup sugar

Put berries in blender and puree until smooth. 
Combine water and sugar in saucepan or microwave safe bowl and heat until sugar is dissolved.
Add lime zest, juice and sugar/water mixture to berries and pulse to combine. Pour into glass baking dish and freeze. 


Every 30 min. or so, using whisk or fork, scrape mixture and stir frozen edges toward center. Total time, about 3 hrs or until mixture is frozen, but not solid. Scrape mixture again before serving, breaking up any solid pieces. 


If granita becomes too hard, simply leave it out for a few minutes, scrape, and return to freezer.

Tuesday, July 17, 2012

Meals for a Month {July-Aug}

Here is is, already the middle of July. Summer just seems to be whizzing by, doesn't it?? I am thoroughly enjoying sunshine, flip flops and less makeup, a slower paced schedule, freckles, tennis in the park with Hubby, tans and toenail paint that doesn't last for months (like it does in the winter!), shorts and breezy sundresses, ice cream, iced coffee, sun-ripened strawberries and juicy watermelon slices, clothes drying on the line outside, lettuce fresh from the garden, brilliant roses, carefree butterflies and busy hummingbirds, fresh cut grass and of course, meat and veggies right off the grill and fresh and crunchy summer salads! To name a few.


Week 1 (July 17-21)

Tuesday
Entree: Chicken and Bacon Bruschetta
Side: Green Salad
Wednesday
Entree: BLT Sliders with Camp Sauce
Side: Hasselback Gold Potatoes
Thursday
Entree: Skinny Chicken and Broccoli Alfredo
Side: Garlic Bread


Friday
Entree: Taco Pizza
Side: Fresh Fruits and Veggies
Saturday
Entree: 3 Bean Salad with Grilled Corn and Avocado
Source: Myrecipes


Week 2 (July 24-28)

Tuesday
Entree: Chicken and Mango Kebabs
Side: Corn on the Cob
Wednesday
Entree: Slow Cooker Sweet Teriyaki Chicken
Side: Rice
Thursday
Entree: Double Bean Burgers with Avocado Basil Cream
Side: Green Salad
Friday
Entree: Pepperoni Pizza
Side: Fresh Fruits and Veggies
Saturday
Entree: Chipotle Chicken Taco Salad
Side: Tortilla Chips

Week 3 (July 31-Aug. 4)

Tuesday
Entree: Balsamic Grilled Bruschetta Chicken
Side: Risotto
Source:  Picky Palate


Wednesday
Entree: Sweet Potato and Black Bean Enchiladas
Side: Spanish Rice
Thursday
Entree: Turkey Burgers
Side: Grilled Peaches and Fresh Veggies
Friday
Entree: BBQ Chicken Pizza
Side: Fresh Fruits and Veggies
Saturday
Entree: Dorito Taco Salad

Week 4 (Aug. 7-11)

Tuesday
Entree: Blue Cheese & Balsamic Burgers
Side: Roasted Potatoes and Salad
Wednesday
Entree: Balsamic and Brown Sugar Pork Chops
Side: Rice
Thursday
Entree: Cilantro-Lime Chicken with Avocado Salsa
Side: Potatoes
Source: MyRecipes
Friday
Entree: Pepperoni Pizza
Side: Fresh Fruits and Veggies
Saturday
Entree: Tuna-Noodle Salad

I also plan on making my Aunt Marion's cowboy beans for our church's August potluck. And maybe another strawberry icebox cake!

Monday, July 16, 2012

Thai Chicken Pizza

I told you I was on a Thai kick, right? Okay, then I won't belabor the point.


A Thai kick definitely wouldn't be complete without giving this pizza a whirl.

It has all the right components...sweet chili sauce...cilantro...PEANUTS...

I actually used up all my sweet chili sauce on that delicious salad, so what do you think I did about a sauce for the crust?

Yep- I used the leftover dressing from said yummy salad. It was perfect! But, I'm sure that if you don't have some amazing Thai salad dressing leftover hanging around in the back of your fridge, that plain old sweet chili sauce will work just fine.

By the way, this was my first known and deliberate encounter with a shallot. They unwrap like garlic and look like onions and have a mild onion flavor. Don't be deceived by the mild reputation, though- I cried buckets cutting it!

Tears aside...


Enjoy the peanuts.

Thai Chicken Pizza
adapted slightly from Annie's Eats
makes 1 pizza

1 recipe pizza dough
1/4 cup sweet Asian chili sauce (or dressing, if you have it!), plus more for drizzling
1 shallot, thinly sliced
1/2 large zucchini, thinly sliced
1 cup shredded cooked chicken
2/3 cup shredded mozzarella cheese
3-4 (better make it 4) TB chopped peanuts
2 TB minced fresh cilantro
ground red pepper flakes

Preheat oven to 500.
Follow directions to make crust. Spread chili sauce (or dressing) evenly over crust.
Layer with shallot, zucchini, chicken, cheese and as much red pepper as you like (it's hot!).
Bake pizza 12-14 min. or until crust is lightly browned. Cool slightly, then sprinkle with peanuts and cilantro. Drizzle with extra sauce just before slicing and serving.

Friday, July 13, 2012

Cowboy Beans

When Hubby and I were married, three years ago, we got some very cool wedding gifts. One very unique gift we received was from my Aunt Marion. My aunt and uncle live in Malawi, Africa, with their family, serving as missionaries with African Bible Colleges. Unfortunately, because it wasn't a furlough year for them, they were unable to attend our wedding. However, they sent a very special present with my grandparents (also missionaries in Malawi).


It is a beautiful, African-made beanpot. Before I received the pot, along with instructions from my aunt (and a recipe- which I will share with you!), I had never heard of a beanpot. It is ceramic or stoneware (I'm not sure which) with a lid. I think it works much like a crock pot, designed to cook slow and low. If you don't have a beanpot, you may be able to try this recipe in your crock pot instead (although I haven't tested it!).

The recipe my aunt included with the special pot is SO good. I made it for our church's fourth of July barbecue last week and people couldn't stop raving about it! When so many wonderful ingredients are combined, how can you go wrong?


Cowboy Beans
makes approx. 8-10 side-dish servings

1/4 lb. bacon
1/4. lb. hamburger
1 onion, chopped
1 28 oz. can pork and beans
1 16 oz. can kidney beans, drained
1 16 oz. can butter beans, drained
1/2 cup brown sugar
1/3 cup white sugar
1/4 cup barbecue sauce
1/4 cup ketchup
1 TB mustard
2 TB molasses
a few drops of liquid smoke (optional)

Preheat oven to 250.
Fry and crumble the bacon. Brown hamburger and onions in bacon grease.
Combine all ingredients in beanpot and bake 4-5 hrs.
(If you don't have a beanpot, try using the crockpot on low for 4-6 hrs)

Wednesday, July 11, 2012

Strawberry Shortcake Skewers

I have been away too long! I apologize for leaving you recipe-less for over a week, but Hubby and I had a rather unexpectedly full and emotionally tiring week. I cooked {for us} only a handful of times the whole week (4 potlucks were involved in the craziness) and every time I had time I tried to squeeze in a load of laundry or do something totally mindless.


For the fourth, I did manage to make these skewers and a pot of phenomenal baked beans which I will share with you very soon, I promise! Hint: they got rave reviews at our church barbecue!

But back to the skewers.

These adorable little creations are, of course, Pinterest inspired. I was intrigued by Lady Behind the Curtain's idea to put strawberry shortcake on a stick! Genius! Everything is more fun on a stick. In her recipe, she used Grand's refrigerated biscuits, strawberries and Cool Whip. I decided to go a step or two further and use my favorite biscuit recipe and make my own homemade whipped cream (the perfect use for that carton of whipping cream leftover from the strawberry icebox cake!).

So, in the first attempt, I made a double batch of biscuits and, in the spirit of patriotism, cut them out with a cute little star shaped cookie cutter.


These I stacked with thick slices of strawberries and a dollop of whipped cream. For the red-white-and-blue effect, I topped the whole thing off with a blueberry. They were delicious, and very cute, but I'm sorry, I have no pictures. However, there were several problems with these...

1) Whipped cream is very difficult to "skewer"- I imagine Cool Whip would be the same.

2) Due to the whipped cream, the skewers are almost impossible to stack, which makes presentation and preparation difficult.

3) Not enough strawberry.

Going to a potluck the next day, I still had leftover star biscuits, so I decided to try revising the process. I simply skewered a biscuit, topped it with a whole hulled strawberry (end also removed), followed by another biscuit, another strawberry, and finally, another biscuit. They were stackable, transportable, and I served them with the whipped cream on the side for dipping or smearing or what have you. Definitely easier to handle (and better for preparing in advance!). And- more strawberry!! :) Problem(s) solved.


So, try it either way, but do try it! These little gems are so fun for summer get-togethers- my friends couldn't stop talking about them! They are cute and tasty and so unique!

Strawberry Shortcake Skewers
makes about 3 dozen skewers (cut in half if desired)

wooden skewers
doubled recipe for biscuits (or use you own favorite recipe)
sugar for sprinkling
enough strawberries to allow 2 per skewer
blueberries, if desired
whipped cream or Cool Whip for dipping

Make biscuit dough as directed. Roll out to 1/2 in. thickness. Cut out using a 1 1/2 in. cookie cutter in whatever shaped desired. Place on baking sheet. Sprinkle biscuits with sugar. Bake slightly less than directed (since biscuits are small). Cool completely.
Wash and hull strawberries.
To assemble: Skewer a biscuit and slide it down the stick, leaving room for a "handle". Follow this with a strawberry and repeat once, then end with another biscuit. Top with a blueberry if desired.
Repeat for each skewer.
Serve with whipped cream or Cool Whip for dipping.

Monday, July 2, 2012

Thai Crunch Chicken Salad


I've been on a bit of a Thai food kick.

I think it began with the delicious chicken satay...

then was encouraged by the amazing stir fry I made using the leftover peanut sauce...

and continued by the great little Thai restaurant my friends and I found in Mukilteo on our reunion...

and now, even as I bring to you this scrumptious salad, a Thai pizza recipe has gotten awfully cozy with next Friday night.

I'll confess. I'm not a huge fan of curry. I'm allergic to coconut. I don't even like spicy food. So what is it that draws me to Thai food?

What do you think?

If you guessed "peanuts" or "peanut butter" you would have hit the nail on the proverbial head. Let's be honest. That's all I'm really in it for. The excuse to spread peanut butter all over salads, pizza, noodles, chicken, whatever.

This salad lives up to its name. Crunch. Just about every ingredient in here gives that satisfying feeling. Starting with my new friend.

Readers, meet napa cabbage.

Napa Cabbage, meet readers.

I had never had the privilege of acquaintance with such a cabbage before, in fact, I did not even know such a variety existed until I looked for it at our local supermarket! It is very pretty, chops up nicely, and looks more like iceberg lettuce than its more well known comrade, green cabbage.

Next on the crunch list are carrots and cucumbers. I don't need to tell you about them, do I?

Then we have edamame. Oh, elusive edamame. I could not find these green soybeans anywhere, so what did I do? I subbed in another crunchy lookalike. Sugar snap peas! They worked like a charm with their fresh taste and signature snap. Oh, and I also substituted chives from my garden for the green onion. Yum.

Last on the crunchy lineup are, of course, peanuts. Yay peanuts!


And what is poured on top of all the crunchy goodness? This fabulous tangy-sweet dressing.


Can you guess what's in here? PEANUT BUTTER.

Oh, and other things.


Thai Crunch Chicken Salad
slightly adapted from How Sweet It Is
serves about 6

1 napa cabbage, chopped
1 red cabbage, chopped
6 green onions (or a bunch of chives)
1 large cucumber, peeled, sliced and quartered
2/3 cup chopped or sliced carrots
2/3 cup chopped sugar snap peas (or edamame)
2/3 cup torn fresh cilantro
2/3 cup chopped peanuts
3 boneless, skinless chicken breasts (grilled is delicious!)
1/2 tsp salt
1/2 tsp pepper

Dressing and Marinade
1 cup sweet chili sauce
1/2 cup rice vinegar
1/2 cup lite canned coconut milk (or regular skim milk if you're allergic like me!)
6 TB brown sugar
4 garlic cloves, pressed or finely minced
2 TB creamy peanut butter
2 tsp sized knobs of fresh ginger, grated
2 limes, juiced
1 TB soy sauce

Preheat oven to 375 degrees. Spray baking pan with nonstick spray. Season chicken with salt and pepper, then place in the baking dish.
Combine all sauce ingredients in a saucepan, whisking to combine. Bring to a boil, then reduce to a simmer and cook for 3-4 min. until slightly thickened. Remove from heat and pour half of the sauce over the chicken, turning chicken to coat completely. Set remaining sauce aside to dress salad.
Bake chicken 25-30 min. or until cooked through.
While chicken is cooking, combine all salad ingredients (except for peanuts) in a large bowl and toss. When chicken is done, let cool a few minutes, then shred or chop.
Serve salad, top with chicken, peanuts and dressing.
Related Posts Plugin for WordPress, Blogger...