Showing posts with label breakfast. Show all posts

Wednesday, November 6, 2013

Pumpkin Waffles {with Maple Whipped Cream}


So I've come to the conclusion that waffles and whipped cream were meant to be together.

Just typing that is making my mouth water.

Oh, my. We made these amazing waffles last night and they.

Are.

Killer.

Do people say "killer" anymore? Yeah, I usually don't say it much either, but these. Oh, these just are.

Whoever thought to pair maple and pumpkin together is an absolute genius. Those two elements together just scream fall and marry perfectly visually and in your mouth.

DO NOT SKIP THE WHIPPED CREAM.

You would be committing a serious, and I do mean, serious error! The real whipped cream laced with maple just takes these amazingly spicy and pumpkiny (yes, I just invented that, spell check) waffles to a whole new level. And you don't want to miss out on the ride.

Oh, and just for the record, bacon LOOOOVES hanging out with maple and pumpkin.

Just sayin'.


Pumpkin Waffles with Maple Whipped Cream
makes 4-5 waffles (on a round Belgian waffle maker)

For the waffles:

2 cups baking mix (like Bisquick)
1 tsp pumpkin pie spice
1 cup milk
1/2 cup pumpkin puree
1 tsp vanilla extract
2 TB unsalted butter, melted
1 TB vegetable oil
1  large egg

For the whipped cream:

1 cup heavy cream
2 TB maple syrup

Lightly grease a waffle maker with some nonstick spray and preheat it according to the manufacturer's directions. 
In a bowl, whisk together baking mix and pumpkin pie spice. Make a well in the center of the flour mixture.
In another bowl, combine milk, pumpkin, vanilla, butter, oil and egg. Whisk until smooth. Add to flour mixture and stir until just combined (a few lumps are ok).
Add 3/4-1 cup batter to the waffle maker and close lid. Cook according to the manufacturer's directions. Remove waffle with a fork and keep warm while repeating with remaining batter.
Make the whipped cream: in a chilled bowl with stand mixer or handheld mixer, beat cream with syrup until soft peaks form. Serve with warm waffles and more syrup if desired.

Tuesday, October 1, 2013

Overnight Sourdough Pancakes {+ my first cooking class}

So a couple of weeks ago I went to my very first cooking class! It was in our local kitchen shop and was a great experience! Our instructor, Sue, was very relaxed and methodical, taking time to demonstrate proper technique and answer any questions- and there were many! We not only learned how to bake sourdough bread in the form of sliders and buns, but also got a lesson on how to feed and maintain our very own sourdough starter! I really enjoy sourdough bread, so was excited to get to take home my own sourdough "baby"- and feed it and watch it grow!


Sue informed us that sourdough is infinitely variable- the yeast takes on different flavors depending on the air where you live! So while the sourdough in San Fran is quite sour, ours here in the NW may not be. Rather it will be a very flavorful artisan bread. In the class, we made farmstead sourdough buns (which I'd love to recreate) and they were delicious! Fluffy, soft and- while not particularly sour- bursting with flavor.


After tending and feeding my starter for a little over a week, I decided to try one of the recipes we were sent home with- sourdough pancakes!

Rule of thumb- don't deplete your store of starter! You want to have at least half a cup left to continue to feed!

The pancakes are fantastic! The sourdough gives them a hearty, yeasty flavor and a light, airy texture. They are relatively easy to prepare, too, because you prep the starter the night before (unless you want to have them for dinner, in that case you could prep it in the morning).


If you don't have your own starter, but would like to, check your local kitchen shop or order it online! Your starter should come with instructions on how to reconstitute and care for your starter.


Overnight Sourdough Pancakes
makes about 2 dozen pancakes

1 c. sourdough starter
2 c. warm water
3 1/2 c. flour
3 eggs
4 TB sugar, maple syrup, or honey
1/4 c. oil or melted butter
1 tsp baking soda
1 tsp salt

The night before you want to eat, combine in a large bowl the starter, water, and flour (make sure it has plenty of room to rise). Cover.
In the morning, add the rest of the ingredients and mix until well combined. Add more water if thinner pancakes are desired.
Heat a large pan over medium/high heat and grease with oil or butter. Spoon about 1/4 c. of batter into the pan for each pancake. Cook 1-2 min. per side, or until golden. Keep hot in a warm oven while repeating with the rest of the batter if desired. 
Serve with butter and syrup, berries, or other desired toppings.

Friday, August 9, 2013

Lemon Belgian Waffles {with Blueberry Syrup}


It's almost officially the weekend! And weekends mean brunch. Or breakfast for dinner. Pancakes. Eggs. Sausage. Bacon. Waffles.

WAFFLES.

I used to think that waffles were just pancakes all dressed up. With little holes to catch the syrup. Wonderful little holes!

Or to prevent you from spreading butter smoothly across the surface. Evil little holes!

But then my parents gave us a Belgian waffle maker for our anniversary. YUM. Not only does the waffle iron make waffle making fun (it flips over like those ones you always see at hotel continental breakfasts), but the waffles themselves are delicious! They are crispy and light, just perfect for toppings of fresh fruit and whipped cream.


This particular recipe just pops with fresh lemon flavor and gets an extra dose of indulgence from  freshly make blueberry syrup. I tell you, even though the waffles are first rate, the real star of this show is the syrup. It is a gorgeous purple color and a perfect balance of sweet and just slightly tart.

When you've polished off all your waffles, you just might have some of this syrup leftover, so let me clue you in on what to do with the remaining deliciousness (besides just eating it by the spoonful). Last week we served they syrup atop vanilla ice cream at our church potluck- oh, heaven! This week, I have been stirring a tablespoon into my plain Greek yogurt every morning in lieu of my usual honey- oh, double heaven (is that a thing?)! I'm going to miss it when it's gone. Oh, well...guess I'll just have to make some more...


Lemon Belgian Waffles with Blueberry Syrup
makes about 6 waffles

Waffles:
2 cups all purpose flour
1/2 tsp baking soda
1/2 tsp salt
1 1/4 cups buttermilk
1/2 cup milk
2 TB vegetable oil
2 TB applesauce
2 large eggs, separated
2 TB white sugar
1 1/2 TB lemon zest
2 TB fresh lemon juice

Preheat a Belgian waffle iron and grease lightly.
In a mixing bowl, whisk together flour, baking soda, and salt. In a separate large mixing bowl, whisk together buttermilk, milk, vegetable oil, applesauce, 2 egg yolks, sugar, zest and lemon juice. In a small bow with an electric hand mixer (or in the bowl of a stand mixer), beat 2 egg whites until soft peaks form.
Slowly add flour mixture to butter mixture, whisking as you do so, just until combined (don't overmix- batter should be slightly lumpy). Using a rubber spatula, gently fold in egg whites until combined. 
Spoon about 3/4 cup batter onto hot waffle iron and cook according to manufacturer's directions, until golden (cooking time will vary). Slowly lift lid when finished and carefully remove waffle. Repeat with remaining waffles and serve warm with blueberry syrup if desired.

Blueberry Syrup:
1 cup white sugar
2 TB cornstarch
1 cup cold water
2 cups fresh or frozen blueberries
1 1/2 TB fresh lemon juice

Whisk together sugar and cornstarch in a medium saucepan. Stir in water, add blueberries and lemon juice. Cook mixture over medium high heat, stirring frequently until mixture reaches a boil.
Reduce heat to medium low and boil gently for 1 minute, stirring constantly.
Pour syrup into a blender, cover and blend on low speed about 1 minute or until well pureed. 
Serve over waffles, ice cream, yogurt, etc.

Thursday, June 20, 2013

Bacon, Cheddar & Kale Frittata


So a couple of months ago I discovered the frittata. Oh, and what a delicious discovery it was!

It also opened the door of my imagination to a whole world of possible frittatas. How easy would it be to swap out the asparagus for some other vegetable? The Gruyere for a different delectable cheese?

Then I woke up one morning fantasizing about the combination of quality bacon with some sauteed kale (both of which happened to be hanging around in our fridge). Let me tell you, it was a winning idea.

I mean really, how can you possibly err when you saute kale and onions in bacon fat? And toss in some unbelievably bright farm fresh eggs. And Tillamook cheddar. I mean, really.


Bacon, Cheddar & Kale Frittata
serves 6

12 large eggs
3 TB half & half
1/2 tsp salt
1/4 tsp black pepper
4 slices bacon
1/2 medium onion, diced
4 cups chopped kale
1/2-1 cup shredded cheddar cheese, depending on preference

Preheat oven to 400.
In a medium bowl, whisk together eggs, half & half, salt and pepper until combined.
In a non-stick, oven safe skillet, cook bacon over medium heat until crisp. Remove and drain on paper towels. Reserve about 1 TB of bacon grease in pan. When drained, chop or crumble bacon and set aside.
Add onions and saute 1-2 min. Add kale and continue sauteing until kale is wilted, about 3-4 min.
Stir cheese and bacon into egg mixture. Pour egg mixture into the skillet with the onions and kale and cook, using a rubber spatula to stir and scrape the bottom. Large curds will begin to form after about 2 min. but the eggs should still be quite wet. Shake the skillet to distribute eggs evenly then allow to cook for 30 seconds without stirring- this will set the bottom.
Transfer the skillet to the oven and bake about 10 min. If the frittata is set but just slightly wet and runny when you cut into it, it is done. 
Remove from oven and let stand 5 min. Loosen edges with spatula, then slide it out of the pan, cut into wedges and serve.

Wednesday, June 12, 2013

Healthy Cinnamon Banana Pancakes


So I think I told you in my last post that Hubby and I are on a bit of a "get healthy" kick. We've shed a few pounds between us so far and it feels great! I'm loving these sunny days because I really enjoy getting on my bike in the morning and riding along the river, listening to my audiobook (right now I'm working my way through Dickens classics!) and drinking in the scenery. 

One thing about getting in shape, however, is the need to give up some things. I'm not a big fan of dieting- I prefer simply eating variety and in moderation. But when you're trying to lose weight, staying away from a lot of sugars and unhealthy fats is pretty key. So I'm trying to practice saying no...

No to sugar in my tea. No to more than one cookie. No to hot cocoa. No to seconds. No to soda. Saying no can get old, so I was excited to find that I didn't have to say no to our typical Monday "big breakfast"! 

Monday is Hubby's day off, so we usually like to make something a little different than our weekday routine, such as pancakes or waffles. In the effort to use up a few fast-ripening bananas, I came across this fabulous recipe on Pinterest!

It uses all whole wheat flour, hardly any sugar and no oils at all and the best part is the pancakes totally melt in your mouth. I couldn't believe how delicious they were, considering I'm not normally a big fan of banana flavored treats. Hubby had his with a little syrup, but I sampled them with a light smear of peanut butter. I can hardly eat a banana without a spoonful of peanut butter, so why not? It was a perfect pairing. This breakfast sure tasted indulgent, but it was nice to know it wasn't!


Healthy Cinnamon Banana Pancakes
adapted from Big Oven
makes 8-10 pancakes

2 TB sugar
1/2 tsp molasses
1/4 tsp salt
1 tsp cinnamon
1 egg
1 cup water
2 TB unsweetened applesauce
2 large, very ripe bananas, finely chopped
1 cup whole wheat flour
 1 tsp baking powder

In a medium bowl, combine sugar, molasses, salt, cinnamon, egg, water, applesauce & bananas, whisking until pretty smooth (bananas will be chunky).
Add flour and baking powder and mix in gently until just combined (stirring too much will make pancakes tough).
Heat a large pan or griddle to med-high heat and grease with non-stick cooking spray or a small amount of butter or oil.
Using a 1/4 cup measurement, pour batter onto hot pan. Cook 2-3 min. or until pancakes are no longer glossy on top and bottom is golden brown. Flip and cook another 1-2 min. Keep warm while repeating with remaining batter.
Serve with butter, syrup, peanut butter, additional fresh bananas or other toppings of your choice!

Saturday, May 11, 2013

Happy Mother's Day Mom! {and some brunch ideas}


My mom is a pretty incredible lady. A gifted teacher and writer, she chose to quit her job to stay at home and devote her life to raising her kids when my older brother was born. And not only that, she later chose to put those incredible skills to work and home school all seven of us (a job which is not yet complete!)- quite a feat having so many different ages, grades and skill levels to work with at once. 

She also serves alongside my dad as a compassionate and kind pastor's wife-a role in which she has been an excellent example and inspiration to me as I have taken up that role as well. I am immensely blessed to share this calling with her and draw upon her wisdom and experience as I seek to serve my husband and my church. 

One of the things I am most grateful for in my mom is her insistence on family togetherness. Ever since I can remember, she and my dad have proactively fostered an attitude in our family of wanting to be together. My siblings and I absolutely love nothing better than to be together. We are each other's best friends. Since I was a tiny baby put into the arms of my adoring older brother (not quite two), we have loved being together, and the same has held true with my three sisters and two brothers that arrived in following years. One place we have always loved especially to gather is the kitchen. At my parent's house we often find ourselves laughing at how we all tend to end up there, standing around, chatting, snitching bits of food from the few who are in the kitchen to actually cook! How many mornings I've spent chatting with my dad over cereal at the kitchen counter, how many times I've yakked with Mommy while prepping a salad for dinner, how many Thanksgivings where people and food filled the kitchen to overflowing (and occasionally erupted in flames...but that's a story for another day), how many summer nights where strains from Daddy's radio drifted through the open kitchen window, how many birthday cakes whipped up with little children clamoring around to lick the bowl... and somewhere in the middle of it all, Mommy. Mommy pulling perfectly moist chicken from the oven. Mommy, stirring a pot of "train wreck" meat sauce to fill our hungry guests. Mommy, sneaking a spoonful of cookie dough off to one of us who was outside missing out on all the fun. Mommy, calling to someone not to forget to poke the baked potatoes with a fork! Mommy holding up beaters dripping with cake batter, treating the littlest ones with a lick. Whatever we're doing, Mommy is always there pulling us all together, reminding us that family are our forever friends.

How grateful I am to you, Mommy, for the closeness of our family. My siblings ARE my best friends, just like you said they would be, but so are you. I wish I could spend Mother's Day with you. Thank you for all your hard work and for how much you continue to pull our family together, for creating a beautiful, comfortable environment for us to enjoy each other in, and for always supplying us with delicious food to gather round! You are more of a blessing to us all than we can find words to express. May you know how much you're loved!

~~~~~~~~~~~~~~~~


Whether you're attending a brunch at your church, throwing a lovely party for mom, or just want something a little bit special to serve to your mom in bed or at the table, here are a few of my favorite brunch recipes!


Happy Mother's Day!!

Monday, April 22, 2013

Quiche with Ham & Kale


I truly love just about anything that come wrapped in a flaky pie crust, but quiche is a weakness.

Of course it helps that I absolutely adore eggs. And cheese. And crust. Did I mention crust?

My idea of a perfect brunch would be a piping hot, flaky-crusted quiche with a colorful array of fresh fruit. I don't make quiche often because it's not super healthy, but once in awhile it's fun to splurge, especially when you have leftover ham and kale, not to mention a bit of Gruyere cheese!

So that's exactly what I did. I followed a recipe for a basic quiche, using my mom's pie crust recipe, then tossed in my cubed leftover Easter ham, some sautéed kale and the mellow cheese.

It was fantastic! The kale retained a bit of it's texture, while the ham and cheese lent a delicious saltiness to the rich egg custard. Oh, and as always, mom's pie crust turned out to be the best part!


Tip: I used my tart pan instead of a pie plate because it's so pretty and easy for serving, but that left me with a bit of extra dough and filling. I simply used the extra to make a small quiche in one of my 14 oz. ramekins! It was great for leftovers!


Quiche with Ham & Kale
adapted from Real Simple
serves 4-6

1 9 in. pie crust (your favorite or mine)
1 TB olive oil
1 med. onion, chopped
salt and pepper
4 large eggs
3/4 cup half and half
1/8 tsp ground nutmeg
1 cup grated Gruyere cheese
2 cups chopped kale
1 cup cooked ham, cubed

Heat oven to 375. Fit the crust into a 9 in. pie plate (or tart pan- deep dish would work well). Place on a baking sheet (in case it spills over!).
Heat oil in a large skillet over med-low heat. Add the onions and a 1/2 tsp each of salt and pepper. Stir occasionally and cook until soft, about 5 min. Add kale and saute several additional minutes or until kale is slightly wilted.
In a large bowl, whisk together the eggs, half & half and nutmeg. Stir in cheese and ham, followed by the onion/kale mixture.
Pour the egg mixture into the crust. Bake until a knife inserted in the center comes out clean, 35-45 min. Let sit for 5 min before serving.

Tuesday, March 26, 2013

Asparagus, Bacon & Gruyere Frittata

I had an amazing revelation this past week.

There is an egg pie sort of thingy that is fantastically delicious that you don't have to make a crust for and comes together in a matter of minutes!


Maybe to you this is old news, but I just made my first frittata and am basking in the enjoyment of it!

I absolutely love quiche, but I rarely make them because not only are they fattening (hello, pie crust!) but they are somewhat labor intensive (hello again, pie crust!) and they take a long time to bake! Beautiful and delicious for special occasions, but not really an every day or even every week kind of thing, you know?

I trust you do.

So, all that to say- frittata is quiche's low maintenance cousin!


On a side note, my spell check is at it again. This time it wants to change "frittata" to "irritation". Oh, yes, let's serve up a little irritation for breakfast! Sounds delightful, doesn't it?

"What's on the menu, honey?"

"Oh, just a little asparagus, bacon and Gruyere irritation, dear!"

Way to get my man to the table, spell check.

But...back to the FRITTATA...

Not only is it pleasing to your nostrils as you saute the asparagus, bacon and shallots, but also to your eyes- vibrant yellow eggs dotted with spring green asparagus and crisp bacon. Oh! and don't forget your taste buds! One of the most delightful things about this bright dish is the way the Gruyere stays in little gooey pockets, spilling forth melty goodness in each bite!

Whether you choose to serve your frittata for a holiday, a weekend brunch or a quick weeknight dinner, let's just say that it will get your man, or your family, or your company, or the president of the United States to your table much quicker than any "irritation" would.


Asparagus, Bacon & Gruyere Frittata
adapted from Tracy's Culinary Adventures
serves about 6

12 lg. eggs
3 TB half and half
1/2 tsp salt
1/4 tsp pepper
2 tsp olive oil
1/2 lb. asparagus, trimmed and cut on the bias into 1/4 in. pieces
6 slices bacon, chopped
1 shallot, minced
3 oz. Gruyere cheese, cut into 1/4 in. cubes

Preheat your oven to 400.

In a medium bowl, whisk together the egg, half and half, salt and pepper until completely combined.

Set a 12 in. nonstick, oven safe skillet over medium heat. Add the oil and when hot, throw in the asparagus and bacon. Cook, stirring occasionally, until the asparagus has lightly browned and is nearly tender, about 3 minutes. Add the shallot and cook just until slightly softened, about 2 minutes.

Add the cubes of cheese to the egg mixture and stir. Pour egg mixture into the skillet with the asparagus, bacon and shallot and cook, using a rubber spatula to stir and scrape the bottom. Large curds will begin to form after about 2 minutes, but the eggs should still be quite wet. Shake the skillet to distribute the eggs evenly and allow to cook for 30 sec. without stirring- this will set the bottom.

Transfer the skillet to the oven and cook until the frittata puffs and the surface browns slightly, 10-12 min. Check for done-ness by cutting into the frittata with a paring knife. If the eggs are firm, but just slightly wet, it's ready. Pull the skillet from the oven and let stand for 5 min. Loosen edges with the rubber spatula, then slide the frittata out of the pan and onto a serving plate. Cut into wedges and serve.

Wednesday, February 20, 2013

The Ultimate Fried Egg Sandwich {a Guide}


I don't know about your family, but in mine the fried egg sandwich was the quintessential "go-to" lazy day comfort food dinner. I don't know what it is about a fried egg and a slab of cheddar slapped between two pieces of toasted bread, but it almost always sounds good. You can make it in about five minutes and I can just about guarantee you'll have the ingredients on hand.

The other thing that's awesome about this sandwich is that, much like any other sandwich, it's infinitely customizable. The only thing that must remain is the egg. Switch out everything else, but as long as you keep that egg you can label it a "fried egg sandwich".

Unless of course you scramble the egg. Then it would have to be a "scrambled egg sandwich" wouldn't it?

But, as my brother would say, I digress.

Hubby and I have been enjoying traditional fried egg sandwiches every Sunday night now for awhile. It is so nice to have a few routines thrown into your weekly menu- not only does it make it a little easier to plan meals, it gives us something sure to look forward to! For instance, our week looks like this:

Monday- who knows. This is Travis' day off, so we don't plan anything. Usually we eat out or make something easy at home.
Tuesday- normal, but I can plan something a little more complicated or time-intensive because I don't have afternoon or evening activities.
Wednesday- Soup of some kind in the winter, salads in the summer
Thursday- normal
Friday- pizza
Saturday- breakfast for dinner
Sunday- Fried egg sandwiches and smoothies

See? Just a little structure.

So back to Sunday. We usually aren't super hungry on Sundays because we have a late lunch and just spend the afternoon napping or doing lazy things, so a light supper of sandwiches and smoothies (I'll have to share my staple smoothie guidelines with you soon!) is just perfect.

The other day, though, we decided to go a little crazy on our sandwiches. You know, break out of the order and make some chaos in the kitchen? It was fun and the end result was amazing. Best fried egg sandwich ever.

I want to share it with you, not because it's an amazing recipe you need to follow step by step, but because I want to give your imagination a springboard to create your own fried egg masterpiece!

But seriously, if you wanted to recreate this sandwich exactly as we made it, you really would be making a wise move.

Because it is incredibly yummy. Yum-tastic. Even.

But you knew that when scrolled down and peeked at the ingredient list, didn't you?

And you thought I wouldn't notice.

Yes, as we all know, bacon makes everything more amazing. So does fresh, ripe avocado. And cheese. Especially Tillamook Vintage White Cheddar cheese (as previously established). Oh, and bagels! Bagels are, of course, also on the amazing list.

So make your list, check it twice, and make some new traditions in your house!


The Ultimate Fried Egg Sandwich (a guide)
You don't really need to print it, but if you want to... (printable version)
a KitchenJoy Original "recipe"
makes 2

2 onion bagels (Safeway artisan bagels are amazing)
2 eggs
4 slices bacon (we used turkey bacon)
2 slices Tillamook Vintage White Cheddar cheese
1 ripe avocado, coarsely mashed

Fry eggs to your desired doneness, seasoning with salt and pepper or Lawry's seasoned salt. Meanwhile, fry bacon and toast bagels. If desired, butter bagels lightly. Spread one half of each bagel with half of mashed avocado. Assemble: place two bacon slices on top of avocado, top with cheese, egg, and other half of bagel. Enjoy!

Saturday, November 10, 2012

Baked Pumpkin French Toast

When I made this dish, I realized I couldn't even remember the last time I'd had french toast. Isn't that sad? I certainly realized just how sad when I tasted this delectable treat!


Where have you been all my life, baked pumpkin french toast??!!

Seriously. This is so amazing. I'm not sure how to describe it without using cliche words and phrases like "melts in your mouth," "creamy," "to die for," "I want to eat the whole pan right now" and so on. So I guess I will. The eggs, pumpkin, milk and spices transform a loaf of bread (although no ordinary loaf of bread, mind you- I employed my homemade Italian bread...and really, please don't get on my case about using Italian bread for French toast...one bite and you wont' care what nationalities are mixed up in your mouth, I promise) into this amazing soft, creamy sweet treat that (literally, cliches aside, this one's for real) melts in your mouth. Sheesh, it could practically be dessert. For us it was dinner. Then breakfast. But it could really be served as dessert and I would be crazy happy to welcome it as such.


It's also great because you can make it ahead of time (even the day before!) and just pop it in the oven when you're ready to eat!

Oh, and it doesn't really need a drizzle of maple syrup, but go ahead. You know you want to.

Baked Pumpkin French Toast
serves 8-12

1 loaf French bread, cut into cubes
6 large eggs
2 1/2 cups milk
1 cup pumpkin puree
3/4 cup sugar
2 TB vanilla (yes, tablespoons!)
1/2 tsp cinnamon
1/4 tsp nutmeg

Streusel:
1/2 cup flour
1/2 cup brown sugar
1 tsp cinnamon
1/4 tsp nutmeg
1/4 tsp salt
1/2 cup cold butter, cut into small pieces

Spray a 9x13 pan with cooking spray. Place bread chunks evenly in the pan.
In a large bowl, mix together eggs, milk, pumpkin, sugar, vanilla and spices. Pour evenly over bread. Cover pan and store in the refrigerator several hours or overnight.
In a separate bowl, mix together flour, brown sugar and spices. Add butter and cut into dry ingredients using a fork, your hands, or a pastry blender. Combine until mixture resembles sand with a few pea sized chunks. Cover and store in refrigerator.
When you're ready to bake the French toast, preheat oven to 350. Remove French toast from the refrigerator and sprinkle crumb mixture over the top. Bake 45-55 min. or until set and golden brown. Serve warm with syrup if desired.

Saturday, November 3, 2012

Whole Wheat Apple Cinnamon Pancakes {with Cinnamon Syrup}

It's Saturday, y'all! You know what that means in our house...breakfast for dinner!

Last weekend I made a batch of these whole wheat apple cinnamon pancakes from Two Peas and Their Pod and man, were they yummy! But let me tell you straight up: the syrup is the best part.


Oh wow. Really. It's like, so amazing. You'll want to put it on everything (after you send your pancakes drifting out to sea on it, that is). Like more apples. Or maybe some peaches. Toast or oatmeal, anyone? Leftover apple cider waffles? Grab anything you can find (including your own fingers of course) and dunk it in this syrup, because yeah, it's that good.

But back to the pancakes. Hearty wheat taste, bursts of fresh apple chunks, hints of spice...I'm pretty much convinced that the "whole wheat" and "apple" parts of the title are just to trick us into thinking we're being all healthy while simultaneously pouring on copious amounts of spicy, sugary syrup that is basically like liquid gold .


The edible kind.

But there I go about the syrup again. Gee. Anyways. Do yourself a favor this weekend and make a batch of syrup. Er. Pancakes.Whatever.

Whole Wheat Apple Cinnamon Pancakes with Cinnamon Syrup
serves 3-4

For pancakes:
1 cup whole wheat flour
2 1/2 TB brown sugar
1 tsp baking powder
1/4 tsp baking soda
1/2 tsp salt
1 tsp cinnamon
1/4 tsp allspice
1 cup buttermilk, plus 2 TB
1 TB canola oil
1 lg. egg
1 tsp vanilla
1 cup diced, peeled apple

For syrup:
1/2 cup white sugar
1/2 cup brown sugar
2 TB flour
1/2 tsp cinnamon
1 tsp vanilla
1 cup water

In a med. bowl, whisk together flour, sugar, baking powder, baking soda, salt and spices. Set aside.
In a small bowl, whisk together buttermilk, oil, egg and vanilla. Pour wet ingredients over dry ingredients and whisk until combined. Do not overmix. Gently fold in apples.
Heat griddle or non-stick skillet over med. heat. Spray with cooking spray. Pour about 1/4 cup of batter onto the hot griddle pan, spacing out pancakes a few inches from each other. When the pancakes start to bubble up, flip and cook until lightly browned.
While the pancakes are cooking, make the syrup. Stir together dry ingredients in a small saucepan. Then add water and vanilla. Bring to a rolling boil, stirring often. Continue boiling and stir until mixture thickens to syrup consistency, about 5-8 min. Remove from heat and let stand a few minutes before serving.
Serve the pancakes with warm syrup. Enjoy!

Wednesday, October 31, 2012

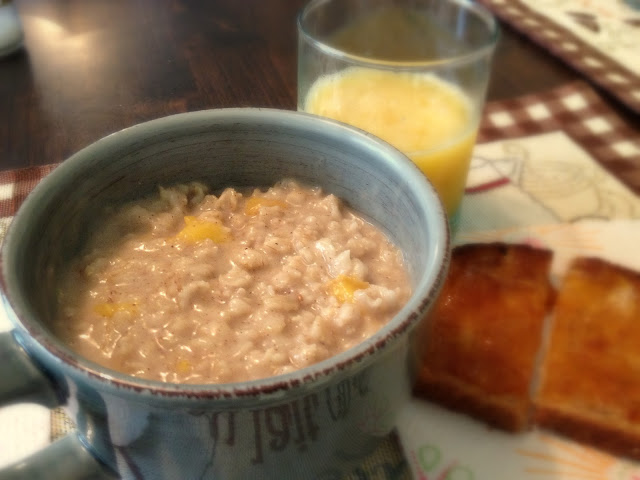
Peaches & Cream Oatmeal


I don't know about you, but I have fantastic childhood memories revolving around those itty bitty packets of Quaker Oats instant oatmeal. We LOVED those as kids. In fact, I still love them.

For our family, those were usually a special treat reserved for our annual camping trip (other special treats included Spam, Svenhard's Danish pastries, sugary cold cereal from those fun little boxes, Dinty Moore stew, etc.). They were also a staple breakfast item at my great-grandma's house. She kept strictly to the Apples & Cinnamon flavor. I've loved just about every flavor I've tried, especially the "& Cream" varieties (with perhaps the exception of "Bananas & Cream").

Recently when Hubby and I took our own camping trip, I couldn't help but snag a box of the "& Cream" instant oatmeal packets. They were of course fantastic (I avoided the banana). One day when I was enjoying the "Peaches & Cream" variety, I stirred in a few chopped ripe peaches (a great idea, by the way) and that got my wheels turning.

So back at home, I created my own homemade version of "Peaches & Cream" oatmeal. It isn't instant, mind you, but it is delicious. No powdered "cream" or dehydrated peaches here- this is the real stuff. And boy, is it good. I used peaches that I had previously peeled, sliced and frozen (no thawing necessary), but I think it will work equally as well with fresh or canned peaches. Another bonus to making your own is that you can adjust the portion size! This recipe makes a pretty hearty 2 person meal and is perfect for these chilly fall mornings!


Homemade Peaches & Cream Oatmeal
by Jenn
makes 2 hearty servings

3 cups water
dash salt
1 1/2 cups old-fashioned oatmeal
1 cup chopped peaches
1/2 tsp cinnamon
1/4 tsp nutmeg
3 TB brown sugar
2 TB heavy cream or half and half

Bring water and salt to boiling in a small saucepan. Stir in oats and peaches and reduce to medium heat. 
Cook 5-8 min., stirring occasionally, or until most of the liquid is absorbed (or until it reaches desired consistency- remember the oatmeal will thicken somewhat as it cools). 
Remove from heat and stir in spices and brown sugar. Stir in cream.

Saturday, October 27, 2012

Sweet Potato Breakfast Biscuits

Every once in awhile, it's fun to have breakfast for dinner. We don't do big breakfasts a lot- usually only on Mondays when it's Hubby's day off and we have a leisurely morning. Otherwise, it's a bran muffin and greek yogurt for me and cold cereal for him. Aren't we exciting?

So anyway, that's why I've decided Saturdays are now "breakfast for dinner night". There are just too many great breakfast foods to pass up, so they're moving to the night shift!


Our first in the Saturday breakfast series this month is a recipe from one of my favorite blogs, How Sweet It Is- she always cracks me up and leaves me drooling with her quirky humor and drop-dead-gorgeous photos. This recipe was no exception! Stuff a little bit of sweet potato in a fluffy, tender biscuit, top with pristine poached eggs, bacon (of course), cheese and whatever else your little heart desires, and you've got yourself a mighty tasty breakfast sandwich.

Putting the amazing flavor and texture of a sweet potato in a biscuit is pure genius, and of course, I am a little bit obsessed with poached eggs these days so we know that was a major attraction. There is just something so totally irresistible about those pretty little white packages that spill forth golden goodness at the slightest invitation. Sigh.

Sweet Potato Breakfast Biscuits
adapted slightly from How Sweet It Is
makes 10 biscuits

1 medium sweet potato, cooked and mashed
1 1/2 cups flour
1/2 TB sugar
2 tsp baking powder
1/2 tsp baking soda
1/2 tsp salt
6 TB butter, cold and cut into small pieces
1/2 cup milk
To make breakfast biscuits add poached eggs, bacon, cheese and spread of choice

Preheat oven to 425.
In a large bowl, combine flour, sugar, baking powder, baking soda and salt and whisk to combine. Add butter and use a pastry blender to cut in till mixture resembles coarse crumbs. Stir in milk and sweet potato, using your hands if necessary, to blend dough together. 
Roll dough out on a lightly floured surface to 1/2 in. thickness. Cut using a floured glass or biscuit cutter and place onto a baking sheet. Bake 10-12 min. or until biscuits are puffy and golden. While biscuits are baking, prepare your breakfast sandwich ingredients. Assemble and enjoy!

Friday, September 28, 2012

Classic Eggs Benedict with Low-Cal Hollandaise

I know what you're thinking. Low-Cal hollandaise? Why would you do such a thing??

Let me explain. Do you have any idea how much butter is in hollandaise sauce? Seriously, it's pretty scary. I mean, to-die-for-delicious scary, but also roll-me-away-from-the-table-get-me-a-triple-bypass-now scary. SO.

I bring you a rather tasty (though surely unfit for the taste buds of true hollandaise connoisseurs) alternative. A low calorie hollandaise. One which means you don't have to shun the goodness of Eggs Benedict altogether, but may quite comfortably indulge with minimal guilt.


So, point being made, enjoy your full calorie real hollandaise on special occasions, but stash this recipe to keep cravings at bay with a clear conscience.

You're welcome.

By the way, this was my very first attempt at poaching eggs! I must say, it was an enchanting process and came off with great success! You may have your own method already, or you may want to try google for your preferred method, but I used the fairly common route of simmering in vinegar and water. Worked great, the eggs were beautiful, and there was no vinegar taste.


Classic Eggs Benedict with Low-Cal Hollandaise
sauce recipe from Eating Well
serves 2

4 eggs
1/4 cup white vinegar

4 English muffins, split
4 slices thick sliced Canadian bacon

1 TB butter
3/4 cup non or low-fat buttermilk, divided
1 TB cornstarch
1/2 tsp salt
pinch cayenne pepper
1 egg, lightly beaten
1 TB lemon juice

To poach eggs, break each egg carefully into separate small bowls or ramekins. Fill pot with at least 2 in. water. Bring to a boil. Stir in vinegar and reduce heat to a gentle simmer (water should be steaming and small bubbles coming up from bottom). Submerging the lip of each bowl into the water, gently slide eggs in, one at a time. Stir carefully to create a gentle whirlpool effect. Cook 4 min. for soft set, 5 min. for medium and 8 for hard. Remove using a slotted spoon and drain on a clean towel.

Meanwhile, make sauce. Melt butter over low heat in a saucepan. Cook until butter turns golden, 30-60 sec. Pour into a small bowl and set aside.
Whisk 1/4 cup of buttermilk, cornstarch, salt and cayenne in saucepan until smooth. Whisk in egg and remaining buttermilk. Set pan over med. heat and cook the sauce, whisking constantly, until it comes to a simmer. Whisk and cook 15 sec. Remove from heat and stir in lemon juice and reserved butter.

Toast English muffins. Heat bacon in frying pan. To assemble: butter muffins if desired. Top with bacon. Place one poached egg on each half of the muffin and pour desired amount of sauce on top. Enjoy!

Saturday, May 26, 2012

Power Granola


Ah, the satisfying crunch of granola. Not much like it. Especially when you know it's healthy- packed with wonderful ingredients like oats, flax seed, honey, nuts and more! One of the best things about homemade granola is it's pretty cheap- unlike its ready-made counterparts. And very versatile. You can swap the peanuts and almonds out for virtually any kind of nuts you want, add in coconut or some other dried fruit, skip the honey for a bit of maple syrup or agave nectar, replace the orange juice with something more to your liking or even swap the cinnamon for a different spice! See what I mean? This recipe is meant only to be a springboard for your taste buds and wild imagination!


I must say, I think the combination I chose is remarkably delicious, but feel free to make alterations! I can't stop grabbing little handfuls as I go by the pantry, and it is a perfect compliment to my morning Greek yogurt.


Power Granola
adapted from Myrecipes.com
yields about 4 3/4 cups

2 cups regular oats
1/3 cup flax seed meal
1/4 cup chopped peanuts
1/4 cups chopped slivered almonds
2 tsp cinnamon
1/3 cup orange juice
1/3 cup honey
1/4 cup packed brown sugar
2 tsp canola oil
1 tsp vanilla extract
1/3 cup raisins

Preheat oven to 300.
In a large bowl, mix first 5 ingredients.
In a small saucepan over medium heat, combine orange juice, honey, and brown sugar. Heat and stir just until sugar is dissolved. Remove from heat and stir in oil and vanilla.
Grease large cookie sheet or jelly roll pan. Pour juice mixture over oat mixture and stir to coat evenly. Spread in a thin layer on greased baking pan and bake for 10 min. Stir well. Bake another 10-15 min or until golden brown (granola will become more crunchy as it cools).
Spoon granola into bowl. Stir in raisins. Cool completely. Store in airtight container at room temperature for up to 2 weeks.

Sunday, April 15, 2012

Amish Friendship Bread

If you have never had the privilege of being handed a bag of friendship bread starter from a friend, I encourage you to be the one to begin it!


Amish Friendship Bread is a delicious tradition much like a chain letter (although infinitely more enjoyable) in which a bag of bread starter is passed on, regrown, divided and passed on again...in a never ending cycle (unless of course you are a sourpuss who takes the bag and throws it away!). It does require a commitment- the directions usually take 10 days to complete (although most of those days all you have to do is "mush the bag", as my directions said!). However, the end result is a fun gift to give away to a friend, and a couple of delicious loaves of moist sweet quick bread to enjoy!


I was given a bag of starter by a dear friend of mine, and I gave away my resulting three bags of starter to my dear sister, special sister-in-law and my best friend. The loaves I baked from the remaining starter were enjoyed immensely by friends, neighbors, and of course, my husband and myself! The recipe I received was sort of like a coffee cake/banana bread type of bread, deliciously coated in crunchy cinnamon-sugar.


 The instructions I received did not come with a recipe for starter, just the finished product (part of the mystery?). However, I found a recipe online that looks similar if you think you'd like to be the first link in a new chain representing the sweetness of friendship!


Find a recipe for starter plus instructions to give to your friends here. To make bread with the cinnamon-sugar coating, mix together 1/2 cup of sugar and 1/2 tsp cinnamon. Using half the mixture, coat 2 greased loaf pans. Sprinkle the remaining half evenly over the top of both pans of batter. Bake as directed.

Monday, April 9, 2012

Petite Vanilla Scones {Baking with Sisters- Part 2}

Another recipe my sisters and I tackled while they were visiting was a Pinterest find- Petite Vanilla Bean Scones. I cross the "Bean" out because we were not in possession of a vanilla bean at the time, unfortunately. So, these are the non-bean adaptation. If you'd like the original bean-included version, follow the link to the recipe on the Baking Bites blog! These tiny scones are soft and cakey, infused with vanilla flavor and delicately drizzled with a sweet glaze. If you are fortunate enough to have ever snagged a few at your local Starbucks, you are likely drooling about now and are eager to discover if they are easy enough to make at home. Well, get to the kitchen, because they are incredibly simple and fast to make and you probably have all the ingredients on hand! Between the three of us, we whipped these darling treats out in no time flat and were ready to move onto the next treat (which you'll read about in Part 3)! They baked up beautifully and looked even more adorable when coated with the shiny, vanilla colored glaze. They are a perfect portion size, too- a fantastic compliment to a cup of coffee or tea, and they would be equally at home on a breakfast tray or as an after dinner treat.


Petite Vanilla Scones
makes 20 small scones
adapted from Baking Bites

2 cups flour
1 1/2 tsp baking powder
1/2 tsp salt
1/2 cup butter, room temperature
1/3 cup sugar
2 tsp vanilla extract
1/2 cup milk

Preheat oven to 400.
Line a baking sheet with parchment paper. In a medium bowl, whisk together flour, baking powder and salt.
In a large bowl, cream together butter and sugar until light. Add vanilla and beat to incorporate. Add in half of flour mixture, followed by the milk. Stir in remaining flour mixture until dough comes together in a firm, slightly sticky mass.
Divide dough into 5 equal pieces and roll into tennis ball sized rounds. On lightly floured surface, press each ball into a disk about 1/2 in. thick. Cut each disk into quarters and place on prepared baking sheet.
Bake 11-15 min. or until lightly browned. Cool before glazing.

Vanilla Glaze
2 cups powdered sugar
4 TB milk
2 tsp vanilla extract

Beat together all glaze ingredients until very smooth and of pour-able consistency. Add extra sugar if too thin, extra milk if too thick. Pour over cooled scones.
Related Posts Plugin for WordPress, Blogger...