Showing posts with label pizza. Show all posts

Monday, November 4, 2013

Sourdough Pizza Crust


So you remember how I took that sourdough bread class in October?

Well, I've been faithfully feeding my starter on a {fairly} regular basis and it has grown! Or it had grown. I recently gave a couple of cups away to my sisters in Oregon who want to try their hand at sourdough tending and baking. Now I need to work at building it back up again.

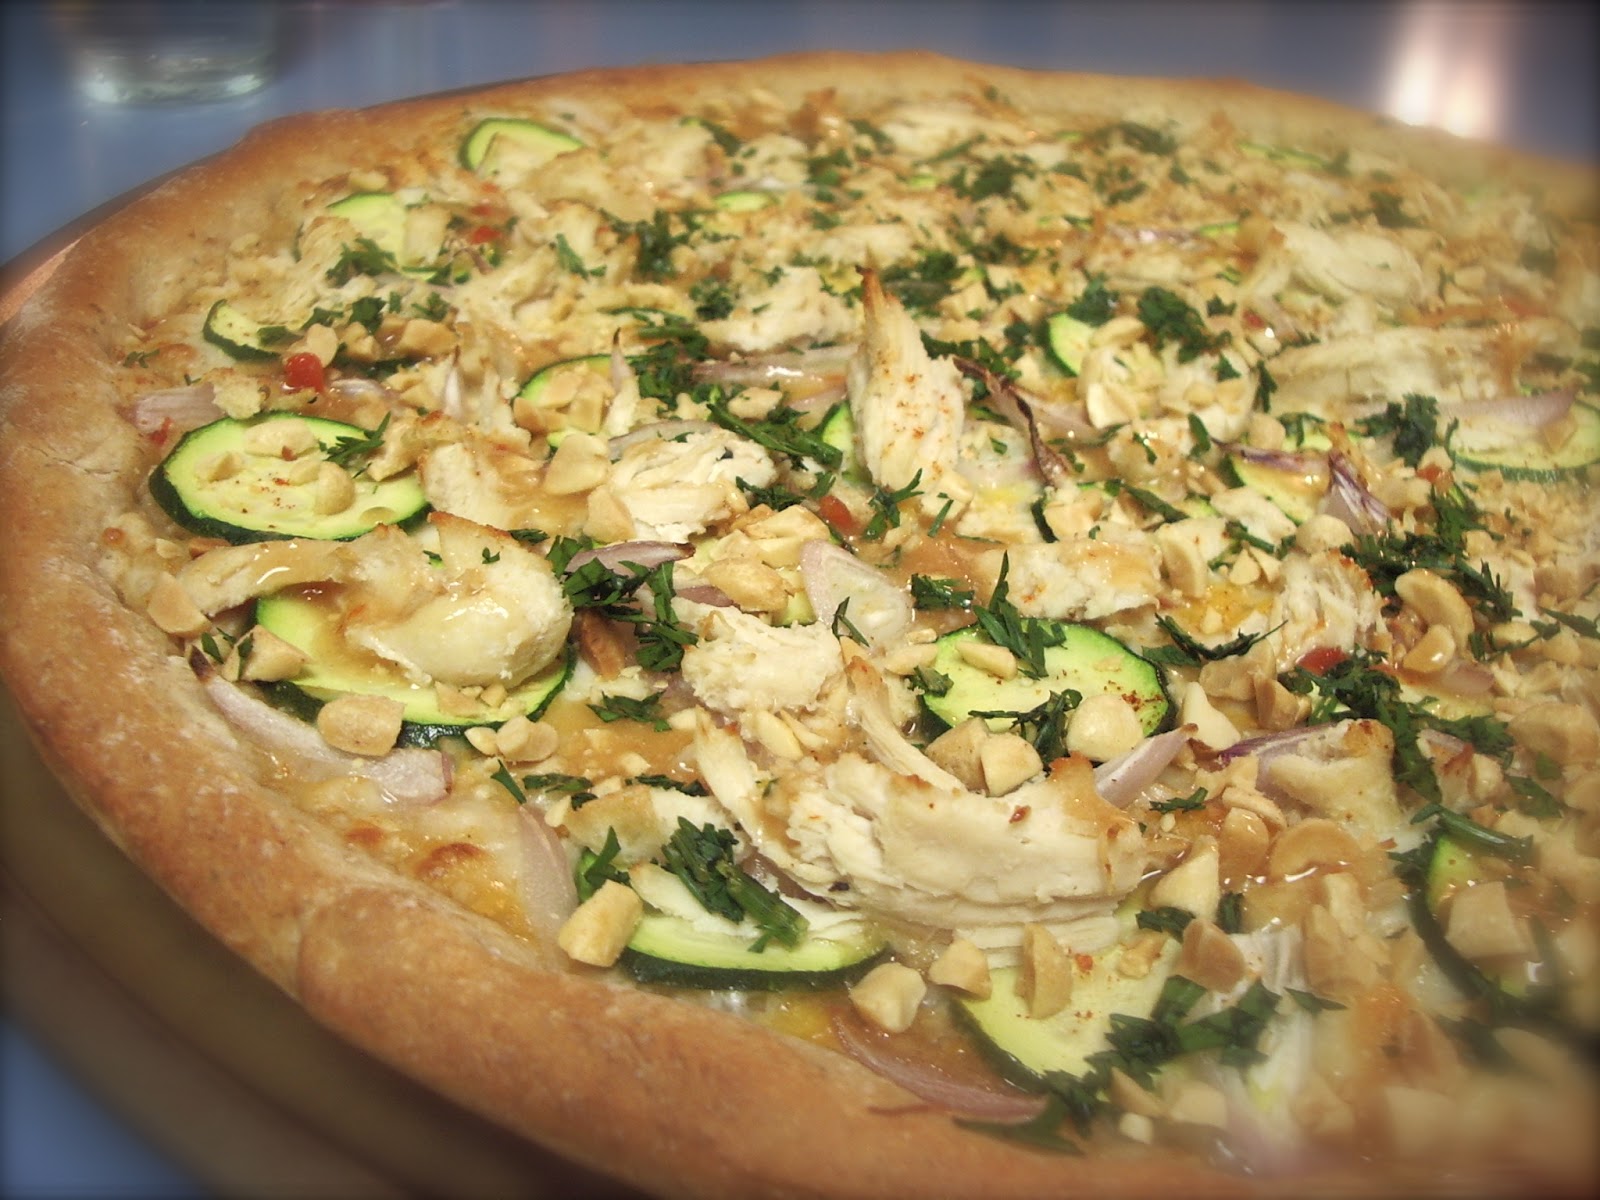
But before I gave some away, I was starting to get quite a jar full. So I decided to try making sourdough pizza crust! Even though my starter isn't super sour, I thought it would make a deliciously flavorful crust. It did! What a yummy change for our Friday pizza nights! The sourdough crust was a great blend of chewy and crisp, with a very subtle but rich flavor. I usually make a whole wheat thin crust, but this new crust will definitely be added to the rotation whenever I need to use up a cup of starter!

It is a little time consuming, but worth the effort! I've heard it said that sourdough is a lazy bread. It needs lots of time to rest in between steps. :) This pizza crust is no exception, but the great thing is that it makes two crusts, so if you are a small family or a couple like us, you can freeze the other crust for next week!


Sourdough Pizza Crust
makes 2 thin crust 12" pizzas or 1 thicker crust 14" pizza

1 cup sourdough starter (straight from fridge, unfed)
1/2 cup hot tap water
2 1/2 cups flour
1 tsp salt
1/2 tsp instant yeast

Spoon starter into a mixing bowl. Add hot water, flour, salt and yeast. Mix to combine, then knead till smooth and slightly sticky, about 7 minutes at medium speed using a stand mixer fitted with dough hook. Place the kneaded dough in a lightly greased container and allow to rise until just about  doubled in size. This might take 2 to 4 hours, depending on how vigorous your starter is.
For two thinner pizzas, divide the dough in half and shape each half into a flattened disk. Drizzle two round 12 in. pizza pans with olive oil, tilting to coat. Place one half in each pan. Cover and let rest for 15 min.
Gently press dough towards the edges of the pans. When it starts to shrink back, cover and let is rest again, about 15 min. Finish pressing the dough to the edges of the pans.
(For 1 thicker crust pizza, follow directions above without dividing dough in half and using a jelly roll pan or 15 in. pizza pan.)
Cover pan(s), let dough rise until it's as thick as you like (mine was fine without rising any longer, but you may find you want to let yours rise for an hour or more).
Preheat oven to 400.
For thin crust, prebake the crust about 4 min. before topping. Top, then bake until cheese is bubbly, about 8 min. For thicker crust, prebake about 8 min. Top, then bake about 10 more minutes.
Remove from oven, let cool slightly before slicing and serving.

Monday, August 13, 2012

BBQ Chicken Pizza

Are you ready for a KitchenJoy original pizza??


If you can use Thai peanut sauce, strawberry jam, and refried beans in place of traditional pizza sauce (not all together, of course!), I thought, then why not barbecue sauce??! I have seen it done before and it always sounded good, so I decided to give it a try.


I baked some chicken with a special Dean's BBQ seasoning, shredded it, added some scallions, tomatoes, and garlic (oh, and don't forget CHEESE), and there you have it! A fantastic and different pizza to shake up the old routine. Yum!

BBQ Chicken Pizza
a KitchenJoy original recipe
makes 1 pizza

1 recipe pizza dough
about 1/3 to 1/2 cup barbecue sauce (our favorite is Sweet Baby Ray's!)
1 chicken breast, cooked and shredded, seasoned to your liking
shredded cheese (enough to cover- your favorite variety!)
1 scallion, thinly sliced
2-3 cloves garlic, thinly sliced
grape tomatoes, sliced

Prepare dough as directed. Preheat oven to 500.
Spread crust evenly with BBQ sauce. Top with chicken, followed by cheese, scallions, garlic and tomatoes.
Bake 10-12 min. or until crust is golden and cheese is bubbly. Cool slightly, then slice and serve! 

Monday, July 16, 2012

Thai Chicken Pizza

I told you I was on a Thai kick, right? Okay, then I won't belabor the point.


A Thai kick definitely wouldn't be complete without giving this pizza a whirl.

It has all the right components...sweet chili sauce...cilantro...PEANUTS...

I actually used up all my sweet chili sauce on that delicious salad, so what do you think I did about a sauce for the crust?

Yep- I used the leftover dressing from said yummy salad. It was perfect! But, I'm sure that if you don't have some amazing Thai salad dressing leftover hanging around in the back of your fridge, that plain old sweet chili sauce will work just fine.

By the way, this was my first known and deliberate encounter with a shallot. They unwrap like garlic and look like onions and have a mild onion flavor. Don't be deceived by the mild reputation, though- I cried buckets cutting it!

Tears aside...


Enjoy the peanuts.

Thai Chicken Pizza
adapted slightly from Annie's Eats
makes 1 pizza

1 recipe pizza dough
1/4 cup sweet Asian chili sauce (or dressing, if you have it!), plus more for drizzling
1 shallot, thinly sliced
1/2 large zucchini, thinly sliced
1 cup shredded cooked chicken
2/3 cup shredded mozzarella cheese
3-4 (better make it 4) TB chopped peanuts
2 TB minced fresh cilantro
ground red pepper flakes

Preheat oven to 500.
Follow directions to make crust. Spread chili sauce (or dressing) evenly over crust.
Layer with shallot, zucchini, chicken, cheese and as much red pepper as you like (it's hot!).
Bake pizza 12-14 min. or until crust is lightly browned. Cool slightly, then sprinkle with peanuts and cilantro. Drizzle with extra sauce just before slicing and serving.

Saturday, June 30, 2012

Strawberry Balsamic Bacon Pizza

When I stumbled across this recipe on Annie's Eats, I thought, Wow, now there is an intriguing combination! Strawberries on pizza?


And in that moment, I knew it was something I wanted to try.

Oh and also...

I am currently in love with balsamic vinegar.

Especially the little bottle of Tahitian vanilla flavored balsamic vinegar I got at a cool store in Seattle.

They had a tasting room- how cool is that??

Flitting from one end of the store to another, drinking straight vinegar from little plastic cups- sounds like a good time, right?

Okay, maybe it sounds a tad weird, but trust me, it was awesome. Take it from a cynic.

My personal favorites were the dark chocolate, the Tahitian vanilla (obviously), the strawberry and the espresso. If you've never had the joy of a vinegar and olive oil tasting room, find someplace in your area that does it. It's quite the experience.

But, I'm getting off topic a little, aren't I?


I have heard (and now know by my own experience) that strawberries and balsamic vinegar are a good match (you should try them on ice cream sometime!), and with pizza and bacon involved, what better time to give it a try?

I have this bad habit of not thoroughly reading recipes before I decide to try them, therefore I didn't even know this pizza had chicken on it too until I started making it.

Oh, well.

At any rate, I ended up pan frying the chicken in the bacon grease, and well, you just know that turned out amazing.

In fact, the whole pizza was amazing! I just had a leftover piece for lunch and seriously, every bite bursts with flavor! From the sauce made from strawberry jam, balsamic reduction and chili sauce to all the sweet and savory toppings, it is an experience I will no doubt soon be recreating.


Strawberry Balsamic Bacon Pizza
adapted slightly from Annie's Eats
makes 1 large pizza

Sauce:
1/4 cup balsamic vinegar
1/2 cup strawberry jam or preserves
1 tsp sweet chili sauce (can be found in the Asian food section)

1 recipe pizza dough (use mine or your own favorite!)
1 cup shredded or diced cooked chicken (if desired, cook in bacon grease)
4 slices smoked bacon, diced and cooked until crisp
1/2 cup thinly sliced yellow onion
4 oz. mozzarella cheese
2 oz. grated Parmesan cheese
2-3 TB minced fresh cilantro
1/2 cup fresh strawberries, hulled and diced

Heat balsamic vinegar in a small saucepan over med-high heat. Bring to a boil, reduce to a simmer, and let cook 4-5 min. or until reduced by about half and thick and syrupy. Watch carefully so as not to burn! 
In a small bowl, combine the balsamic reduction with the jam and chili sauce. Set aside.
Preheat oven to 500. 
Roll out pizza dough onto lightly greased pan. Spread balsamic-strawberry mixture in a thin layer over the crust. Layer with chicken, bacon, onion, cheeses, cilantro and strawberries (in whatever order you like).
Bake until crust is lightly browned and cheese is melted and bubbling, about 12-14 min. Remove from oven and let cool slightly before slicing.

Tuesday, May 22, 2012

Taco Pizza

As many of you know, Hubby and I have a little routine of pizza & a movie every Friday night. We go to the gym, work out like crazy people (I do Zumba!), then come home, have pizza and snuggle up to a great film. It is a fantastic tradition, and unless I get some crazy aversion to pizza later in life, I hope we never stop.

One thing I am challenged with, though, is how to keep the pizza regimen fresh. You know, not pepperoni every week. Last week I was inspired by a recipe I spied in my AllYou magazine, and made a few tweaks to suit me. I have had taco pizza before- at a delicious pizzeria in Cannon Beach- and I have made something close to it before, but this looked fantastic. And it was! Using refried beans and salsa for the "sauce" was pure genius and the fresh veggies and cilantro on top gave it that slam-bang finish.

If you don't have a favorite homemade crust, check out the link to my easy whole wheat thin crust- it's my staple! It only takes about 15 min. to make and has a great wheat flavor (and since it's a thin crust, it's quite a bit lower on calories than most!).


makes 1 pizza (mine is a 15")
adapted from AllYou magazine
(no measurements- fix it to your liking!)

1 recipe pizza crust
refried beans
salsa
shredded cheese
corn (frozen or canned)
olives, sliced
1 lb. hamburger meat
1 recipe taco seasoning
iceberg lettuce, chopped
tomatoes, chopped
fresh cilantro, chopped

Make crust. Preheat oven to 500 (or whatever your crust recommends). Spread refried beans over crust. Top with salsa, spreading evenly. Sprinkle evenly with cheese. Brown hamburger, add taco seasoning and a little water. Simmer about 15 min. (You will only need about a 1/4 lb of the meat, so  you can freeze the rest for tacos!). Top cheese with meat, olives, and corn.
Bake 12-14 min or until crust is browned.
After baking, sprinkle pizza with lettuce, tomatoes and cilantro. Slice and serve!

Saturday, February 4, 2012

Pepperoni Pizza Pinwheels

Looking for a quick snack to take to a game day party? Need something to feed to hungry kids or teenagers? Or just a platter of something tasty to fill up the potluck crowd at church? If the last, I can sympathize. This is the "end of the month" grocery-wise for Travis and I, so I was trying to figure out what I could bring to our church potluck that could materialize out of the limited supply left in my cupboards. From somewhere, suddenly it hit me! A genius idea. Pizza pinwheels! I have seen this idea before and I think it originates with Pillsbury, using their crescent dough or pre-made pizza dough- which would work great! But I decided to use my own favorite pizza crust recipe and experiment a little. Wow. These little guys are fantastic- and I if I can keep hubby from eating them all tonight, I think they will disappear tomorrow!


Start with a basic pizza crust recipe. I doubled mine, which you can find here. I opted to leave out the whole wheat flour and did all white instead, but I'm sure it would be great either way. Allow it to rest about 5 minutes, which gives the yeast time to make the dough stretchy. Roll it out on a floured surface into as large a rectangle as you can without it breaking.

Yes, this is a rectangle...ish.

Spread your favorite pizza sauce on top and sprinkle with cheese and any other toppings you like. I just used pepperoni, but anything would really be fantastic.


Starting at one of the long ends, roll tightly, cinnamon roll style.


Slice into 1/2 in. rounds (I used a serrated knife, and it worked pretty well). Arrange on a greased cookie sheet and bake.


Voila! Cheesy, bubbly, pizza filled swirls of yummyness! 


Pepperoni Pizza Pinwheels
(printable version)
A KitchenJoy original recipe
makes about 36 pinwheels

Doubled recipe pizza crust dough
pizza sauce
shredded cheese
pepperoni (or other toppings)

Preheat oven to 425.
Roll out dough very thin into a large rectangle.
Spread sauce on top, sprinkle with cheese. Top with pepperoni.
Starting at a long edge, roll cinnamon roll style.
Slice into 1/2 in. rounds. Place several inches apart on greased baking sheet.
Bake 10-12 min. Let cool 1-2 min, then remove to wire racks to cool completely.

Friday, October 28, 2011

Butternut Squash Pizza with Chicken and Caramelized Onions

For the last few weeks, our Friday pizza nights have been the same. Pepperoni with olives. Nothing wrong with that combo- but...a little boring after awhile. I had two motives to try something out of the ordinary. 1) I was bored with plain old pepperoni and 2) I had some butternut squash in the fridge begging to be made into something delectable. As I was looking through recipes containing the sweet orange gourd, I happened upon the suggestion of pizza. Squash on pizza? Sounds a little strange. But so many people in various corners of the world wide web were raving about it, so I thought it couldn't be all bad. And after my recent soup experience, I was ready to have an open mind toward this glorious vegetable (or is it a fruit?). I searched for awhile, looking for the perfect combination of ingredients I currently possessed and ingredients that sounded appetizing together. Nothing really fit the bill, so I finally decided to make up my own combo. And, boy, it was a winner, if I do say so myself!


I decided to top a thick and chewy crust with a white, almost Alfredo type sauce, then layer on roasted butternut squash, caramelized onions, chicken, and mozzarella cheese.
This was definitely a much more involved pizza than I'm used to. There were a lot of steps, but, like the soup, it would be well worth it once in awhile.
 The thin, whole wheat crust I usually make is a jiffy, and doesn't require any rising time, so the pizza is usually together in under 30 min. However, for this masterpiece, I decided to try a more traditional, thicker crust, and used Paula Deen's "Basic Pizza Crust"- it was absolutely delicious! But, it required 45 min of rise time, so I got to work on that.
Meanwhile, I also started the squash roasting. I cut it into 1 in. chunks, tossed them in olive oil (the chunks amounted to a little over a cup) and roasted them on a baking sheet at 450 for 20 min.
While the squash was roasting, I started the onions doing their beautiful thing in a shallow pan on the stove top. They sizzled away for a good 30 min in hot butter and a little olive oil, releasing their natural sugars to make a beautifully brown, sweet pan of deliciousness. Even if you are not a fan of onions in general, I urge you to try caramelizing them. They are simply transformed! The harsh, pungent, tangy onion becomes a mellow, sweet, slightly crispy delectable addition to pizzas, sandwiches, burgers, omelets, etc!
While the dough was rising, the squash was roasting, and the onions were caramelizing (this is beginning to sound like a Dr. Seuss book!) I got the white sauce going. Most meals I make (and certainly not pizza) don't have this many "irons in the fire" as it were, but I thought it was sort of fun thing to do on a cold, quiet afternoon.
Anyhow, I simply made up the white sauce in my Better Homes and Gardens Cookbook (the cheese version- using Parmesan cheese), cutting all of the amounts in half. It still made enough to cover two pizzas (the dough also makes enough for two pizzas, so I froze one half of it).
Once the dough had done it's thing, I stretched it out and topped it with the sauce, the squash, the onions, some cubed chicken, and then sprinkled it with cheese (I used a pizza blend containing mozzarella, cheddar and provolone). I really wished I had access to ricotta or feta or something a little more fun, but alas! our little market did not have it. Then I popped the whole thing in the fridge.
When I baked it later, I wanted to try out the new pizza stone my brother and sister-in-law (cooks and fellow bloggers themselves!) gave me for my birthday, but was sadly disappointed when my pizza stubbornly refused to slide off the pizza pan and onto the heated stone. I pulled and tried spatulas, but to no avail. I think I shall have to invest in the famed "pizza peel" or else try freezing the pizza first for easier transportation. However, the pizza baked up beautifully on the pizza pan, and it was delicious!

Disappearing fast...
We ate almost the whole pizza between the two of us, and thoroughly enjoyed the delightful co-mingled unusual flavors. On the whole the flavors were very understated, with the simple white sauce a perfect back drop for the sweet and mellow squash and onion. What a great discovery!


Butternut Squash Pizza with Chicken and Caramelized Onions
(printable version)
a KitchenJoy original recipe (with help)
Makes 1 12-14 in. pizza

pizza dough of your choice
1/2 recipe white sauce (recipe follows)
1-1 1/2 cups cubed peeled butternut squash, roasted
1/2-1 cup diced cooked chicken breast
1 medium onion, sliced and caramelized
1/2 cup or so cheese of choice

Spread pizza dough in pan. Cover with white sauce. Top with squash, chicken and onions. Sprinkle with cheese. Bake according to dough directions.

White Sauce (adapted from Better Homes and Gardens Cookbook)
Makes enough for 2 12in. pizzas
1 TB butter
1 TB flour
dash salt
dash pepper
3/4 cup milk
1/2 cup Parmesan cheese

Melt butter on stove top. Whisk in flour, salt, and pepper; heat till smooth and bubbly. Stir in milk. Heat to boiling; boil 1 min or until thickened. Stir in cheese until melted and smooth. 

Source for dough: Foodnetwork.com

Friday, October 8, 2010

Welcome to My Pizzeria! (Whole Wheat Pizza Crust)

I love pizza! I don't know very many people who don't love pizza, come to think of it... :) My family used to have pizza and movie nights every Sunday when I was growing up (and I think they still do!) and for many years my sisters and I made our own homemade pizza crust. I have tried many recipes for crust, all of which were good. But a few months ago, I think I stumbled on my favorite crust yet. I was on a diet (still should be, haha!) and looking for a low calorie, thin crust I could use with some healthy toppings. I can't remember where I found it, actually, so I'm not sure who to give the credit to! But the last two times I've made it, I have gone the healthier route and used whole wheat flour, which I think improved it even more- not only is it good for you, but the whole wheat gives it a great flavor! If you haven't tried a homemade crust, and you like your crust a bit on the thin side, you've got to give this recipe a try. It's easy and tastes fabulous with any toppings! We have tried ham & pineapple (for all you Hawaiian fans!), pepperoni with or without olives, and I've even used leftover sloppy Joe or taco meat for a topping- yum! It depends on what I have between the cupboard and the freezer! But I think our favorite is the ever-being-modified chicken pizza. But I need to start at the beginning!
First things first- as all good recipes start: preheat the oven! This is the only recipe I have ever made where you heat the oven to 500. Yeah. That's hot. :) While the oven is warming up to this insane temperature, I mix the yeast and sugar with warm water and let it sit while I mix the flours and salt together and cook the chicken. After about 8 minutes, I pour the yeast mixture over the flour and stir with my favorite wooden spoon. Then I form the dough into a ball and knead it for about 2 minutes, then press it into a semi-round shape. Then comes the fun part! You can do it however it seems to work for you, but I like to hold the dough in my hand and keep turning it around and around while I gently pull the edges out. I usually do this until it starts to tear a little, then I put it on the greased pizza sheet and begin pressing it out toward the edges of the pan (if you make it pretty thin, it will fit one 15" pizza sheet, but you can go smaller if you like it a bit thicker- experiment!). If any holes appear, just pinch them shut with your fingers!
Next, spread your sauce of choice on top. I like Ragu Homemade style (since we are going homemade here...). Chicken pizza is also delicious with white garlic sauce, but I haven't tried that at home yet. Spread as generously as you like (I go pretty thin- I don't like really saucy pizza), but don't forget to leave the edges sauce-free for the crust! Cheese goes on top of this, of course, and again you can choose your preference! I usually go with all mozzarella for the chicken pizza, and a blend of mozzarella and cheddar for pepperoni, Hawaiian and other varieties. I have also used a blend of mozzarella and feta for the chicken pizza, which is also very yummy. However, feta isn't something I usually have on hand!
The last step in the pizza-building process is the toppings! I think my chicken pizza turns out just a bit different every time, depending on what I have around to add to it!
Tonight's version included: one diced chicken breast, pan-fried in olive oil and sprinkled with Pizza seasoning (a mixture of oregano, basil, marjoram & garlic) and garlic powder, two fresh diced Roma tomatoes, a can of sliced olives, and generous amounts of fresh spinach. A note on the spinach: add this last and don't be afraid to cover pretty much the whole pizza with it. It shrinks lots during cooking, so if you don't put on very much, you'll regret it. If you cover the whole thing, it shrinks up to be just the right amount. This is what our pizza consisted of tonight, but don't be afraid to experiment with your own favorite flavors!
Once all the toppings are situated, pop that pizza in the oven! The blazing 500 degrees cook it in only about 10-12 minutes (or maybe less, depending on your oven!).
One of the best things about making pizza at home is getting your creative juices flowing and creating your own masterpiece! Experiment with flavors. Cheeses, meats, veggies. The possibilities are endless! This is the stuff traditions are made of.

Homemade Whole Wheat Thin Pizza Crust
(printable version)
(if you don't want whole wheat, just use all white flour)
makes 1 pizza

1 .25 oz. package of active dry yeast
1/4 tsp sugar
3/4 cup warm water
1 cup whole wheat flour
3/4 cup white flour
1/2 tsp salt
1/2 tsp Italian herbs

Preheat oven to 500 degrees. In small bowl, dissolve yeast and sugar in warm water. Allow to rest for 8 min. Mix flours, salt and herbs in another bowl. Pour yeast mixture over flour and mix with sturdy spoon. On lightly floured surface, knead dough for about 2 min. Allow dough to rest covered with a cloth about 5 min. Press into a 12" circle. You may also lift off of counter and rotate in hands, pulling dough gently into a circular shape. Place on lightly greased pizza sheet, stretch and press dough to edges. Spread with sauce and add desired toppings. Bake 8-12 min. or until edges are golden brown. Enjoy!
Related Posts Plugin for WordPress, Blogger...