Thursday, January 26, 2012

Penne with Creamy Pumpkin Sauce {and Chicken}

As I have mentioned before, I have a lot of pumpkin to use up. Not only in baggies in my freezer, already pureed, but also still in pumpkin form in my cold back pantry, awaiting puree-ification. So, I'm trying to get creative. I have made pumpkin bread, pumpkin cookies, pumpkin soup, pumpkin mac 'n' cheese, pumpkin donut holes, you name it. They have all, by the way, been delicious. And I am glad that my over-abundance of pumpkin means that I will be able to cook and bake with it all year, instead of being constrained to it's seasonal spotlight, autumn. My latest foray into cooking with pumpkin is another pasta dish, which tasted remarkably similar to its cheesier baked cousin, pumpkin mac 'n' cheese. This is definitely a simpler method of mixing your pumpkin with your pasta and it is incredibly tasty too! I am sorry to say that it is not a very pretty dish, which always grieves me. I confess, I am partial to food that looks just as pretty on the plate as it tastes delicious in your mouth. This is not one of those. It is unfortunately not very eye-catching, but it is delicious, and for that, I must share.
The original recipe I found was a non-meat entree, but I fixed that. :) I decided the addition of chicken tossed in the creamy sauce sounded fabulous, so the first step I took was to bake a couple of chicken breasts. I did not really season them, since I wanted them to soak up the flavor of the sauce. I recommend baking chicken breast uncovered in a 350 oven for about 45 min to an hour, depending on thickness. Chicken is done when no longer pink inside and juices are clear. When the chicken gets close to being done (say, 25 min. till), you can start on the pasta. Cook your penne (I like to use whole wheat penne) or other pasta, if you have an aversion to penne.
Meanwhile, in a pot, stir together cream cheese, Parmesan, butter and milk over low heat until it is all melted and creamy (I accidentally added the pumpkin at this juncture as well, but it didn't seem to hurt). If you can't resist the urge, go ahead and dip your finger in for a taste test. Mmmmm....


Add the pumpkin (if you didn't add it prematurely like me) and seasonings.


Make sure it's all creamy and hot through, then add it to the pasta. When the chicken is done, cube it and throw it in; toss, and you've got yourself a creamy, delicious dinner! I served ours with asparagus and homemade Italian bread (I should share that recipe with you soon- it is delicious!!). Enjoy!


Penne with Chicken and Creamy Pumpkin Sauce
(printable version)
serves 4

2 chicken breast halves, cooked and cubed
1/2 box of whole wheat penne pasta (about 8 oz)
4 oz. cream cheese (half a package), cubed
1/4 cup Parmesan cheese, grated
1/4 cup butter
1/4 cup milk
1/2 cup canned (or homemade) pumpkin puree
1/4 tsp ground red (cayenne) pepper
nutmeg to taste (start with a dash)

Cook pasta according to package directions.
Meanwhile, heat cream cheese, Parmesan, butter and milk on low until cream cheese is melted, stirring frequently. Add pumpkin and seasonings and stir, heating through.
Drain pasta; add sauce and chicken and toss to coat.

Source: Kraft Foods

Tuesday, January 24, 2012

Huckleberry-Ricotta Pancakes {with Honey Syrup}


Travis and I do not have TV (we have a TV, we just don't get TV), so it is a rare and special occasion when we get to watch The Food Network at his parent's house. I love cooking shows, and I have to admit, my guilty pleasure is "Cupcake Wars" which starts late on Sunday nights. When we were there a few weeks ago, however, we amused ourselves with watching several episodes of "Diners, Drive-Ins and Dives", where the host travels around the country sampling fare from many different local establishments. As we watched the chef of one restaurant prepare a few of his staple favorites, I was drawn in. Not only did he make his own fresh ricotta cheese, he then proceeded to make these amazing looking pancakes. I thought to myself, I can do that. So it promptly went on my menu. Now, I googled the combination and came up with many recipes, but I decided to try tweaking a fairly simple one that I discovered, appropriately enough, on the Food Network website.
Travis and I don't get to cook together very often- that is usually a luxury we enjoy on his day off, cooking breakfast together. So it was a special treat to whip up these scrumptious pancakes with him, laughing, blasting Keith Green music and inhaling delicious aromas of berries, coffee and bacon.
The pancakes were absolutely fantastic! I am not much of a pancake girl myself, but these are not any old pancakes. Although the recipe is very little altered from a traditional pancake mix and water regimen, the minor additions make a major difference. I am certain you could get crazy with making your own pancake mix from scratch (which, incidentally, isn't that difficult), but if you have a giant bag of Krusteaz in your pantry that needs to be used up (like I do), why would you? Anyhow, complicated or no, these beautiful pancakes are a winner in my book. The addition of ricotta cheese to the batter made the cakes light and creamy, almost melting in your mouth. The tang of the beautiful berries (blueberries would work just as well here, if you don't have huckleberries handy) kept it from being overly sweet, and the honey syrup...oh, the honey syrup!
While Travis flipped the flapjacks, I worked on the syrup which was suggested by the Food Network to pour over our pancakes. I was slightly skeptical, and ended up reading the recipe wrong (in my defense, it is written in a confusing way!) and had to make the whole thing over. But the end result was well worth it. Something about the honey perfectly complimented the other flavors. This recipe is definitely a keeper and one that would be just as well suited to a quiet weekend breakfast as a special brunch for company.


Huckleberry-Ricotta Pancakes with Honey Syrup
(printable version)
originally by Giada De Laurentiis of the Food Network
serves about 4

For Pancakes:
1 2/3 cups water
1 1/2 tsp vanilla extract
2 cups pancake mix (Krusteaz recommended)
1 cup ricotta cheese
2/3 cup frozen huckleberries (or blueberries)
For Syrup:
1/3 cup water
1/3 cup sugar
1/3 cup honey

In small saucepan, dissolve sugar in 1/3 cup water over medium heat (about 5 min). Stir in honey and keep syrup warm.
Heat griddle to medium heat.
Stir 1 2/3 cups water and vanilla together in large bowl. 
Add pancake mix and stir just until moistened but still lumpy. 
Stir in ricotta, gently incorporating, but maintaining lumpy batter.
Fold huckleberries in gently.
Grease griddle lightly with butter or oil. 
Working in batches, spoon 1/4 cup of batter onto griddle for each pancake.
Cook until golden brown, about 3 minutes per side. Serve with honey syrup.

Source: Food Network

Wednesday, January 11, 2012

Meals for a Month- Jan./Feb.

If you need some ideas, here's my proposed menu for the month of January! I say proposed because it often changes with our schedule- but I like at least having ideas to go off of!


Jan. 10-14
Tuesday
Side: Fruit smoothies and tortilla chips
Wednesday
Side: Homemade Italian Bread and green salad
Thursday
Entree: Tacos
Side: Fresh fruit
Friday
Entree: Hawaiian Pizza
Side: Fresh Veggies
Saturday
Side: Italian Bread

Jan. 17-21
Tuesday
Entree: Balsamic Garlic Chicken
Side: Risotto and asparagus
Wednesday
Side: BLTs on homemade bread
Thursday
Entree: Breakfast for dinner- maybe a quiche?
Side: Fresh fruit
Friday
Entree: Chicken, Garlic, Tomato and Spinach Pizza
Side: Fresh Veggies
Saturday
Side: Rice

Jan. 24-28

Tuesday
Entree: Shepherd's Pie (with ground turkey)
Side: Rolls
Wednesday
Side: None
Thursday
Entree: Herb Baked Chicken and Potatoes
Side: Asparagus and rolls
Friday
Entree: Pepperoni and Olive Pizza
Side: Fresh Veggies or Fruit
Saturday
Entree: Tomato Soup
Side: Grilled Cheese Sandwiches

Jan. 31-Feb. 4

Tuesday
Entree: Creamy Pumpkin Pasta with Chicken
Side: A veggie
Wednesday
Entree: Split Pea with Ham
Side: Italian Bread
Thursday
Entree: Ricotta and Huckleberry Pancakes
Side: Sausage or Bacon
Friday
Entree: Pepperoni and Sausage Pizza
Side: Fresh Veggies or fruit
Saturday
Entree: Pork Stir Fry
Side: Rice

Feb. 7-9

Tuesday
Entree: Chicken Fettuccine Alfredo
Side: Rolls or Bread and a veggie
Wednesday- Thursday
Entree: Leftovers for Hubby to reheat while I'm gone at a friend's wedding


Saturday, December 31, 2011

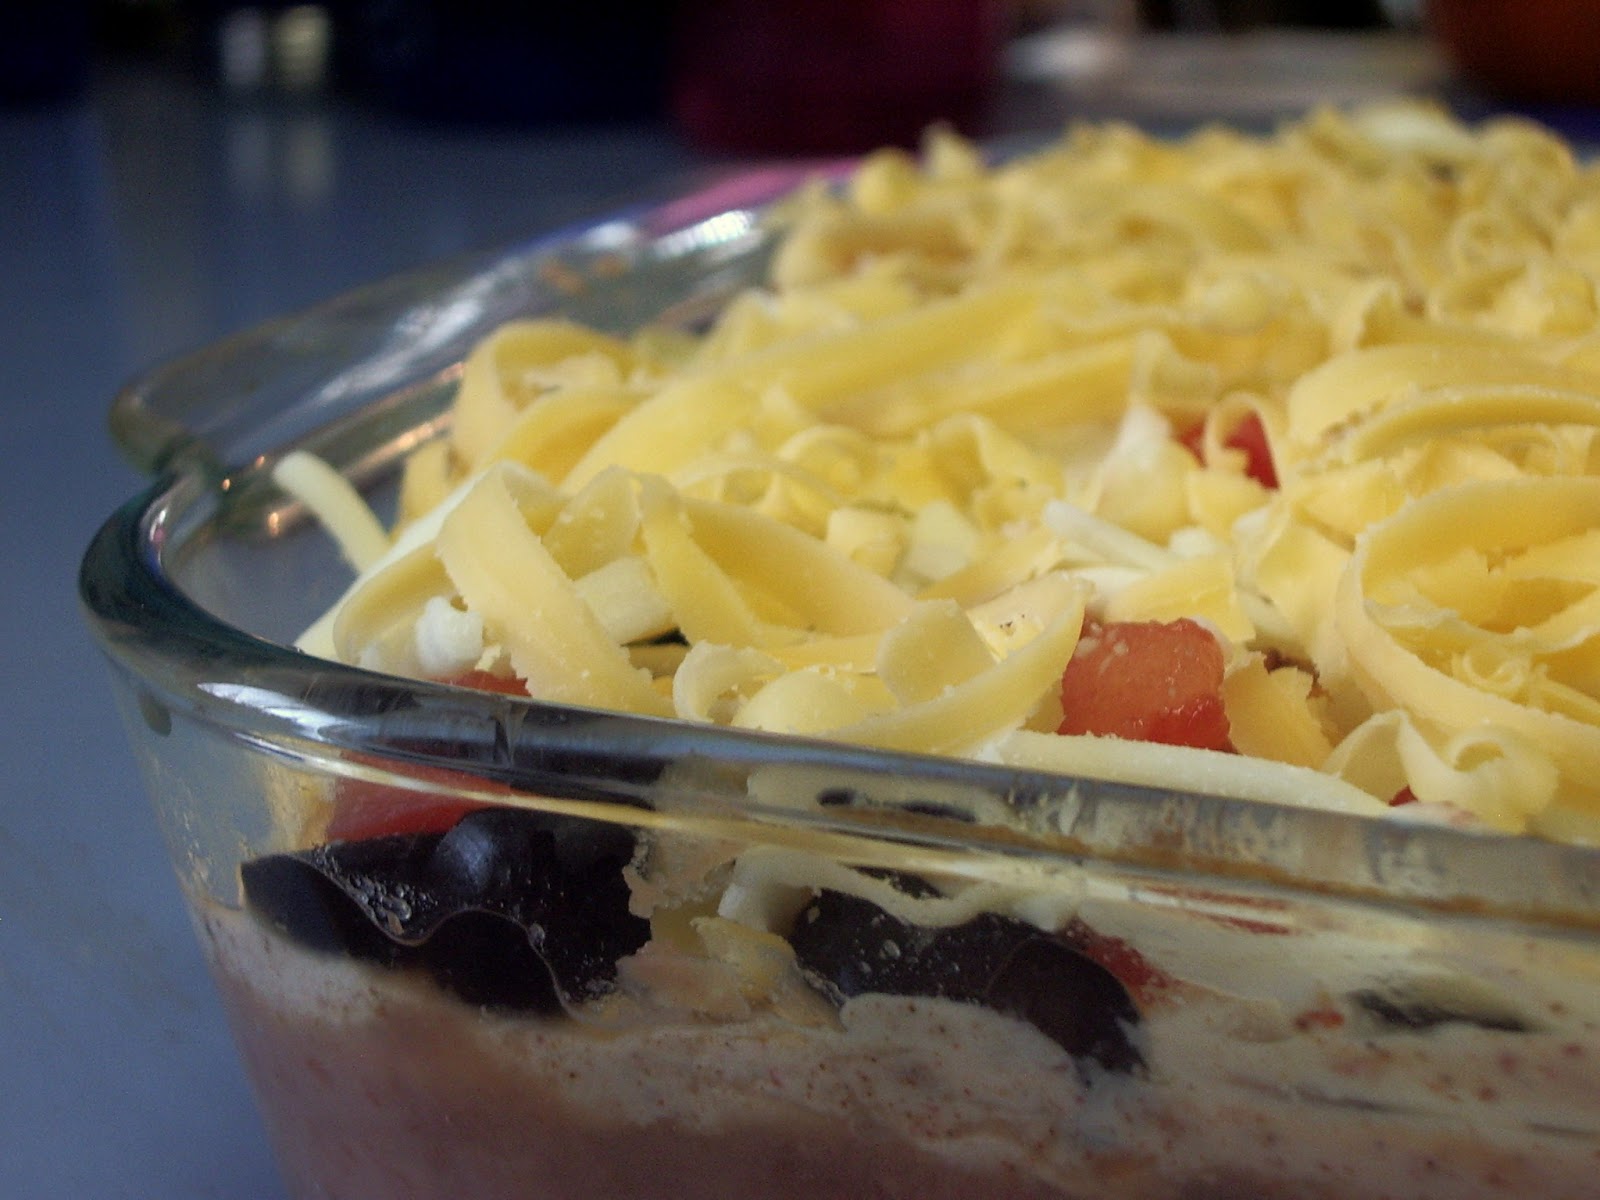
Mexican Layered Dip

Happy New Year's Eve everyone! I hope this last day of 2011 finds you reflecting on all your blessings and God's faithfulness to bring us this far. Here's to the grace to face the joys and challenges of 2012 with courage!

This recipe has been a staple at many family parties over recent years and that is why it occurred to me to bring it out for a New Year's Day party we are going to tomorrow. If you have any parties to attend tomorrow (or yet tonight?), this is a VERY quick and VERY easy crowd-pleaser to throw together. And it tastes fantastic. The perfect munching snack with a bowl full of crisp tortilla chips.
This dip was originally introduced to our family by my Dad's mom, who we kids call Nani. She taught my sister Jessica how to make it, so from then on it has mainly been Jessica's responsibility to prepare it for parties, potlucks, etc...but even more importantly, to remember what order the layers go in! I hope I remembered right, but if not...oh well! There's really no wrong or right way to do it, except...one thing I know. The beans ALWAYS go on the bottom. :)

Start with a couple of cans of refried beans (enough to thickly cover the bottom of whatever size pan you're using- my measurements are what I used for an 8x8).


Next, mix a packet of taco seasoning with a container of sour cream.


Make sure it's well incorporated, then spread it over the beans.


Sprinkle with sliced olives.


Top with diced tomatoes.


Cover generously with cheese (your call on what variety of cheese).


Serve immediately or you can make it ahead if you're really organized. Serve with tortilla chips!


Nani's Mexican Layered Dip
(printable version)
serves....a crowd

2 cans refried beans
8 oz. container of sour cream, mixed with one packet of taco seasoning
large can sliced olives
1 lg or 2 sm. tomatoes, diced
shredded cheese

Layer all ingredients in order listed (or in whatever order you prefer...just be sure you put the beans on the bottom!! :) Serve with tortilla chips.

Thursday, December 29, 2011

Me and My Mixer

I just want the world to know...
I GOT A KITCHENAID MIXER FOR CHRISTMAS!!!


My dear sweet hubby is so wonderful, he got me just what I was afraid to hope for...a beautiful blue KitchenAid stand mixer. I couldn't wait to get home (we spent Christmas with my family in OR) to whip up something yummy. So the very next day (yesterday), I got it out for a test drive. It is HEAVY. I had to have hubby lift it up to the counter for me! Definitely not going to fall apart any time soon! And the bowl is so shiny! :) I sort of rearranged my kitchen to make just the perfect spot for it. Visible, accessible, and not in the way.

After using it only once so far (with the standard mixing attachment), for pumpkin snickerdoodles, my favorite thing is being able to dump stuff in and walk away or fix another part of the recipe while the machine does all the work. I already love baking and cooking, but I think this beautiful and sturdy machine will make it even more fun!

If any of you, my dear readers, have a stand mixer and have any tips, tricks, quirks or recipes to share that you think would be helpful, please do so in the comments!! I would love your advice as I begin my KitchenAid adventure!

Wednesday, December 28, 2011

Pumpkin Snickerdoodles

Can we just establish, here and now, that I am a HUGE snickerdoodle fan? OK, now that we have that taken care of, we can move on.


Whether you prefer soft (like I do) or crispy snickerdoodles, home baked (who wouldn't?) or store bought (for emergencies), certainly we must all agree to the certain charm of sugar and cinnamon lightly coating a sweet, buttery cookie...if this isn't you, don't stop reading here. I shall convince you.


I am rather locally famous (I say this with modesty of course) for my traditional snickerdoodles, which is only the recipe from the Better Homes and Gardens Cookbook, but which I try to keep soft and light (as stated before, I generally am not a champion of crispy cookies). But this fall, I made a discovery which has changed my world forever. Please sit down. Pumpkin snickerdoodles (oh wait, you probably already read the title...oh well...proceed). The first time I tried this recipe, it was with fear and trepidation, hoping the addition of pumpkin and several new spices would not mar the perfection that is the snickerdoodle. But with one bite, I knew. Not only was it delicious, a sneaking admission hovered on the edges of my mind. Was it...could it be...better? Yes, I think it is even a step beyond perfection, if such a thing there may be. They are light and airy and a beautiful golden hue. There is a definitive flavor of fall to these perfect little morsels, but I would be happy to make them any time of the year! Especially considering my freezer is already stocked with frozen homemade puree. And there are seven more home-grown (not by me- my mother-in-law!) in my pantry waiting to become puree. Which means...over 14 cups of pumpkin puree waiting in the wings. Maybe I should give some away... :)


The process of making these adorable, sparkly little things is really very similar to traditional snickerdoodles, except the addition of a couple of extra ingredients, pumpkin and nutmeg to the dough, ginger and allspice to the sugar/cinnamon mixture they are coated with.


Once you have all the ingredients well mixed, you roll them in the sugar and spice mixture, pop them in the oven to bake, and begin anticipating wonderful aromas and even more wonderful flavors. Don't forget to let them cool a bit before sneaking a nibble!!


By the way, as I was writing, I began to be curious about the origin of the name "Snickerdoodle"...I looked it up on Wikipedia, but wasn't sure I should share...don't want you to lose your appetite! ;) BUT...here's the link if you're feeling adventurous.

Pumpkin Snickerdoodles
(printable version)
by Pennies on a Platter
makes around 3 dozen

1 cup unsalted butter at room temperature
1 cup white sugar
1/2 cup brown sugar
3/4 cup pumpkin puree
1 egg
2 tsp vanilla
3 3/4 cups flour
1 1/2 tsp baking powder
1/2 tsp salt
1/2 tsp cinnamon
1/4 tsp nutmeg


For coating:
1/2 cup white sugar
1 tsp cinnamon
1/2 tsp ground ginger
Dash allspice


Combine butter and sugars; mix with electric mixer 2 to 3 minutes or until light and fluffy. Stir in pumpkin. Add egg and vanilla and beat until well blended.
In separate bowl, whisk together flour, baking powder, salt, cinnamon and nutmeg. Add gradually to wet mixture and blend until fully incorporated. 
Chill at least 1 hour.
Preheat oven to 350. Mix coating ingredients in small bowl.
Line baking sheets with parchment paper or grease lightly. Form dough into 1 in. balls and roll in coating. Place on sheet and flatten lightly, dipping instrument in sugar mixture if necessary to prevent sticking.
Bake about 12 minutes or until lightly golden but still soft. Cool a couple of minutes, then transfer to wire rack. Cool completely.
Enjoy!


Originally by Dlyn

Wednesday, December 14, 2011

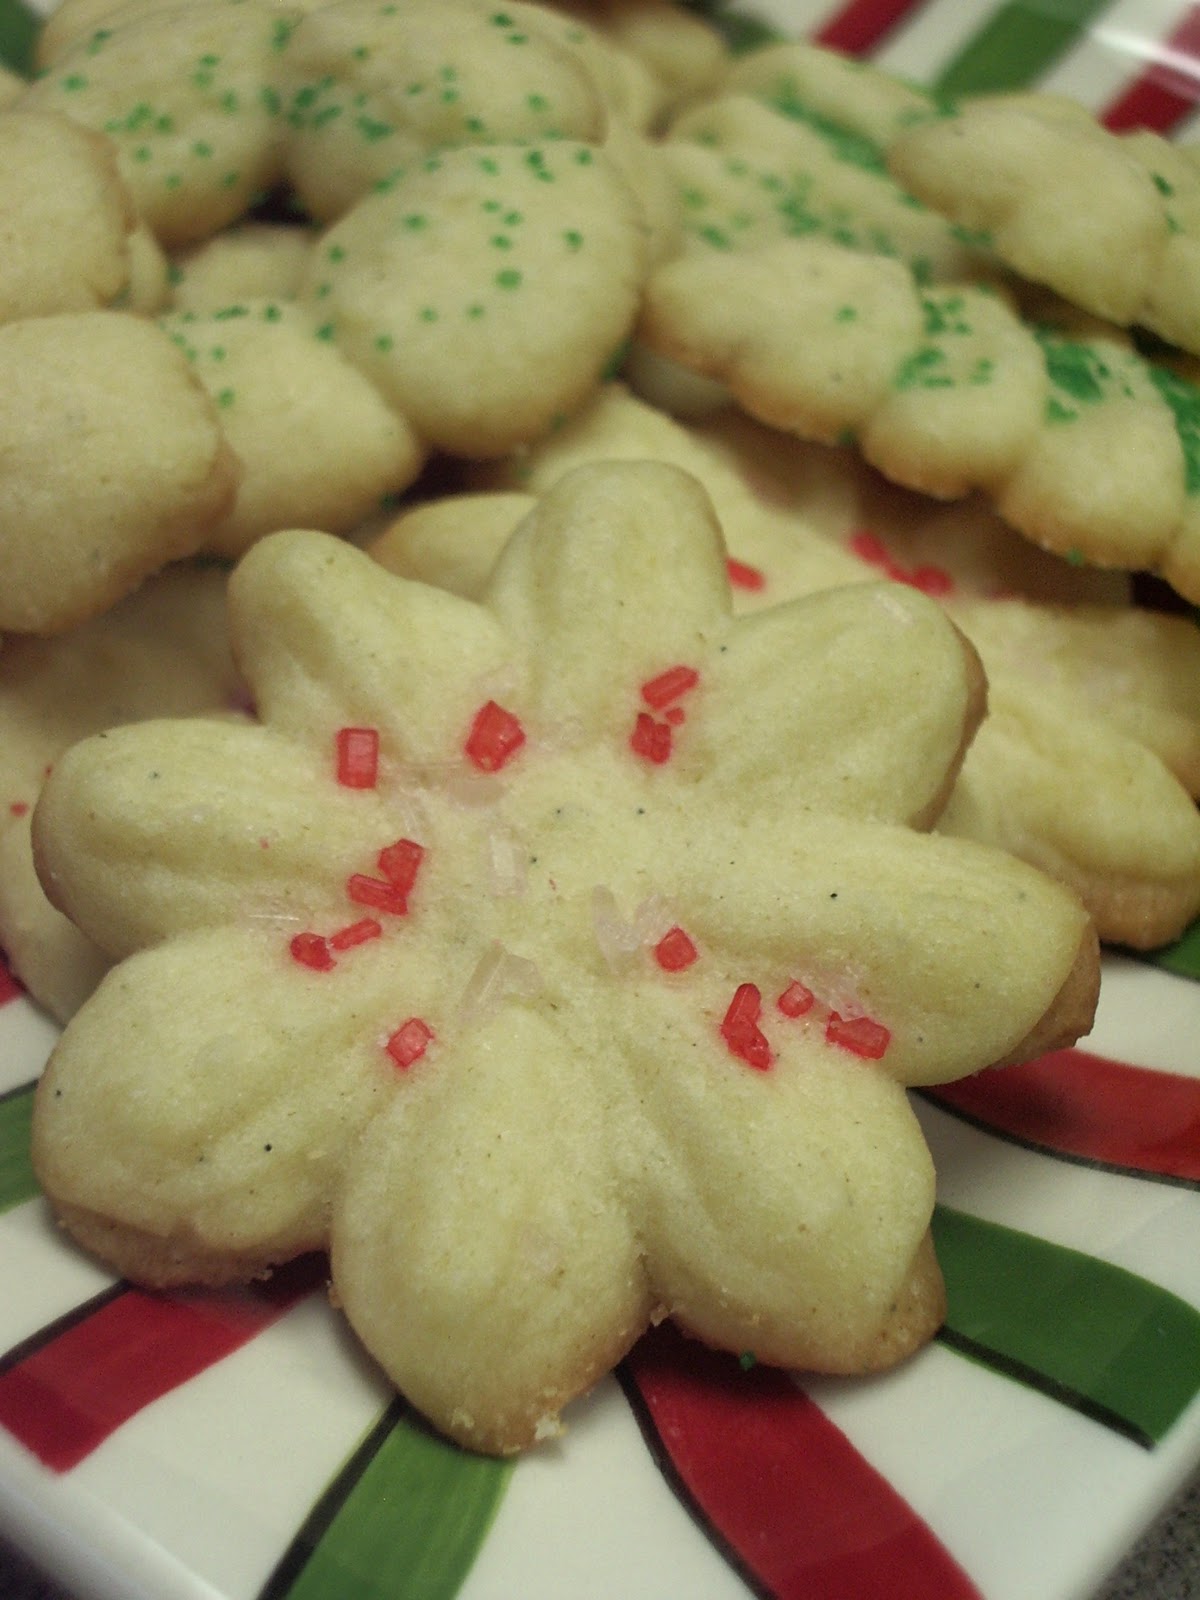
Spritz Cookies

I take for granted that everyone reading this blog has at some point either given or gotten a pretty little (or large) blue tin containing some deliciously buttery, short-breadish type cookies typically referred to as Danish butter cookies. They come in lots of shapes including rectangles, pretzels, circles and more and always seem to be topped with big sugar crystals. If you are a fan of these coveted Christmas party favorites, you will surely be a big fan of Spritz cookies.


In my opinion, they taste remarkably similar and are delightfully cute and fun to make. You will need a cookie press. If you don't have a cookie press, I urge you to take the plunge (it should only be $10 or $15)! Though you will not use it every day of the week, it is a fun tool to have, especially at the holidays, and is a great change of pace from the normal drop or cutout cookies. If you haven't seen one, here's what mine looks like:


You place the dough inside and press it out through different disks to create different shaped kinds of cookies.
This recipe comes from my absolute favorite holiday cook book to date, the Better Homes and Gardens "Cookies for Christmas" book. I finally secured myself a used copy from Amazon this year- I admit, part of the reason this book is so near to my heart is because of the sentimental attachment. My sisters and I have a tradition of baking cookies together, usually sometime the week before Christmas. We choose several varieties and have a baking party while watching Pride & Prejudice. Now that I'm married and moved away, we only get to do this every other year, but we always have a blast. The first year this tradition started we used this cook book, borrowed from our local library! It has some fantastic, time-tested recipes and some we have tried that were instantly adopted into our family's favorites.


I don't think I have made these spritz cookies before, but I have used a cookie press before. I used to make dozens of shortbread cookies with my cookie press (a gift from my grandma- my new one was a gift from my sister-in-law) and dip them in chocolate as a special after-dinner treat for my grandma (my other grandma... :)) At any rate, beware, because these cookies are addictive! They are small and adorable and buttery and crispy/soft and you won't be able to eat just one!


Start with butter. Lots of butter. Use your mixture to soften the butter until it is fluffy.


Add the sugar and again, mix until it is a beautiful bowl of fluffy sweet butteryness.


Add in eggs, vanilla and almond extract and beat until it's blended. I used a vanilla paste my sister-in-law gave me and it adds a real vanilla bean look and flavor.


Beat in as much of the flour mixture as you can, stir in the rest until it is well mixed.


If you like, at this point you can tint part or all of the dough if you want to with food coloring. I did not because I was short on time, but it would be very pretty to have cookies in red and green. Do not chill the dough.Roll dough into a log that will fit into your cookie press. Attach preferred disk for desired shape.


Press cookies onto pan. This takes a bit of experimentation. I got a routine down with my press, but it took a bit. Some cookies took two pumps on the handle, some only one...you'll have to find your own rhythm. Add sprinkles or candies if you like- be creative!


The recipe said to bake 8 minutes, but I found that was too long for my taste. I kept it at about 5 or 6 minutes because I like my cookies a little softer. Enjoy!


from Better Homes and Gardens "Cookies for Christmas"
makes about 60

3 1/2 cups flour
1 tsp baking powder
1 1/2 cups butter
1 cup sugar
1 egg
1 tsp vanilla
1/2 tsp almond extract
food coloring and decorating sugars if desired

Preheat oven to 400.
Stir together flour and baking powder.
In a large bowl, beat butter until softened.
Add sugar and beat until fluffy.
Add egg, vanilla, and almond extract and beat well.
Gradually add flour mixture and beat until well mixed. Do not chill.
Tint dough with food coloring if desired. Force dough through cookie press onto ungreased cookie sheet. Decorate if desired.
Bake 5-8 minutes, or to desired done-ness. Remove and cool. 
Related Posts Plugin for WordPress, Blogger...