Wednesday, December 7, 2011

Crazy Cooking Challenge: Cappuccino Fudge

Here we are, Crazy Cooking Challenge #2 already!! This month's challenge was to find the ultimate fudge recipe. What a delightful hunt! I have never made fudge before, so it was a bit of an experiment for me as well. Because this was my first time, after drooling over many decadent looking squares, I decided on a rather simple fudge, but as I am sure you will agree, it suits ME to a tee.


If you do not know by now, I am a bit of a coffee nut. Coffee snob. Connoisseur. Whatever. You get the idea. I like coffee. My kitchen fairly swims in it. Take a look at the previous post about Coffee and Cream Drops. See any clues?
Now that we've established (again) my infatuation with glossy brown beans (that includes cocoa beans!), we can move on to the delicious creation I concocted in my kitchen which included both. Cappuccino Fudge. It really was a snap to make- Annie wasn't kidding when she said it was simple. I really thought fudge would be more complicated than this (and maybe some are), but it was easy and turned out fantastic, so my confidence in fudge making is definitely bolstered to try something harder next time!


The first step is to line a pan with foil (hint: this makes for very easy removal later!).

Good old trusty foil.
Next, move over to your stove top! Another thing I like about this is it really only dirties one pot. Start with some marshmallow cream...this stuff is harder to get into the pan then you might think! It is SO sticky! Add instant coffee powder, sugar, butter, cinnamon, salt and heavy whipping cream. Annie's recipe only called for 1 tsp of instant coffee, but after reading some of the comments on her blog I decided I wanted to make sure it had a real distinct coffee flavor. So I put in a whole tablespoon.


Mix it all together until it's nice and smooth (I used a whisk for this part), while heating it over medium heat.


Once it really begins to boil, keep it there and turn on the timer! Here comes the tedious part: keep stirring while it boils for 5 whole minutes.


Then take it off the heat and stir in a bag of chocolate chips till they are melted and the mixture is creamy and smooth again. Pour the whole thing into your nice foil-lined pan and smooth it out.


Cover and refrigerate at least 4 hours before you cut and devour!! Or. Share with your friends. Your favorite friends. Special treats are only for special friends, right?


This fudge tasted exactly as I hoped against hope that it would. A perfect marriage of coffee and rich chocolate. It was firm and the texture was smooth and it sliced beautiful into darling little squares.


If you want to get fancy, you could do like I did and serve each topped with a fine dusting of coffee powder (or cinnamon) and a whole coffee bean. Any way you slice it, this fudge is a perfect holiday indulgence your friends will love you for.


Cappuccino Fudge
(printable version)
by Annie's Eats (with tweaks)
makes about 36 squares

1 jar marshmallow cream (7 oz)
1/2 cup sugar
2/3 cup heavy whipping cream
1/4 cup butter
1 TB instant coffee powder
1/4 tsp cinnamon
1/4 tsp salt
1 (12 oz) bag semi-sweet chocolate chips

Line an 8” square baking pan with aluminum foil; set aside.
 In a 2 qt. saucepan, combine marshmallow cream, sugar, cream, butter, coffee powder, cinnamon and salt.
 Bring to a boil over medium heat, stirring constantly. Continue to boil 5 minutes, stirring constantly. Remove from heat. 
Stir in chocolate chips until smooth. 
Pour into prepared pan. 
Cover and refrigerate at least 4 hours. 
Place on cutting board and cut into 36 squares.

Source: Annie's Eats


Photobucket

Thursday, December 1, 2011

Coffee and Cream Drops


I have expounded in previous posts about my love for coffee and chocolate and my subsequent adoration of anything combining the two, so I won't bore you by composing another monologue on that subject. That said, however, I must share with you a new cookie discovery employing the combination of those very two blessed ingredients! Just a glance at the name and I knew I had to try them. If you have seen my kitchen, you would know too. It is practically a shrine to coffee (except that would be irreverent, so I can't exactly call it a shrine...a tribute, perhaps?). Anyhow, this cookie recipe is a delightful combination of flavors, with chocolate taking center stage and coffee slipping into the background. I think using espresso powder would bring the coffee taste out more. Another name for this cookie (I think) could be "Two-tone mocha chip cookies". You know the Java Chip Frappuccino at Starbucks? This is kind of like that in cookie form. It is especially unique because not all the flavors are mixed together- they sit companionably side-by-side, and are melded together in the oven.


The dough begins as a basic, chocolate chip type cookie dough, with coffee added. Then, you divide it in half.
One half becomes fudgy and chocolaty with the addition of cream and cocoa powder.


The other gets dressed up with chocolate chips (I used dark chocolate for more chocolaty power!!).


Then, place little bits of each next to each other on the cookie sheet (you will need to coax them to get a little cozy! Hugging is encouraged). :)

Come on, you two. Get close.
That's more like it!
Then, when baked, the two are magically melded into one! I could make this into a good marriage analogy, but I think I'll just leave it right there. The two tones make a beautiful cookies, and the flavors are delicious.

See? Magic!
 The textures are almost identical, though the chocolate side is definitely more fudgy. A perfect addition to any cookie tray- especially wherever coffee is served!!


As you can see, I have some spare coffee beans- I knew they'd come in handy one of these days! :)


Coffee and Cream Drops
(printable version)
makes 48 (the book says- mine made about 42)

2 TB instant coffee crystals (or instant espresso powder)
3 TB light cream or half and half
1 cup butter, softened
2/3 cup sugar
2/3 cup brown sugar
1 tsp baking soda
1/4 tsp salt
1 egg
1 tsp vanilla
2 1/4 cups flour
1/4 cup unsweetened cocoa powder
1/2 cup chocolate pieces (mini or reg.- your choice of chocolate)

Preheat oven to 375.
Stir coffee crystals into 1 TB of the cream until they dissolve; set aside.
Beat butter with mixer 30 seconds. Add sugars, baking soda, and salt. Beat until combined. Beat in coffee mixture, egg and vanilla until combined. Beat in as much of the flour as you can with the mixer. Stir any remaining in with wooden spoon.
Divide dough in half. Stir remaining cream and cocoa powder into one portion. Stir chocolate pieces into the remaining plain dough portion. Spoon a scant teaspoon of each dough side by side onto an ungreased cookie sheet. Press doughs together.
Bake 8 to 9 minutes or until just set. Cool 1 min, remove to wire racks to cool completely.

Source: Better Homes and Gardens "Biggest Book of Cookies", pg. 25

Wednesday, November 30, 2011

Chicken-Cheese Lasagna Roll-Ups

Name the #1 most irritating thing about otherwise divine lasagna:
(I'll give you a hint: it has nothing to do with ingredients)


*pause*


If you're like me, you said "Keeping all the layers together when you cut and serve it!" While I am not an expert on solutions to that problem, I did recently find a recipe that took ALL the work out of slicing up an inviting pan of lasagna. In fact, there's no slicing required at all! This "lasagna" comes in individual servings! What I'm talking about is a lasagna "roll-up"- all the deliciousness of lasagna rolled into a convenient and beautiful little package. I recently discovered Pinterest (which, by the way, is incredibly addicting!) and that is where I first spied this idea (by the way, you can follow me on Pinterest by clicking that red button over there...just sayin'). They looked so intriguing, I had to give it a try! I'm so glad I did.
This recipe is a little different than traditional lasagna because it uses chicken instead of a traditional meat sauce, but now that I've tried this once I can't stop thinking of other ideas- definitely more traditional, vegetarian, Alfredo, you name it! You could wrap all sorts of tasty things up in these gorgeous noodles!
The first step if you don't have any pre-cooked chicken on hand is to bake some chicken breasts. While the chicken is baking, go ahead and boil the lasagna noodles according to the box directions for "al dente".
Once the chicken is done, dice it up and combine with the cheeses, milk and pepper. Yes, three yummy cheeses. ricotta, feta, and Parmesan.

Can you have too much cheese? I think not.

Can't have too much cheese! However, I found this particular blend of cheeses to be a little dry, even with the addition of milk. I think I might swap the Parmesan or feta out for mozzarella next time to add a little more moisture and gooeyness.
Spread some spaghetti sauce in the bottom of a pan (I found an 11x7 was about perfect, but if you don't want them so cozy, a 9x13 would work well also).


Lay the lasagna noodles out flat, working one at a time. Put about 1/2 cup of the mixture (or just divide it into eighths) onto each noodle and spread it down the length of the noodle, leaving about 1 inch at the end empty (this helps with sealing).


Then roll the noodle loosely toward the empty end. If your noodles are still warm, they will seal easily.

Aren't they pretty?
Place the roll seam side down on top of the spaghetti sauce. Repeat with the remaining noodles and cover with more sauce. Cover and bake!


I served ours with a green salad and it was a delicious meal. I loved how the rolls were so easy to remove from the pan, no mess, no slicing. And it tasted a lot like traditional lasagna, just in a more convenient form!


Chicken-Cheese Lasagna Roll-Ups
(printable version)
serves 4-8 (depending on your appetite!)

3 cups chopped cooked chicken
1 cup ricotta cheese
1/4 cup feta cheese
1/4 cup Parmesan cheese
1/4 cup milk
1/8 tsp white pepper
8 lasagna noodles, cooked and drained
2 cups spaghetti sauce

Preheat oven to 375.
Combine chicken, cheeses, pepper and milk. 
Spread 1 cup of the spaghetti sauce in bottom of pan.
Spread 1/2 cup chicken mixture on each noodle; roll jelly roll fashion.
Arrange rolls, seam side down, on top of sauce in pan.
Cover and bake 30 min. or until hot.
Serve, if desired, with additional Parmesan cheese.

Sources: iVillage, Pinterest

Tuesday, November 29, 2011

Monthly Menu- November/December


Happy Thanksgiving! Merry Christmas! The holiday season is upon us! It seem like every year the season sneaks up earlier and earlier. But I love it. The snow on the ground outside and the chill in the air make it easy to love snuggling up with a warm drink, listening to Christmas music and watching fun holiday movies.

Week 1 (Nov. 29-Dec. 3)

Tuesday
Entree: Chicken & Cheese Lasagna Roll-Ups
Side: Spring Greens tossed with homemade Italian dressing
Source: Pinterest, courtesy of iVillage
Wednesday

Entree: Beef-Barley Soup
Side: Rolls
Source: Better Homes and Gardens Cookbook
Thursday
Entree: Shepherd's Pie (with ground turkey swapped for the beef)
Side: Salad
Source: My Mommy
Friday
Entree: Whole Wheat Pepperoni & Olive Pizza
Side: Fresh Fruit or Veggies
Source: I don't remember
Saturday
Entree: Roast Turkey (I didn't get my leftovers, so it's Thanksgiving all over again!)
Side: Baked sweet potatoes, stuffing
Source: I don't know yet

Week 2 (Dec. 6-10)

Tuesday
Entree: Turkey Pot Pie
Side: None
Source: Pillsbury
Wednesday
Entree: Lentil & Turkey Italian Sausage Soup (from the freezer)
Side: Corn Muffins
Thursday
Entree: Chicken Parmesan
Side: Penne pasta and a Veggie
Source: "Everyday with Rachael Ray" Magazine
Friday
Entree: Garlic Chicken "White" Pizza
Side: Fresh Fruit or Veggies
Source: Somewhere on the web
Saturday
Travis' Birthday- we're probably going out to dinner with his parents

Week 3 (Dec. 13-14)

Tuesday
Entree: BBQ Meatballs
Side: Mashed Potatoes
Wednesday
Entree: Turkey Chowder
Side: Rolls or Corn Muffins
Source: I don't know. Somewhere on the internet. Good thing I printed it out, because I can't find it again!

Other
Cappuccino Fudge for the Crazy Cooking Challenge
Mint Chocolate Chip Cookies

Monday, November 7, 2011

Crazy Cooking Challenge: Cream Cheese Mashed Potatoes

I'm so excited! This is my first post with the Crazy Cooking Challenge! November's theme is mashed potatoes, so I scoured the blogosphere for a new and tasty recipe. I adore mashed potatoes. I have recently discovered that I love mashed red potatoes. With the skins on?


And lots of yummy stuff added?


Mmm. I thought it sounded delicious to add cream cheese to the already delightful potatoes, so I searched for a recipe containing that, as well as one limited to the ingredients I possessed (we aren't close to a grocery store and I didn't find my recipe before our shopping trip...). Finally I found a yummy looking recipe on a blog called La Phemme Phoodie. Unfortunately, the recipe called for chive and onion cream cheese (which I'm sure is delicious, but which I did not have!), so I tweaked it just a bit. Since the chive and onion flavor would be missing, I added a couple of cloves of garlic to the boiling potatoes to compensate.


These potatoes are delicious and rich, including milk, butter, sour cream and cream cheese! They are smooth and creamy, and the addition of the cream cheese adds a delightful tang. I cannot accurately call them "Chive & Onion Mashed Potatoes" as she does, but they were delicious nonetheless!! They were a perfect compliment to our cider pork roast and green beans, and they would be more than welcome at our Thanksgiving table in just a few weeks!


Cream Cheese Mashed Potatoes
(printable version)

2 lb. small red potatoes, quartered
1/2 c. butter
1/2 c. milk
1/4 c. sour cream
1 tub (8 oz.) cream cheese
2-3 garlic cloves, halved
1 bay leaf
salt and pepper to taste

Bring a pot of lightly salted water to a boil. Add potatoes, garlic and bay leaf. Cook until potatoes are tender, but still firm, about 10 min. Drain and place in a large bowl (or simply return to pan- not over heat)- remove bay leaf.
Combine potatoes with butter, milk, sour cream, cream cheese, salt and pepper. Mash together until smooth and creamy (or desired consistency).
Serves 8 (I halved it for the two of us and we had about a cup leftover)


Photobucket

Sunday, November 6, 2011

Roasted Butternut & Sweet Potato Lasagna

Oh dear. This is my third post about butternut squash in what, 2 weeks? I think I'm in love. It just keeps getting better. First, this incredible soup. Then, it turned traditional pizza on its head. Now...it has invaded the comfortable world of lasagna.


And I love it even more for the intrusion. Not long ago, I wouldn't have dared put a vegetable in my lasagna (besides tomato sauce), but this delectable yellow gourd has turned a lot of my preconceived notions about vegetables and meatless dinner upside down. Even my husband has been blown away by how delicious and filling a meatless entree can be. I'm begging you as a friend to please, please put all your inhibitions aside and make this lasagna. Okay. Now that I've reduced myself to pleading, let's proceed to the "how" of this culinary adventure.
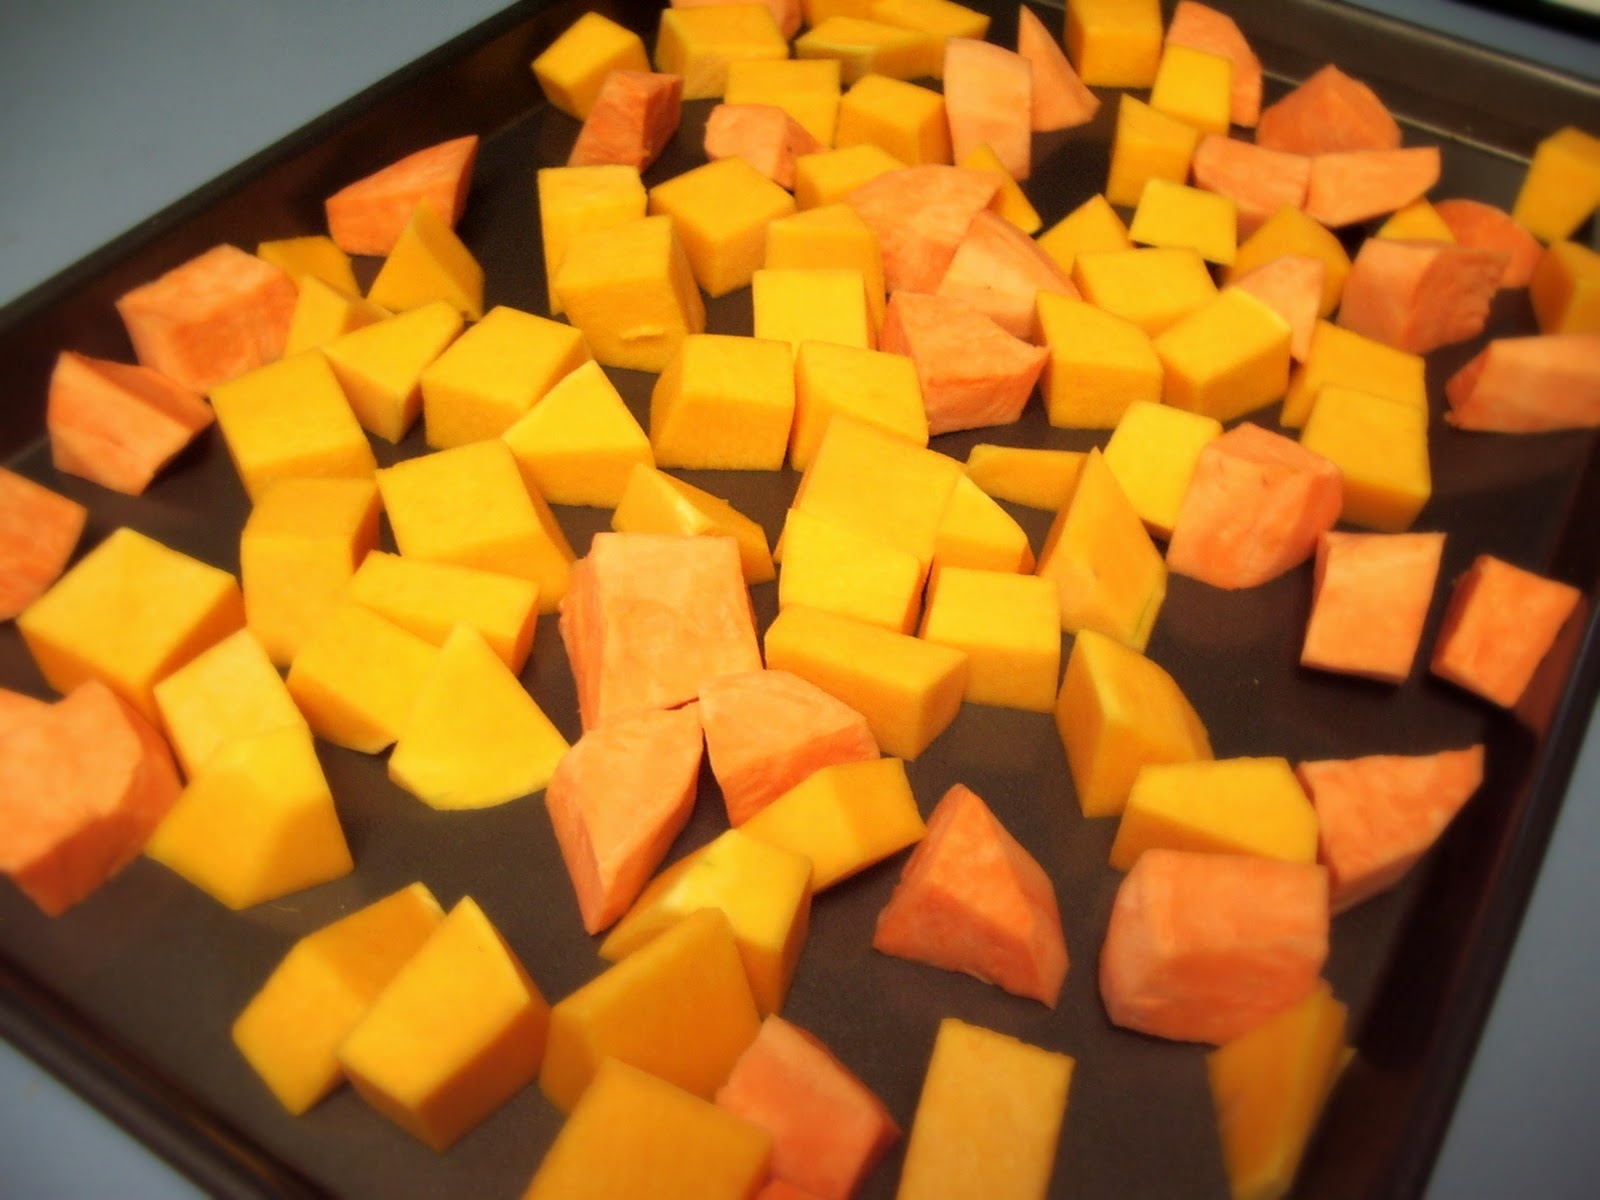
Begin by peeling and dicing a butternut squash and one or two sweet potatoes or yams. Side note: this is not an expensive dish. I purchased a medium sized squash for only a little over $3 and it played a starring role in 3 dinners, plus leftovers! You want to end up with 3 1/2 to 4 cups altogether. Spread them on a baking sheet and drizzle with a bit of olive oil, sprinkle with nutmeg, salt and pepper; toss to coat.


 Roast in the oven until they are slightly crispy and soft enough to poke a fork through.


While the squash is roasting, you can get to work on the cheese filling. The first step in the filling is to cook onions (or shallots) and garlic in brown butter. I didn't have any shallots, so I substituted some sweet onion, which seemed to work fine.


If you haven't browned butter before, you'll find a tutorial here.
The original recipe also called for mascarpone cheese, which sounds amazing, but which I could not find, even at our local Safeway. So, if you can't find it in your area either, you'll find a substitute recipe below. It was delicious. Combine the browned butter, onions and garlic with the mascarpone (or masquerading mascarpone- say that 10 times fast!) and add Parmesan cheese. Set aside.
When the squash and potatoes are done, transfer them to a bowl and mash until smooth with a pastry blender. I whipped them up even creamier with an electric mixer.


Now, you're finally ready to layer!


Some of the comments on the blog I found this recipe on complained that the bottom noodles were crispy, so it was recommended that you put a bit of the squash on the bottom of the pan first- which I did (and it turned out perfect).


Cover that with lasagna noodles. I discovered oven-ready lasagna noodles for the first time on our last shopping trip and had to try them. I must say, I am impressed. They turned out perfectly, no pre-cooking required! Squash mixture goes on top of that, followed by the cheese filling.


Sprinkle a bit more cheese on that, then repeat! This is probably the easiest part of the whole ordeal. :)


Pop it in the oven and wait for delicious aromas to start pouring forth. They will.
Usually you can be fairly alerted to the presence of a tasty meal by the smell. And this dish is no exception whatsoever. I knew I had hit on something good when my husband kept coming in the kitchen, sniffing and saying things like, "Boy, that smells amazing!" It did. We could hardly wait for the pan to come out of the oven and cool long enough to slice. Hubby, hovering, says, "Can we eat it yet?" Good things come to those who wait.
There are so many flavors packed into this hearty dish I don't even know where to start. Which is why, I beg you, please make it for yourself! One thing we remarked to each other as we were eating (pulling our mouths away from our forks long enough to speak was pretty remarkable, come to think of it) was that you could distinguish each separate flavor as you were eating. Squash, smooth and rich. Then tangy and creamy cheese. Nutmeg, aromatic and spicy. Fragrant and pungent garlic. A hint of mellow sweet potato. It was all there. Together, but somehow...separate. Each bite was packed with alternately bursting and mellowing flavors. What an experience! In the words of the blogger who drew me in: "It's like eating a giant plate of autumn." I couldn't have said it better myself.

"I know that this mess of cheesy squash doesn’t look like much, but I gotta tell you that it’s probably the most visually underrated dish I have ever made." - How Sweet It Is blog

Roasted Butternut & Sweet Potato Lasagna
(printable version)
adapted from "How Sweet It Is"
serves 4-6 as main dish

enough lasagna sheets (preferably no-boil) to cover 8x8 pan twice (I used 4 Ronzoni oven-ready sheets)
1/3-1/2 of a medium butternut squash, peeled and cubed (about 2 cups)
1-2 medium sweet potatoes or yams, peeled and cubed (about 1 1/2 cups)
12 oz. mascarpone cheese or substitute (see recipe below)
3 TB butter
1/4 cup finely diced onion
3 garlic cloves, minced
1 1/2 cups grated Parmesan cheese
1/2 cup grated mozzarella cheese
1 tsp salt
1 tsp pepper
1/4 tsp nutmeg
olive oil for drizzling, about 2 tsp.

In shallow baking pan, drizzle squash and potatoes with oil, sprinkle with half the salt and half the pepper and the nutmeg; toss to coat. Roast at 350 for 40-50 min. or until soft and slightly crispy. Cool slightly.
Meanwhile, heat skillet to medium, add butter, onion and garlic. Saute 2-3 min. or until butter is browned, but not burned and onions and garlic are fragrant and transparent. Cool slightly. Combine mascarpone with onions, garlic and butter. Stir in 3/4 cup of the Parmesan.
Mash squash and potatoes until smooth and spreadable. Grease 8x8 in. pan. Coat bottom of pan with small amount of squash mixture. Top with lasagna noodles. Coat with half of remaining squash mixture, followed by half of the cheese mixture. Top this with half of the remaining Parmesan and half the mozzarella. Repeat with remaining ingredients.
Bake in 350 oven for 45 min or until cheese is bubbly and lightly browned.

Mascarpone cheese substitute:
8 oz. cream cheese
1/4 cup heavy cream or half and half cream
2 1/2 TB sour cream

Mix all together until smooth and creamy.

Sources: How Sweet It Is

Friday, November 4, 2011

Copycat Cornbread: {Famous Dave's Sweet Corn Muffins}

Sometimes on chilly afternoons when I've pulled a leftover soup out of the freezer and put it in the crock pot, I feel a bit more adventurous about tackling a side dish. We have soup once a week (Wednesdays) and for a side we usually rotate between cornbread or muffins, rolls, and biscuits. This past Wednesday, we were having chicken tortilla soup (which I will share with you soon!), so corn muffins sounded like just the ticket.


 But, I've been a little bored lately with my standard corn muffin recipe. So, as usual when I'm looking for inspiration, I scoured the internet. I came across one blogger whose corn muffin recipe instantly got my attention. If you've ever been the the barbecue restaurant Famous Dave's, that should give you a clue. If you've never been to one, it is a chain featuring all things barbecue- and it's delicious! The atmosphere is what you would expect of a barbecue place, all about the meat and the hearty sides. One of those hearty sides is their famous corn muffins, slathered in honey butter. They are the perfect mix of sweet and savory, with a bit of corn crunch on the outside, while being absolutely moist inside. There is also just the faintest hint of a trademark "bite" in the aftertaste, owing to the dash of cayenne pepper.


As I looked down the list of ingredients, however, I was surprise by several unusual additions...cake mix? Mayonnaise?


 It intrigued me, so I had to try them. I was a little afraid the muffins would turn out like cupcakes with all that cake mix, but I needn't have worried. They were corn muffins through and through.

See? Very much a corn muffin. :)
And they were delicious (though I suspect, not low in calories...but that's beside the point)! And true to the original. Although I haven't been to Famous Dave's for awhile, I can testify that the flavor and texture stuck with me, and these make for a delicious home version when you're craving that legendary barbecue goodness.


I doubled the recipe (which ended up making about 32 muffins- perfect for freezing convenience!) because it called for a 9 oz. package of cake mix. I do not think such a size exists, the standard size being 18 oz. So, instead of leaving myself with half a box of cake mix to figure out what to do with, I simply doubled all the other ingredients as well.
Adding whole kernel corn to the mix (like Pennies on a Platter suggests) is not necessary- I don't believe they are found in the original, and I did not add it to mine (though I was in indecision about it, as you see the bag of corn in my picture!), but if you like whole corn in your cornbread, by all means, throw some in! I'm sure Famous Dave won't mind...much.

Can you resist me?
Sweet Corn Bread Muffins
(printable version)
adapted from Pennies on a Platter
makes about 32

4 cups yellow corn meal (finely ground- stone ground could result in very crunchy muffins)
1 package yellow cake mix (I used white)
4 tsp. baking powder
2 tsp. salt
1/4 tsp. cayenne pepper
1 cup milk
1 cup buttermilk
1/2 cup vegetable oil
4 eggs, beaten
4 TB brown sugar
4 TB honey
2 TB of Miracle Whip (I hate the stuff, so I just used mayo)
1 can of drained whole kernel corn, if desired

Whisk together first 5 ingredients, set aside. Combine next 6 ingredients in another bowl and mix well. Add to the cornmeal mixture and stir gently- there should be no lumps, but do not over mix. Fold in mayo and corn (if using).
Let rest, covered, in fridge 30 min. or overnight.
Preheat oven to 400. Fill greased muffin cups 2/3 full. Bake 15-20 min (mine were done at 15) or until tops are golden. Let cool in pan a few minutes; remove to wire rack. Serve with butter and honey if desired.
Source: Pennies on a Platter
Related Posts Plugin for WordPress, Blogger...