Showing posts with label holiday. Show all posts

Saturday, May 11, 2013

Happy Mother's Day Mom! {and some brunch ideas}


My mom is a pretty incredible lady. A gifted teacher and writer, she chose to quit her job to stay at home and devote her life to raising her kids when my older brother was born. And not only that, she later chose to put those incredible skills to work and home school all seven of us (a job which is not yet complete!)- quite a feat having so many different ages, grades and skill levels to work with at once. 

She also serves alongside my dad as a compassionate and kind pastor's wife-a role in which she has been an excellent example and inspiration to me as I have taken up that role as well. I am immensely blessed to share this calling with her and draw upon her wisdom and experience as I seek to serve my husband and my church. 

One of the things I am most grateful for in my mom is her insistence on family togetherness. Ever since I can remember, she and my dad have proactively fostered an attitude in our family of wanting to be together. My siblings and I absolutely love nothing better than to be together. We are each other's best friends. Since I was a tiny baby put into the arms of my adoring older brother (not quite two), we have loved being together, and the same has held true with my three sisters and two brothers that arrived in following years. One place we have always loved especially to gather is the kitchen. At my parent's house we often find ourselves laughing at how we all tend to end up there, standing around, chatting, snitching bits of food from the few who are in the kitchen to actually cook! How many mornings I've spent chatting with my dad over cereal at the kitchen counter, how many times I've yakked with Mommy while prepping a salad for dinner, how many Thanksgivings where people and food filled the kitchen to overflowing (and occasionally erupted in flames...but that's a story for another day), how many summer nights where strains from Daddy's radio drifted through the open kitchen window, how many birthday cakes whipped up with little children clamoring around to lick the bowl... and somewhere in the middle of it all, Mommy. Mommy pulling perfectly moist chicken from the oven. Mommy, stirring a pot of "train wreck" meat sauce to fill our hungry guests. Mommy, sneaking a spoonful of cookie dough off to one of us who was outside missing out on all the fun. Mommy, calling to someone not to forget to poke the baked potatoes with a fork! Mommy holding up beaters dripping with cake batter, treating the littlest ones with a lick. Whatever we're doing, Mommy is always there pulling us all together, reminding us that family are our forever friends.

How grateful I am to you, Mommy, for the closeness of our family. My siblings ARE my best friends, just like you said they would be, but so are you. I wish I could spend Mother's Day with you. Thank you for all your hard work and for how much you continue to pull our family together, for creating a beautiful, comfortable environment for us to enjoy each other in, and for always supplying us with delicious food to gather round! You are more of a blessing to us all than we can find words to express. May you know how much you're loved!

~~~~~~~~~~~~~~~~


Whether you're attending a brunch at your church, throwing a lovely party for mom, or just want something a little bit special to serve to your mom in bed or at the table, here are a few of my favorite brunch recipes!


Happy Mother's Day!!

Monday, April 22, 2013

Quiche with Ham & Kale


I truly love just about anything that come wrapped in a flaky pie crust, but quiche is a weakness.

Of course it helps that I absolutely adore eggs. And cheese. And crust. Did I mention crust?

My idea of a perfect brunch would be a piping hot, flaky-crusted quiche with a colorful array of fresh fruit. I don't make quiche often because it's not super healthy, but once in awhile it's fun to splurge, especially when you have leftover ham and kale, not to mention a bit of Gruyere cheese!

So that's exactly what I did. I followed a recipe for a basic quiche, using my mom's pie crust recipe, then tossed in my cubed leftover Easter ham, some sautéed kale and the mellow cheese.

It was fantastic! The kale retained a bit of it's texture, while the ham and cheese lent a delicious saltiness to the rich egg custard. Oh, and as always, mom's pie crust turned out to be the best part!


Tip: I used my tart pan instead of a pie plate because it's so pretty and easy for serving, but that left me with a bit of extra dough and filling. I simply used the extra to make a small quiche in one of my 14 oz. ramekins! It was great for leftovers!


Quiche with Ham & Kale
adapted from Real Simple
serves 4-6

1 9 in. pie crust (your favorite or mine)
1 TB olive oil
1 med. onion, chopped
salt and pepper
4 large eggs
3/4 cup half and half
1/8 tsp ground nutmeg
1 cup grated Gruyere cheese
2 cups chopped kale
1 cup cooked ham, cubed

Heat oven to 375. Fit the crust into a 9 in. pie plate (or tart pan- deep dish would work well). Place on a baking sheet (in case it spills over!).
Heat oil in a large skillet over med-low heat. Add the onions and a 1/2 tsp each of salt and pepper. Stir occasionally and cook until soft, about 5 min. Add kale and saute several additional minutes or until kale is slightly wilted.
In a large bowl, whisk together the eggs, half & half and nutmeg. Stir in cheese and ham, followed by the onion/kale mixture.
Pour the egg mixture into the crust. Bake until a knife inserted in the center comes out clean, 35-45 min. Let sit for 5 min before serving.

Tuesday, March 26, 2013

Asparagus, Bacon & Gruyere Frittata

I had an amazing revelation this past week.

There is an egg pie sort of thingy that is fantastically delicious that you don't have to make a crust for and comes together in a matter of minutes!


Maybe to you this is old news, but I just made my first frittata and am basking in the enjoyment of it!

I absolutely love quiche, but I rarely make them because not only are they fattening (hello, pie crust!) but they are somewhat labor intensive (hello again, pie crust!) and they take a long time to bake! Beautiful and delicious for special occasions, but not really an every day or even every week kind of thing, you know?

I trust you do.

So, all that to say- frittata is quiche's low maintenance cousin!


On a side note, my spell check is at it again. This time it wants to change "frittata" to "irritation". Oh, yes, let's serve up a little irritation for breakfast! Sounds delightful, doesn't it?

"What's on the menu, honey?"

"Oh, just a little asparagus, bacon and Gruyere irritation, dear!"

Way to get my man to the table, spell check.

But...back to the FRITTATA...

Not only is it pleasing to your nostrils as you saute the asparagus, bacon and shallots, but also to your eyes- vibrant yellow eggs dotted with spring green asparagus and crisp bacon. Oh! and don't forget your taste buds! One of the most delightful things about this bright dish is the way the Gruyere stays in little gooey pockets, spilling forth melty goodness in each bite!

Whether you choose to serve your frittata for a holiday, a weekend brunch or a quick weeknight dinner, let's just say that it will get your man, or your family, or your company, or the president of the United States to your table much quicker than any "irritation" would.


Asparagus, Bacon & Gruyere Frittata
adapted from Tracy's Culinary Adventures
serves about 6

12 lg. eggs
3 TB half and half
1/2 tsp salt
1/4 tsp pepper
2 tsp olive oil
1/2 lb. asparagus, trimmed and cut on the bias into 1/4 in. pieces
6 slices bacon, chopped
1 shallot, minced
3 oz. Gruyere cheese, cut into 1/4 in. cubes

Preheat your oven to 400.

In a medium bowl, whisk together the egg, half and half, salt and pepper until completely combined.

Set a 12 in. nonstick, oven safe skillet over medium heat. Add the oil and when hot, throw in the asparagus and bacon. Cook, stirring occasionally, until the asparagus has lightly browned and is nearly tender, about 3 minutes. Add the shallot and cook just until slightly softened, about 2 minutes.

Add the cubes of cheese to the egg mixture and stir. Pour egg mixture into the skillet with the asparagus, bacon and shallot and cook, using a rubber spatula to stir and scrape the bottom. Large curds will begin to form after about 2 minutes, but the eggs should still be quite wet. Shake the skillet to distribute the eggs evenly and allow to cook for 30 sec. without stirring- this will set the bottom.

Transfer the skillet to the oven and cook until the frittata puffs and the surface browns slightly, 10-12 min. Check for done-ness by cutting into the frittata with a paring knife. If the eggs are firm, but just slightly wet, it's ready. Pull the skillet from the oven and let stand for 5 min. Loosen edges with the rubber spatula, then slide the frittata out of the pan and onto a serving plate. Cut into wedges and serve.

Saturday, March 23, 2013

Caramel Apple Cheesecake Bars {Baking with Sisters, Part 6}

When planning our "baking together" menu, the girls and I knew we needed one special treat that would be over the top. As we scrolled through the yummies on our Pinterest boards, the one recipe that kept calling "pick me!" (okay to be honest there were about 20 calling that, but we only had so much time you know!) was the one for Caramel Apple Cheesecake Bars.


Do you see why? With such a promising name, along with a scrumptious, caramel-drizzled photo from The Girl Who Ate Everything, how could we resist?


We decided not to.


It may sound like a fall dessert, but you can typically get Granny Smith apples and Hershey's caramel sauce anytime of year in America.


And Starbucks Iced Coffee, apparently...

We've provided chilly weather, dismal outdoor scenes, a cozy indoor environment and four (no make that five with Hubby...or maybe he counts as two...) healthy appetites...who really needs leaves floating down from trees?


Anyway, we decided it sounded perfect, fall or no.

The recipe was perfectly divided into four parts for us- Crust, Cheesecake Filling, Apples, and Streusel Topping. Oh and for the record, my computer is trying to tell me that streusel is not a word. How about substituting "stressful"? Thanks for the help, but no. No Stressful Topping for me, thank you. The thought of the calories is stressful enough. A little more stress sprinkled on top? No. Streusel will be just fine.


See? Streusel. Not Stressful.

But I'm getting off topic.

Working beautifully as a team, of course, we assigned ourselves each a role.

I made the crust...


Jessica manned the KitchenAid (a new experience for her!) to make the cheesecake filling...


Jewelissa chopped the apples and added spices (the girls had a blast with my "amazing" apple peeler!!)...


Armed and dangerous...to apples, of course.

...and Janell ground out a beautiful streusel topping!


Four hands (oh wait, that's eight hands) sure made the load lighter and the time in the kitchen immensely more fun and the bars were assembled in no time! We played cards while it was baking and lovely smells were wafting out of the kitchen before long.


A game of "Nerds", anyone?

Now the recipe advises chilling the bars and serving them cold, and surely you should store them cold, but don't pass up an opportunity to sneak few bites while they are warm! We certainly couldn't wait and practically before the lid was on the caramel jar little (okay, large) warm forkfuls were disappearing.


Conclusion? The layers of buttery crust, creamy, sweet cheesecake, bursts of tart apple and cinnamon and crumbly topping, all finished off with a drizzle of delectable caramel are simply irresistible. Add the fun of goofing off in the kitchen with your three sweet, adorable and silly sisters, and you're in heaven!


Caramel Apple Cheesecake Bars
makes about 16 bars

Crust:
2 cups flour
1/2 cup packed brown sugar
1 cup butter, softened

Cheesecake Filling:
2 (8 oz.) packages cream cheese, softened
1/2 cup sugar
2 lg. eggs
1 tsp vanilla

Apples:
3 Granny Smith Apples, peeled, cored, and finely chopped
1/2 tsp cinnamon
1/4 tsp nutmeg
2 TB sugar

Streusel Topping:
1 cup packed brown sugar
1 cup flour
1/2 cup quick cooking oats
1/2 cup butter, softened

Drizzle:
1/2 cup caramel topping

Preheat oven to 350.
Crust: In a medium bowl, combine flour and brown sugar. Cut in butter with a pastry blender until mixture is crumbly. Press evenly into a 9x13 pan lined with foil and lightly greased. Bake 15 minutes or until lightly browned.
Cheesecake Filling: In a large bowl, beat cream cheese with sugar with an electric mixer at medium speed until smooth. Then add eggs, 1 at a time, and vanilla. Stir to combine. Pour over warm crust, spreading evenly.
Apples: In a small bowl, stir together chopped apples, sugar and spices. Spoon evenly over cream cheese mixture.
Streusel Topping: In a small bowl, combine all ingredients, using a pastry blender or your hands to get everything very well incorporated. Sprinkle over top of apples.
Bake bars 40-45 min. or until filling is set. Drizzle with caramel topping and let cool. Serve room temperature or cold. Store in refrigerator.

Thursday, March 21, 2013

Soft Pretzel Bites {Baking with Sisters, Part 5}

One of the things my sisters and I love to do together is shop. We all have different shopping styles. Jewel and Janell tend to be zippy shoppers, casing the store in a matter of minutes and assessing the merchandise instantly, spending the rest of the time waiting on a bench outside sipping lattes. I take a little more time, not wanting to miss any item on a sale rack, touching all the pretty fabric I know I can't afford, and stockpiling "maybes"- leery of having to take more than one trip to the fitting room. Jessica is a champion browser, circling the store numerous times to be sure nothing has escaped her notice and deliberating over the question of "to buy or not to buy." Although our styles of shopping differ greatly, there is one thing we always agree on when we make trips to the mall.


Pretzels. There's nothing quite like the aroma of a soft, buttery pretzel after the "hard work" of shopping. Or sometimes it's just the fuel you need to get you in "the zone." Whether enjoyed before, after or during the shopping trip, a mall pretzel is a necessary addition to any girl's day out!

However, this time around, we didn't end up having the time to make the hour-long trek to Spokane for our shopping day, so we decided the pretzels would come to us- in the form of homemade soft pretzel bites!

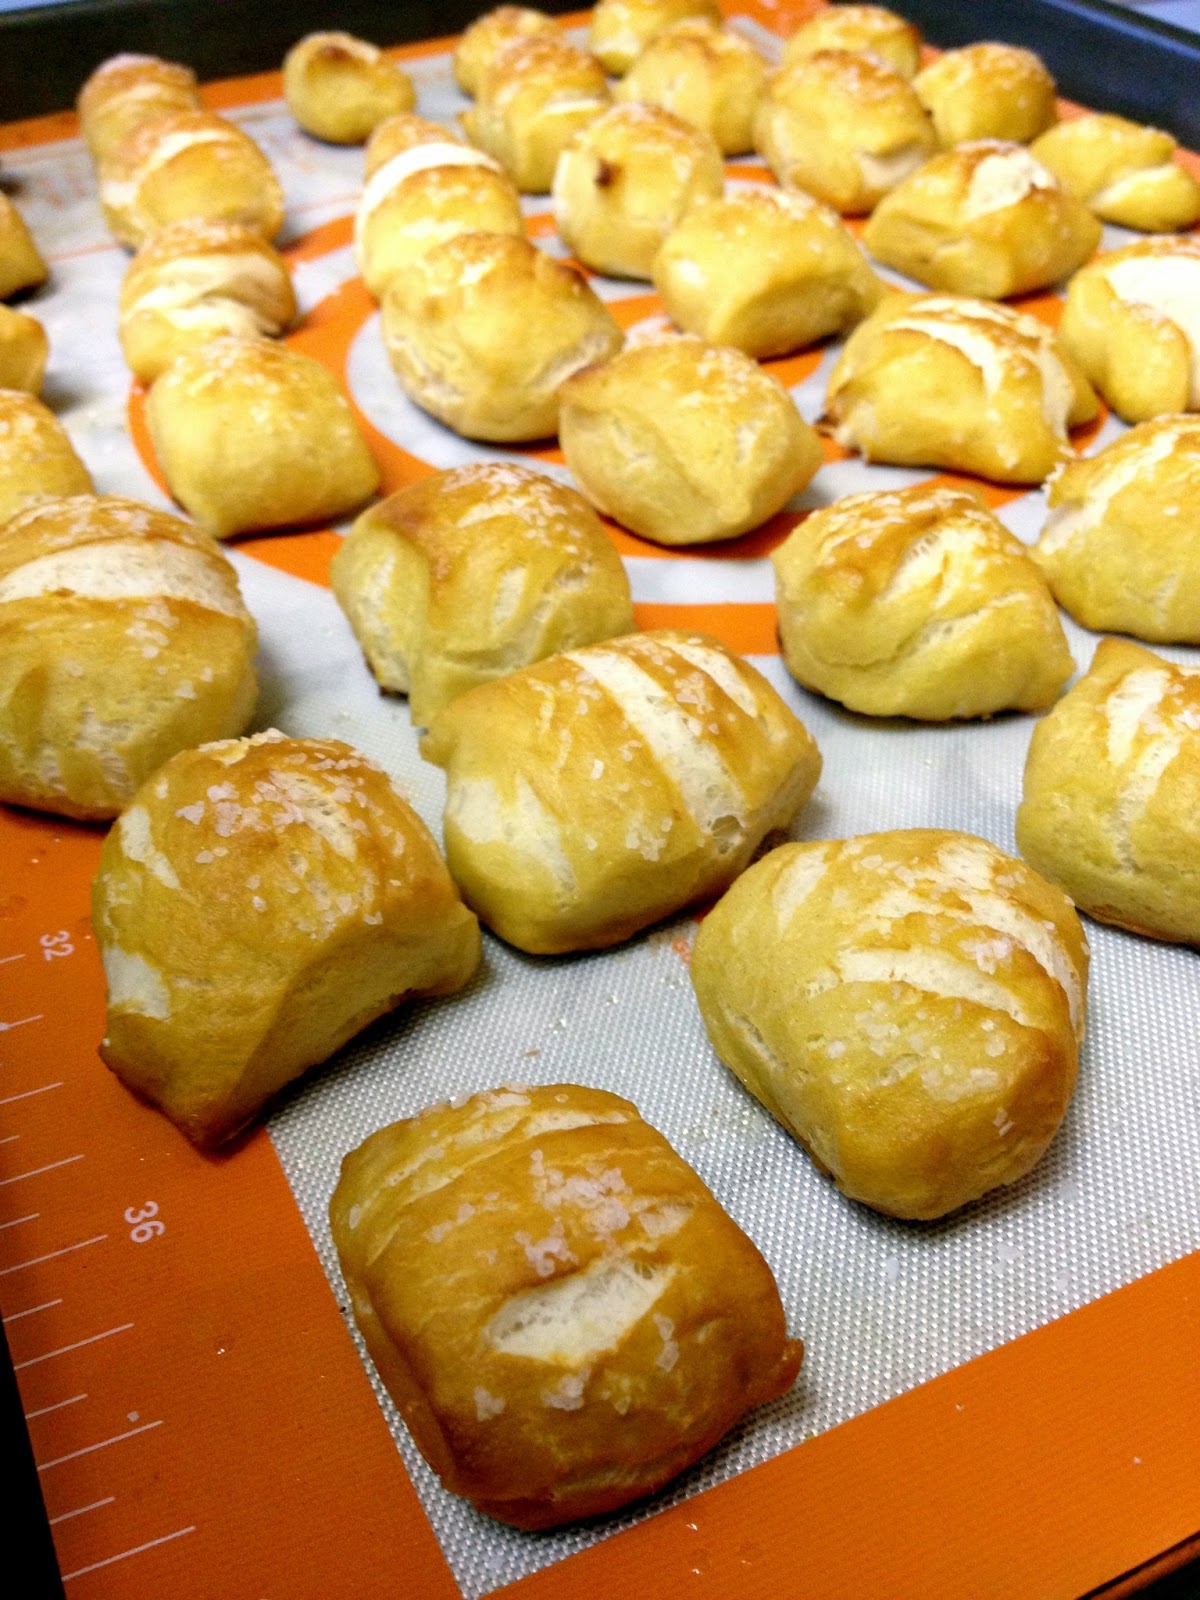
Teamwork made the task easy and fun and the end result was a delicious pile of warm, chewy, buttery, salty bites of pretzely goodness!

Once the dough was made, Jewel scooped spoonfuls of the bites into boiling baking soda water.


Janell slathered melted butter on the bathed bites and Jessica sprinkled them with Kosher salt.


Then into the oven they went! When they came out we slathered on a little more melted butter for good measure and popped them into our waiting mouths- so delicious! They were the perfect snack to go with an afternoon of Downton Abbey and a hair curling party!!


*Note: we tried dipping our bites in melted Velveeta, but it didn't work so well, so please follow the link to "Smells Like Home" to find a recipe for a homemade cheese dipping sauce!


Soft Pretzel Bites
(printable version)
makes a lot!

1 1/2 cups warm water (110-115 degrees)
1 TB sugar
2 tsp Kosher salt
2 1/4 tsp instant yeast
approx. 4 1/2 cups flour
1/4 cup butter, melted
oil
10 cups water (plus more)
2/3 cup baking soda (plus more)
2 TB butter, melted
more salt (for sprinkling)

In the bowl of a stand mixer fitted with the paddle attachment, mix water, sugar, salt and yeast on low speed for 10 seconds. Switch to the dough hook and add the butter and flour. Mix on low speed until well combined. Change to medium speed and knead until the dough is smooth and pulls away from the side of the bowl, 4 to 5 minutes. If necessary to prevent sticking, add more flour 1 TB at a time. Remove the dough from the mixer bowl and transfer to a well-oiled bowl. Turn dough to coat. Cover the bowl tightly with plastic wrap and set in a warm place for 50-55 minutes or until the dough has doubled in size.
Preheat oven to 425. Grease 2 large baking sheets or line with parchment paper. Set aside.
Bring the 10 cups of water and baking soda to a rolling boil in a wide saucepan.
In the meantime, turn the dough onto a lightly oiled surface and divide into 8 equal pieces. Roll each piece into a 24 in. rope. Slice each rope into 1 in. pieces. Place a slightly damp towel over pretzel pieces to prevent them from drying out while you cut the other pieces.
Using a slotted spoon, lower a handful of the pretzel pieces into the water and boil them for about 30 sec., flipping them around in the water with the spoon a couple of times. Remove the pieces from the water with the spoon and drain them on towels as best you can. Place them on the baking sheets. Repeat with remaining dough, adding more water and a pinch or so more of baking soda as needed (some of the water will boil away as you work).
Brush the top of each pretzel with melted butter and sprinkle with salt. Bake until dark golden brown, approx. 10-12 min. Brush with remaining butter before serving. Serve warm.

Saturday, March 16, 2013

Nutty Irishman Cookies

Cookies with cute names are just more fun, don't you think? I sure do! This little cookies not only lay claim to an adorable name- they pack a lot of flavor!


If you've ever had a "Nutty Irishman" coffee drink from your local coffee shop you know that it is the sweet combination of Irish Cream and Hazelnut (I'm familiar with the non-alcoholic version using flavored syrups, but apparently you can use real Irish Cream and hazelnut liqueur). Well, I've taken that idea, along with an inspiration from Hershey's Kitchens, and twisted it into a delicious cookie form!


The base cookie itself is a fudgy chocolate variation on a sugar cookie infused with coffee and Irish cream and hazelnut syrups. The frosting itself gets a boost from the Irish cream and then the cookies are finished off with a sprinkling of chopped nuts. The result is a decadent delight in which all the principal flavors shine through!

And here's an added bonus: if you don't have any Irish cream syrup on hand (which I didn't), I found a great DIY recipe that tastes fantastic! Plus, you'll have a lot left over to add to your coffee come Sunday morning!

So, Irish or not, add a little nuttiness to your life with these pretty, scrumptiously festive cookies!


Nutty Irishman Cookies
inspired by Hershey's Kitchens
makes about 40 cookies

Cookies: 

3 3/4 cups flour
1 tsp baking powder
1/2 tsp salt
2/3 cup cocoa powder
1 cup butter flavored Crisco (or margarine)
1 1/2 cups white sugar
2 eggs
2 tsp vanilla extract
3 TB Irish cream flavored coffee syrup
1 TB hazelnut flavored coffee syrup
1 tsp instant coffee
1 tsp hot water

Frosting: 
2 cups powdered sugar
3 TB butter, softened
1/2 tsp vanilla
2 TB Irish cream flavored coffee syrup
1-2 TB milk

1/2 cup chopped nuts (I used walnuts)

Preheat oven to 400.
Dissolve instant coffee in hot water; set aside.
Sift flour, baking powder, salt, and cocoa powder together; set aside.
In a large bowl, cream together Crisco and sugar until light and fluffy. Beat in the eggs one at a time, then stir in vanilla, coffee syrups and dissolved coffee.
Gradually blend in the dry ingredients until fully absorbed.
Using cookie scoop or teaspoon, form 1 in. balls of dough and place about 2 in. apart on a cookie sheet. Flatten slightly with the bottom of a glass. Bake 6 min. Cool on sheet 2 min., then remove to a wire rack to cool completely.

To make frosting: Combine all frosting ingredients and beat with electric mixer until smooth and spreadable, adding more milk if necessary to reach desired consistency.

When cookies are cooled (about 20 min.), frost and sprinkle with chopped nuts. Frosting will set up, then cookies can be stacked for storing.

Thursday, March 14, 2013

Irish Soda Bread


Top o' the morning to you! Though I can really only lay claim to a wee drop of Irish blood on my mother's side, there's still a part of me that enjoys taking part in the St. Patty's Day celebration of all things Irish. I don't typically do much in the way of traditional Irish cooking, but I am intrigued by it.One recipe I knew I wanted to try was soda bread, which derives its name from the baking soda used as leavening.


I had never tried soda bread, but it is wonderful! A sturdy quick bread, slightly sweet with a hearty whole wheat flavor and studded with juicy raisins, it only took me a few minutes to pop it into the oven. I love the rustic looking craggy crust, the crunchy exterior and the soft and chewy inside. It is delicious warm with butter, and I'm sure it would be great toasted, cold, or as a fantastic accompaniment to some good ol' Irish stew!


Suggested Pairings:
Slow Cooker Sausage and Lentil Soup
Slow Cooker Chicken and Barley Soup
Crock-Pot Beefy Cabbage Soup
Hearty Beef and Cabbage Soup


Irish Soda Bread
makes one round loaf

2 cups white flour
2 cups whole wheat flour
2 TB sugar
1 tsp salt
1 tsp baking soda
4 TB butter
1 cup raisins (or dried cranberries, golden raisins, currants, etc)
1 egg, lightly beaten
1 1/2 cups buttermilk

Preheat oven to 425. Lightly grease cast iron skillet or baking pan.
In a large bowl, mix flours, sugar, salt and baking soda. Cut in butter with a pastry cutter or criss-crossed knives until mixture resembles coarse meal. Stir in raisins.
Make a well in the center of flour mixture. Pour in egg and buttermilk and mix with a wooden spoon until dough becomes too stiff to mix.
Coat hands with flour and knead dough in bowl just until it forms a rough ball.
Transfer dough to pan or skillet and shape into a round loaf. Using a serrated knife, make a deep "X" in the top of the loaf.
Bake 35-40 min. or until loaf is deeply browned and bottom sounds hollow when tapped with a knife.
Serve bread warm, at room temp., or toasted with butter or cream cheese.

Friday, February 1, 2013

Bacon Ranch Cheese Ball

Wow, I can't believe it's been almost a month since I last posted! Sorry about that...life's been a little crazy since the holidays. But, I'm back now, and hopefully will be able to swing right back into the routine of regular writing again.

This treat, which I actually made back in December for my Christmas party, comes to you now just in time for Sunday's big game.

However, if you don't happen to be interested in football (like myself), throw a party anyway.


Yep, this ball of cheese is THAT good.

You knew it was when you saw bacon in the title, didn't you?

This appetizer was such a big hit at my Christmas party (especially with the men, mind you, who aren't necessarily the world's biggest cheese ball fans) that it even overshadowed what I thought would be the bigger hit- a sweet take on the cheese ball that tastes like cookie dough! Hopefully I'll get that recipe posted on here one day too, but seriously. Bacon trumped cookie dough. This is a serious matter.

It couldn't be easier to roll up one of these crowd-pleasers, so you really don't have an excuse. Break out the Ritz (Wheat Thins are also awesome) and have a party!


Bacon Ranch Cheese Ball
slightly adapted from The Recipe Critic
makes one large cheese ball

2 (8 oz.) packages cream cheese
1 (1 oz.) packet dry buttermilk ranch dressing mix
1/2 cup grated cheddar cheese
1 (3 oz) jar real bacon bits (or use a few slices fried and crumbled real bacon!)
pecans or almonds, finely chopped for coating
crackers

Mix together cream cheese and dry ranch mix (this is really easy if you do it in your stand mixer).
Add cheese and bacon and mix thoroughly. Shape into a ball (it helps to use a piece of plastic wrap to form it) and roll in nuts to coat. Store in the refrigerator. Serve with crackers.

Friday, December 14, 2012

Reese's Peanut Butter Temptations


There was never a truer name for a cookie. Temptation is right.


Be prepared to either gain a few pounds or exercise extreme forms of self-control.


Now that I have duly warned you, you are in for a treat. Packaged up in a delightful wrapping of peanut butter cookie dough, you'll find a miniature melty, of-course-always-amazing-no-matter-how-you-dress-it-up Reese's Peanut Butter Cup. Yep. Right there in the middle of a cookie.


Genius, you say? So do I.

I was first introduced to these little gems as a young girl by an older lady on our street named Romayne, who took my siblings and I under her wing as her adopted grand kids. She refers to herself simply as "Grandma Ro" and we are blessed to know her- not only because she is as sweet and grandmotherly as they come, but because she is an amazing cook! After learning that these peanut butter cup cookies earned her accolades at the local county fair, it was with great boldness I asked for the recipe. She was gracious enough to share and I'll be forever grateful! I don't think a Christmas has gone by since then where I have not baked these delectable treats.

You won't regret trying these (unless of course you're on a diet- maybe not even then) for your holiday party or family gathering this year- they're sure to be a hit and may even become your family's new tradition!


Reese's Peanut Butter Temptations
by Hershey's (and Grandma Ro)
makes 40-60 cookies

40-60 Reese's Peanut Butter Cups Miniatures (make sure you have enough!)
1/2 cup butter, softened
1/2 cup granulated sugar
1/2 cup brown sugar
1/2 cup creamy peanut butter
1 egg
1/2 tsp vanilla
1 1/2 cups flour
3/4 tsp baking soda
1/2 tsp salt

Preheat oven to 375. Remove wrappers from candies. If desired, line mini muffin cups with paper baking cups. Otherwise, grease lightly.
In a large bowl, beat butter, brown sugar, granulated sugar, peanut butter, egg and vanilla until light and fluffy. In separate bowl, stir together flour, baking soda and salt. Add to butter mixture, beating until well blended. 
Shape dough into 1 inch balls; place one in each prepared muffin cup. Do not flatten.
Bake 9-10 min. or until puffed and lightly browned; remove from oven. Immediately press peanut butter cup into each cookie. Cool at least 5 minutes in muffin tin, then remove carefully to cool completely.
Related Posts Plugin for WordPress, Blogger...