Showing posts with label snack. Show all posts

Tuesday, June 18, 2013

No-Bake Chocolate Peanut Butter Energy Bites


Sometimes when that afternoon slump hits, you just need to be able to grab something small and quick to keep you going, don't you?

And sometimes you just need that little something to get you through your work out.

Or pick you up off the floor after it.

Ha. Not like that's ever happened to me...


Anyway, whether you're slumping or lying on the floor, these little bouncy balls full of energy-boosting nutrients will have you up in no time! And besides that, they taste like almost good enough to be dessert!

The variations you can make are endless, but my version is, of course, chocolate and peanut butter centered. You can use any kind of chocolate you like, but I think dark chocolate is a great choice, not only because it's rich and delicious, but because the darker the chocolate, the better it is for you! I also incorporate my favorite peanut butter, Simply Jif, which has 1/3 less sugar than the regular variety. Less sweet, more PEANUTTY. How can that be wrong?

Experiment and let me know if you find any other fantabulous flavors!!


Note: Keep in mind that while these snack bites are healthy, they are not a low calorie treat. Just one is roughly 80-90 calories, so eat sparingly if you're going for health benefits!


No-Bake Chocolate Peanut Butter Energy Bites
inspired by Gimme Some Oven
makes around 2 dozen

1 1/2 cups old fashioned dry oatmeal
1/2 cup peanut butter
1/2 cup ground flaxseed
3 TB cocoa powder
1/3 cup miniature chocolate chips (or chopped chocolate of your choice!)
1/3 cup honey
1 tsp vanilla extract

Stir all ingredients together in a medium bowl until thoroughly combined. 
Let chill in refrigerator about a half and hour.
Shape into balls of desired size (1-1/2 in. balls will yield about 2 doz.). 
Store in an airtight container in the refrigerator.

Thursday, March 21, 2013

Soft Pretzel Bites {Baking with Sisters, Part 5}

One of the things my sisters and I love to do together is shop. We all have different shopping styles. Jewel and Janell tend to be zippy shoppers, casing the store in a matter of minutes and assessing the merchandise instantly, spending the rest of the time waiting on a bench outside sipping lattes. I take a little more time, not wanting to miss any item on a sale rack, touching all the pretty fabric I know I can't afford, and stockpiling "maybes"- leery of having to take more than one trip to the fitting room. Jessica is a champion browser, circling the store numerous times to be sure nothing has escaped her notice and deliberating over the question of "to buy or not to buy." Although our styles of shopping differ greatly, there is one thing we always agree on when we make trips to the mall.


Pretzels. There's nothing quite like the aroma of a soft, buttery pretzel after the "hard work" of shopping. Or sometimes it's just the fuel you need to get you in "the zone." Whether enjoyed before, after or during the shopping trip, a mall pretzel is a necessary addition to any girl's day out!

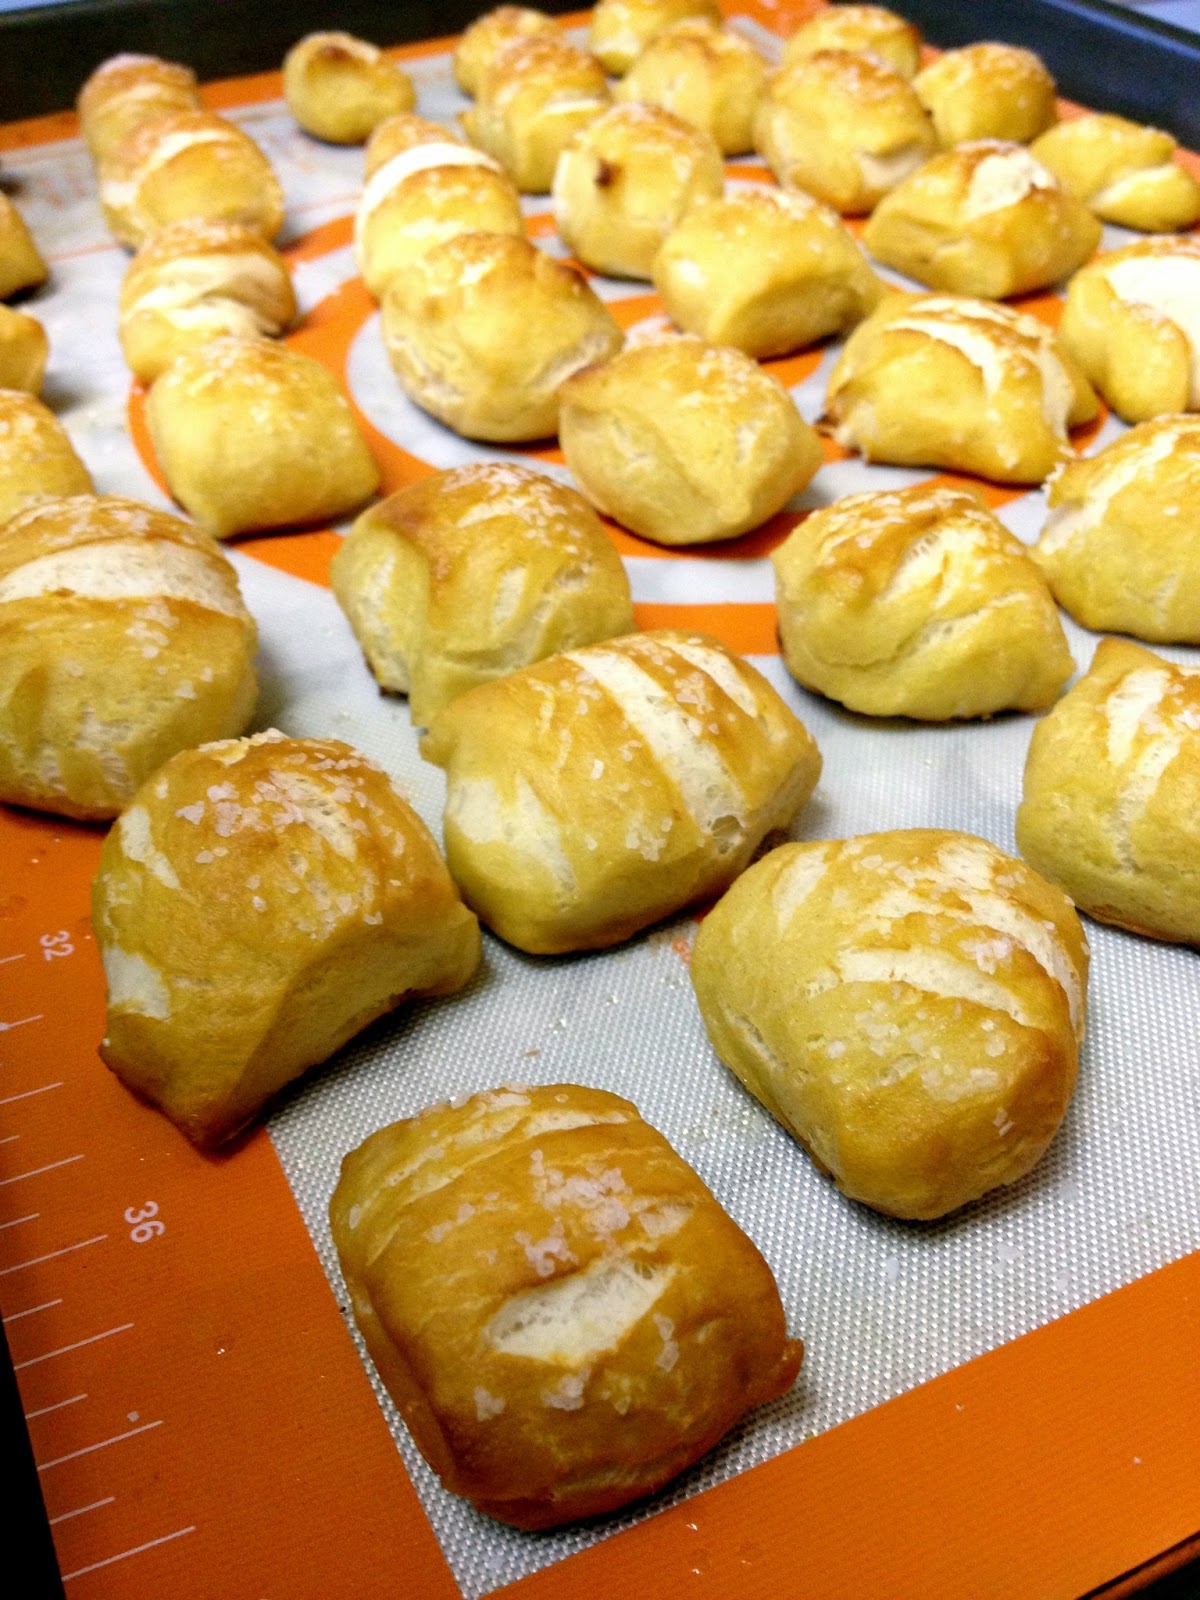
However, this time around, we didn't end up having the time to make the hour-long trek to Spokane for our shopping day, so we decided the pretzels would come to us- in the form of homemade soft pretzel bites!

Teamwork made the task easy and fun and the end result was a delicious pile of warm, chewy, buttery, salty bites of pretzely goodness!

Once the dough was made, Jewel scooped spoonfuls of the bites into boiling baking soda water.


Janell slathered melted butter on the bathed bites and Jessica sprinkled them with Kosher salt.


Then into the oven they went! When they came out we slathered on a little more melted butter for good measure and popped them into our waiting mouths- so delicious! They were the perfect snack to go with an afternoon of Downton Abbey and a hair curling party!!


*Note: we tried dipping our bites in melted Velveeta, but it didn't work so well, so please follow the link to "Smells Like Home" to find a recipe for a homemade cheese dipping sauce!


Soft Pretzel Bites
(printable version)
makes a lot!

1 1/2 cups warm water (110-115 degrees)
1 TB sugar
2 tsp Kosher salt
2 1/4 tsp instant yeast
approx. 4 1/2 cups flour
1/4 cup butter, melted
oil
10 cups water (plus more)
2/3 cup baking soda (plus more)
2 TB butter, melted
more salt (for sprinkling)

In the bowl of a stand mixer fitted with the paddle attachment, mix water, sugar, salt and yeast on low speed for 10 seconds. Switch to the dough hook and add the butter and flour. Mix on low speed until well combined. Change to medium speed and knead until the dough is smooth and pulls away from the side of the bowl, 4 to 5 minutes. If necessary to prevent sticking, add more flour 1 TB at a time. Remove the dough from the mixer bowl and transfer to a well-oiled bowl. Turn dough to coat. Cover the bowl tightly with plastic wrap and set in a warm place for 50-55 minutes or until the dough has doubled in size.
Preheat oven to 425. Grease 2 large baking sheets or line with parchment paper. Set aside.
Bring the 10 cups of water and baking soda to a rolling boil in a wide saucepan.
In the meantime, turn the dough onto a lightly oiled surface and divide into 8 equal pieces. Roll each piece into a 24 in. rope. Slice each rope into 1 in. pieces. Place a slightly damp towel over pretzel pieces to prevent them from drying out while you cut the other pieces.
Using a slotted spoon, lower a handful of the pretzel pieces into the water and boil them for about 30 sec., flipping them around in the water with the spoon a couple of times. Remove the pieces from the water with the spoon and drain them on towels as best you can. Place them on the baking sheets. Repeat with remaining dough, adding more water and a pinch or so more of baking soda as needed (some of the water will boil away as you work).
Brush the top of each pretzel with melted butter and sprinkle with salt. Bake until dark golden brown, approx. 10-12 min. Brush with remaining butter before serving. Serve warm.

Tuesday, March 12, 2013

Muddy Buddies {Baking with Sisters, Part 4}

Some of you may remember a 3-part series I did last year called "Baking with Sisters"- well, I'm adding to it! It has become a tradition for my four sisters and I to have a get-together every year (I think this was our fourth year) and no sister time is complete without getting into the kitchen and trying out some new recipes.

In this instance, however, it isn't a new recipe, but rather an old one, and one you likely know well. We call it "Muddy Buddies" but some may know it as "Puppy Chow". This is the original Chex version that we grew up with and it is a classic that holds its own! How can you go wrong mixing creamy peanut butter, smooth chocolate, crunchy cereal and a dusting of powdered sugar? It's the ultimate sweet snack that's perfect paired with a chic flick or a Downton Abbey marathon!


Two of my sisters, of course, fought over who got to "shake the bag" (the fun part!!) so we divided it in half.


If you've never given this classic favorite a try, there's no time like the present to make some culinary memories with your kids (or sisters)! It comes together in a matter of minutes and will certainly satisfy your sweet-tooth snack craving!


Chex Muddy Buddies
makes a lot

9 cups Chex cereal (feel free to mix varieties)
1 cup chocolate chips
1/2 cup peanut butter
1/4 cup butter
1 tsp vanilla
1 1/2 cups powdered sugar

Measure cereal into a large bowl.
Combine chocolate chips, peanut butter and butter in a microwave safe bowl. Microwave 1 min. Stir. Microwave about 30 sec. longer or until smooth. Stir in vanilla.
Pour mixture over cereal and stir until evenly coated.
Pour into resealable 2 gal. plastic bag (or two 1 gal. bags). Pour in powdered sugar, seal bag, and shake until all pieces are coated. When cool, store in an airtight container.

Thursday, October 4, 2012

Crock-pot Pumpkin Applesauce

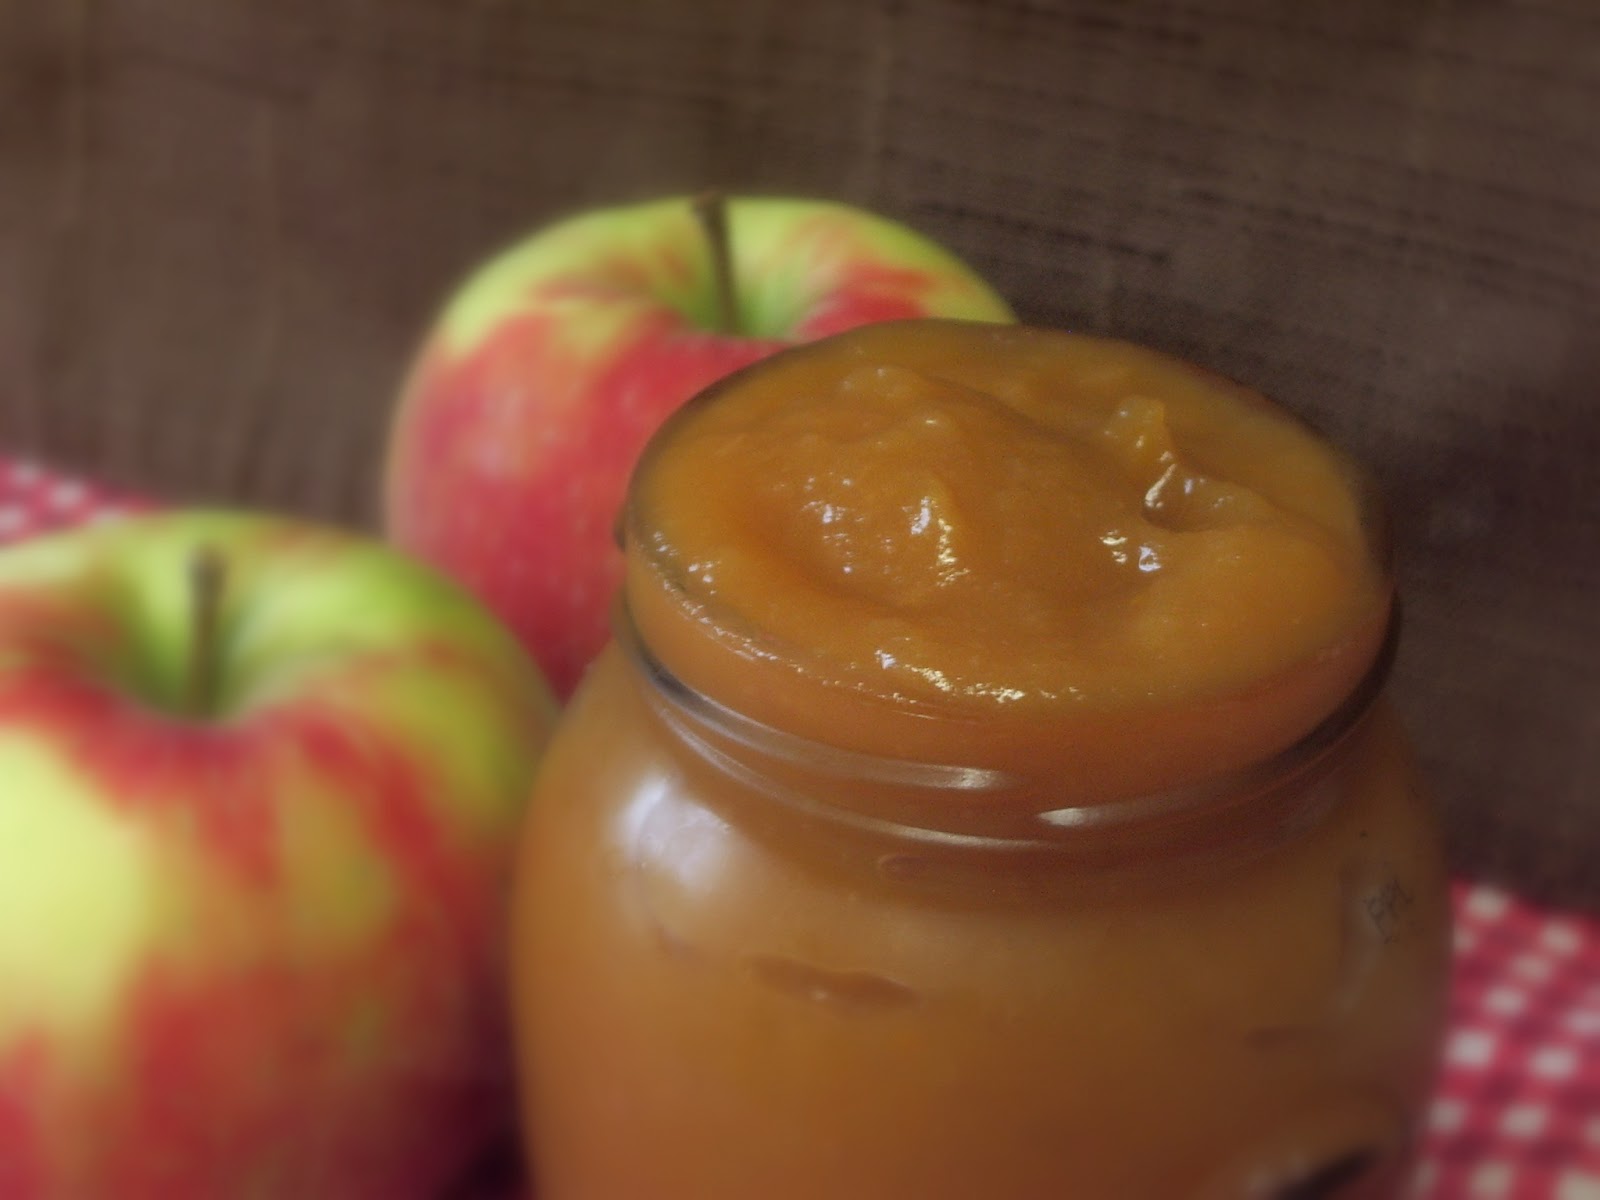
Hubby and I recently went fruit picking! We love a spot in Spokane called Greenbluff, which is home to over 40 small family owned farms- not only are the farms beautiful and often quaint, but you are treated to a lovely view of the valley from the top of the bluff! Last summer we picked strawberries, cherries, raspberries and pumpkins. This summer we picked strawberries and cherries. In early September we made our way to the bluff to score some end-of-the-season peaches as well as some early apples (Honeycrisp)! We ate many of the peaches fresh (they were so good!) and I froze enough to fill over a gal. freezer bag to put in our smoothies we enjoy every Sunday night. I used some of the apples for the delicious Caramel Apple Crumble Bars and then I made this amazing applesauce!


The particular flavor of the applesauce will of course depend on the type of apple you choose (I hear a variety is best!), but the addition of cinnamon and some smooth pureed pumpkin is sure to win the approval of your tastebuds no matter what you use! I found that the Honeycrisp apples provided a perfect pairing of sweet and tart.


I also got to use a fantastic gadget that was a Christmas present from my in-laws- an apple peeler! If you don't own one of these, I highly recommend them! This particular one has the ability to peel, core and slice at the same time- truly a time saver! If peeling apples keeps you from baking pies, making applesauce, etc, consider this a good investment (only about $20). It will change your life. :)


Crock Pot Pumpkin Applesauce
adapted from Stockpiling Moms
makes...a lot. :)

8 apples, peeled, cored and sliced
2 tsp lemon juice
5 tsp brown sugar
2 cinnamon sticks
approx. 1 cup pumpkin puree (canned or fresh)

Combine all ingredients in crock pot. Cook on low about 6 hours, stirring occasionally. Remove cinnamon sticks and blend using stick blender to reach desired consistency. Store refrigerated, up to two weeks, or freeze.

Saturday, May 26, 2012

Power Granola


Ah, the satisfying crunch of granola. Not much like it. Especially when you know it's healthy- packed with wonderful ingredients like oats, flax seed, honey, nuts and more! One of the best things about homemade granola is it's pretty cheap- unlike its ready-made counterparts. And very versatile. You can swap the peanuts and almonds out for virtually any kind of nuts you want, add in coconut or some other dried fruit, skip the honey for a bit of maple syrup or agave nectar, replace the orange juice with something more to your liking or even swap the cinnamon for a different spice! See what I mean? This recipe is meant only to be a springboard for your taste buds and wild imagination!


I must say, I think the combination I chose is remarkably delicious, but feel free to make alterations! I can't stop grabbing little handfuls as I go by the pantry, and it is a perfect compliment to my morning Greek yogurt.


Power Granola
adapted from Myrecipes.com
yields about 4 3/4 cups

2 cups regular oats
1/3 cup flax seed meal
1/4 cup chopped peanuts
1/4 cups chopped slivered almonds
2 tsp cinnamon
1/3 cup orange juice
1/3 cup honey
1/4 cup packed brown sugar
2 tsp canola oil
1 tsp vanilla extract
1/3 cup raisins

Preheat oven to 300.
In a large bowl, mix first 5 ingredients.
In a small saucepan over medium heat, combine orange juice, honey, and brown sugar. Heat and stir just until sugar is dissolved. Remove from heat and stir in oil and vanilla.
Grease large cookie sheet or jelly roll pan. Pour juice mixture over oat mixture and stir to coat evenly. Spread in a thin layer on greased baking pan and bake for 10 min. Stir well. Bake another 10-15 min or until golden brown (granola will become more crunchy as it cools).
Spoon granola into bowl. Stir in raisins. Cool completely. Store in airtight container at room temperature for up to 2 weeks.
Related Posts Plugin for WordPress, Blogger...