Showing posts with label appetizer. Show all posts

Thursday, March 21, 2013

Soft Pretzel Bites {Baking with Sisters, Part 5}

One of the things my sisters and I love to do together is shop. We all have different shopping styles. Jewel and Janell tend to be zippy shoppers, casing the store in a matter of minutes and assessing the merchandise instantly, spending the rest of the time waiting on a bench outside sipping lattes. I take a little more time, not wanting to miss any item on a sale rack, touching all the pretty fabric I know I can't afford, and stockpiling "maybes"- leery of having to take more than one trip to the fitting room. Jessica is a champion browser, circling the store numerous times to be sure nothing has escaped her notice and deliberating over the question of "to buy or not to buy." Although our styles of shopping differ greatly, there is one thing we always agree on when we make trips to the mall.


Pretzels. There's nothing quite like the aroma of a soft, buttery pretzel after the "hard work" of shopping. Or sometimes it's just the fuel you need to get you in "the zone." Whether enjoyed before, after or during the shopping trip, a mall pretzel is a necessary addition to any girl's day out!

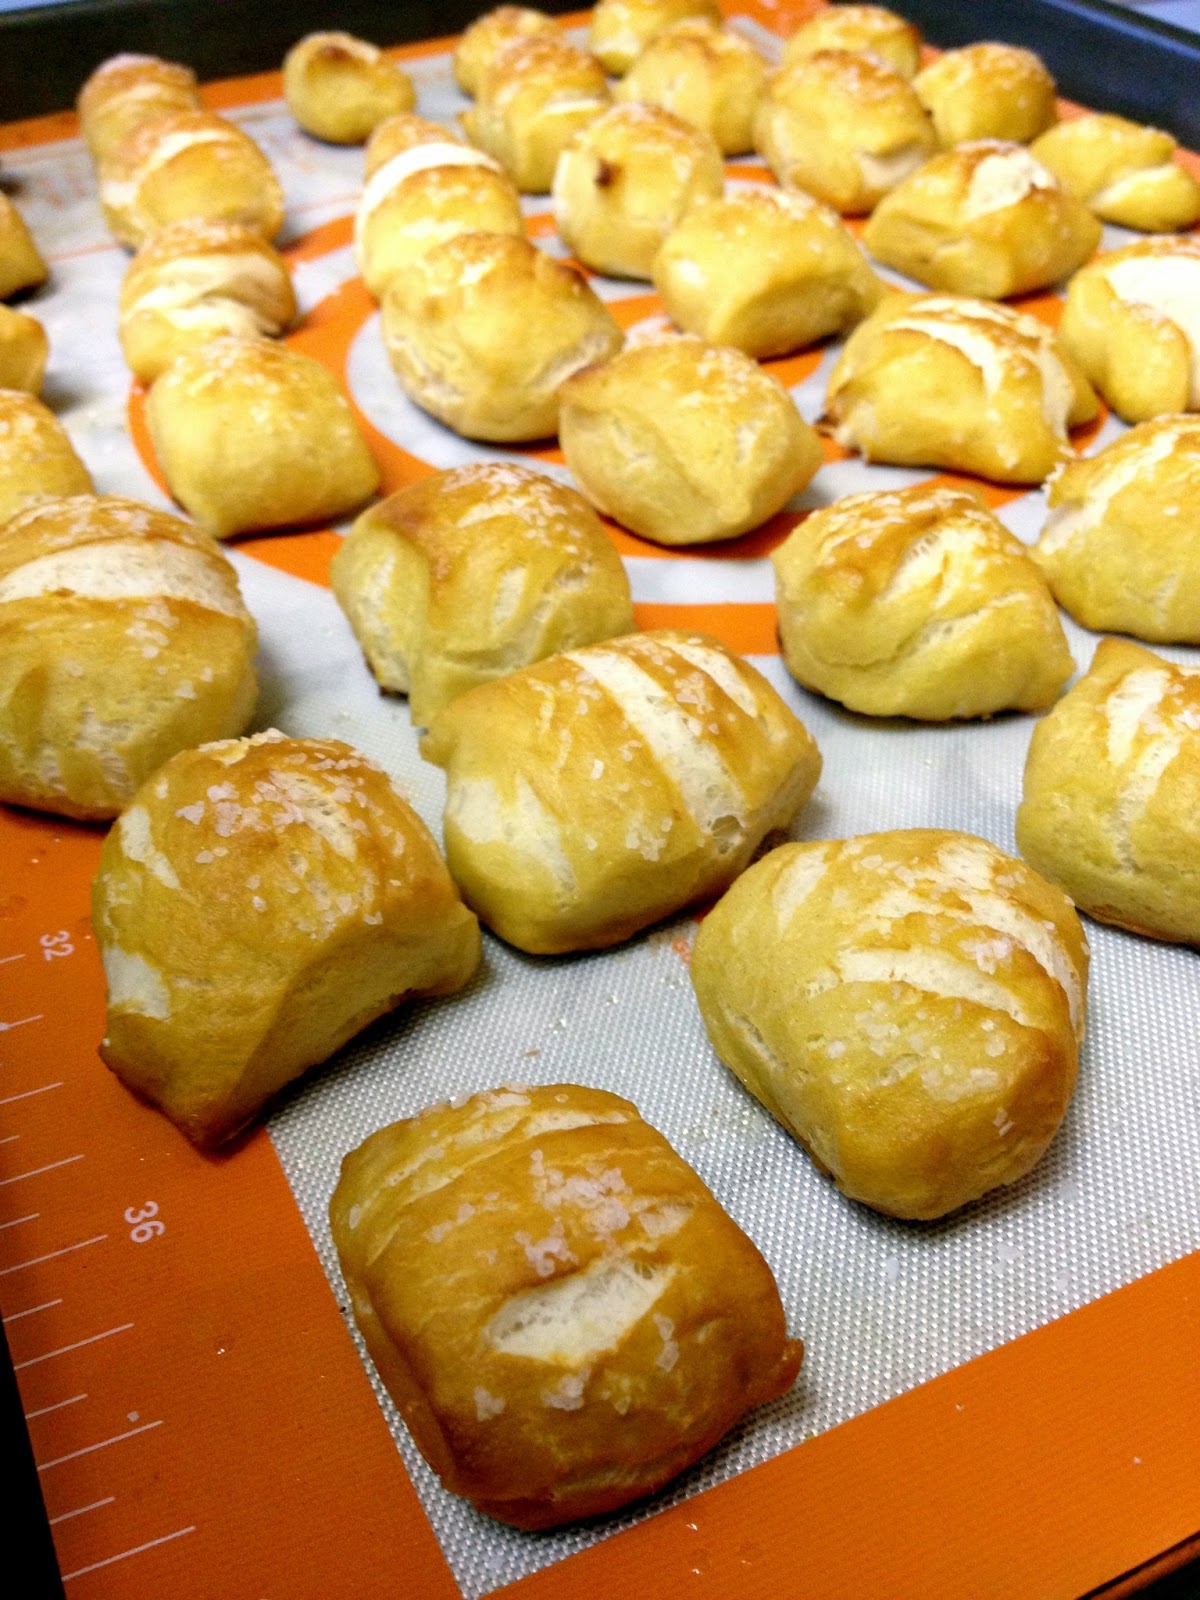
However, this time around, we didn't end up having the time to make the hour-long trek to Spokane for our shopping day, so we decided the pretzels would come to us- in the form of homemade soft pretzel bites!

Teamwork made the task easy and fun and the end result was a delicious pile of warm, chewy, buttery, salty bites of pretzely goodness!

Once the dough was made, Jewel scooped spoonfuls of the bites into boiling baking soda water.


Janell slathered melted butter on the bathed bites and Jessica sprinkled them with Kosher salt.


Then into the oven they went! When they came out we slathered on a little more melted butter for good measure and popped them into our waiting mouths- so delicious! They were the perfect snack to go with an afternoon of Downton Abbey and a hair curling party!!


*Note: we tried dipping our bites in melted Velveeta, but it didn't work so well, so please follow the link to "Smells Like Home" to find a recipe for a homemade cheese dipping sauce!


Soft Pretzel Bites
(printable version)
makes a lot!

1 1/2 cups warm water (110-115 degrees)
1 TB sugar
2 tsp Kosher salt
2 1/4 tsp instant yeast
approx. 4 1/2 cups flour
1/4 cup butter, melted
oil
10 cups water (plus more)
2/3 cup baking soda (plus more)
2 TB butter, melted
more salt (for sprinkling)

In the bowl of a stand mixer fitted with the paddle attachment, mix water, sugar, salt and yeast on low speed for 10 seconds. Switch to the dough hook and add the butter and flour. Mix on low speed until well combined. Change to medium speed and knead until the dough is smooth and pulls away from the side of the bowl, 4 to 5 minutes. If necessary to prevent sticking, add more flour 1 TB at a time. Remove the dough from the mixer bowl and transfer to a well-oiled bowl. Turn dough to coat. Cover the bowl tightly with plastic wrap and set in a warm place for 50-55 minutes or until the dough has doubled in size.
Preheat oven to 425. Grease 2 large baking sheets or line with parchment paper. Set aside.
Bring the 10 cups of water and baking soda to a rolling boil in a wide saucepan.
In the meantime, turn the dough onto a lightly oiled surface and divide into 8 equal pieces. Roll each piece into a 24 in. rope. Slice each rope into 1 in. pieces. Place a slightly damp towel over pretzel pieces to prevent them from drying out while you cut the other pieces.
Using a slotted spoon, lower a handful of the pretzel pieces into the water and boil them for about 30 sec., flipping them around in the water with the spoon a couple of times. Remove the pieces from the water with the spoon and drain them on towels as best you can. Place them on the baking sheets. Repeat with remaining dough, adding more water and a pinch or so more of baking soda as needed (some of the water will boil away as you work).
Brush the top of each pretzel with melted butter and sprinkle with salt. Bake until dark golden brown, approx. 10-12 min. Brush with remaining butter before serving. Serve warm.

Tuesday, March 12, 2013

Muddy Buddies {Baking with Sisters, Part 4}

Some of you may remember a 3-part series I did last year called "Baking with Sisters"- well, I'm adding to it! It has become a tradition for my four sisters and I to have a get-together every year (I think this was our fourth year) and no sister time is complete without getting into the kitchen and trying out some new recipes.

In this instance, however, it isn't a new recipe, but rather an old one, and one you likely know well. We call it "Muddy Buddies" but some may know it as "Puppy Chow". This is the original Chex version that we grew up with and it is a classic that holds its own! How can you go wrong mixing creamy peanut butter, smooth chocolate, crunchy cereal and a dusting of powdered sugar? It's the ultimate sweet snack that's perfect paired with a chic flick or a Downton Abbey marathon!


Two of my sisters, of course, fought over who got to "shake the bag" (the fun part!!) so we divided it in half.


If you've never given this classic favorite a try, there's no time like the present to make some culinary memories with your kids (or sisters)! It comes together in a matter of minutes and will certainly satisfy your sweet-tooth snack craving!


Chex Muddy Buddies
makes a lot

9 cups Chex cereal (feel free to mix varieties)
1 cup chocolate chips
1/2 cup peanut butter
1/4 cup butter
1 tsp vanilla
1 1/2 cups powdered sugar

Measure cereal into a large bowl.
Combine chocolate chips, peanut butter and butter in a microwave safe bowl. Microwave 1 min. Stir. Microwave about 30 sec. longer or until smooth. Stir in vanilla.
Pour mixture over cereal and stir until evenly coated.
Pour into resealable 2 gal. plastic bag (or two 1 gal. bags). Pour in powdered sugar, seal bag, and shake until all pieces are coated. When cool, store in an airtight container.

Friday, February 1, 2013

Bacon Ranch Cheese Ball

Wow, I can't believe it's been almost a month since I last posted! Sorry about that...life's been a little crazy since the holidays. But, I'm back now, and hopefully will be able to swing right back into the routine of regular writing again.

This treat, which I actually made back in December for my Christmas party, comes to you now just in time for Sunday's big game.

However, if you don't happen to be interested in football (like myself), throw a party anyway.


Yep, this ball of cheese is THAT good.

You knew it was when you saw bacon in the title, didn't you?

This appetizer was such a big hit at my Christmas party (especially with the men, mind you, who aren't necessarily the world's biggest cheese ball fans) that it even overshadowed what I thought would be the bigger hit- a sweet take on the cheese ball that tastes like cookie dough! Hopefully I'll get that recipe posted on here one day too, but seriously. Bacon trumped cookie dough. This is a serious matter.

It couldn't be easier to roll up one of these crowd-pleasers, so you really don't have an excuse. Break out the Ritz (Wheat Thins are also awesome) and have a party!


Bacon Ranch Cheese Ball
slightly adapted from The Recipe Critic
makes one large cheese ball

2 (8 oz.) packages cream cheese
1 (1 oz.) packet dry buttermilk ranch dressing mix
1/2 cup grated cheddar cheese
1 (3 oz) jar real bacon bits (or use a few slices fried and crumbled real bacon!)
pecans or almonds, finely chopped for coating
crackers

Mix together cream cheese and dry ranch mix (this is really easy if you do it in your stand mixer).
Add cheese and bacon and mix thoroughly. Shape into a ball (it helps to use a piece of plastic wrap to form it) and roll in nuts to coat. Store in the refrigerator. Serve with crackers.

Wednesday, September 26, 2012

Baked Chicken and Spinach Flautas

What is the difference between a flauta and a taquito?


If you're looking at the pictures and thinking, gee, I have no idea, then you're in good company.

I had no idea either, so I googled it, of course!! From where we stand, there's really no difference. The terms are interchangeable.

However, if you live in the regions of the world from whence we were blessed with such foods, you may know that a flauta is usually made with a flour tortilla and a taquito is usually corn. Also there are some questions of size, but we won't go into that.

For all practical purposes, there really isn't a difference.

And even if there is, who really cares what you call it as long as it's crispy and has cheese oozing out of it? Am I right??

Sooo...pick a name out of a hat and enjoy this yummy and healthy Mexican-cuisine inspired appetizer/dinner!


Baked Chicken and Spinach Flautas\
adapted slightly from Healthy-Delicious
makes about 10 flautas (serves 3-4)

1 lb. chicken breast or thighs (or pre-cooked, shredded equivalent- those rotisserie chickens would be great here!)
16 oz. chicken broth
2 cups water
1 tsp paprika
1 tsp salt
1 tsp garlic powder
1 tsp cumin
1 tsp chili powder
1 Jalapeno pepper, minced (I used canned pickled jalapenos since they are less hot)
3 cups fresh baby spinach, chopped
10 soft taco size flour tortillas
6 oz. good melting cheese, shredded (I used a mozzarella blend)
cooking spray (or oil) and additional salt

Preheat oven to 450.
If using uncooked chicken, chicken pieces in deep pan and cover with broth and water. Bring to a boil, then reduce to a simmer and cook for 10 min. or until chicken is no longer pink. Remove from liquid and shred. Mix chicken with seasonings.
Pour out all but 1/4 cup of the cooking liquid. Add jalapeno and spinach and cook over low heat 2-3 min. or until spinach is wilted.
To assemble, spread about 1 TB of the chicken mixture along one edge of a tortilla. Repeat with spinach and cheese. Roll up and place seam side down on a greased baking sheet. Repeat with remaining ingredients. Spray tops of flautas with cooking spray or brush with oil then sprinkle with salt, if desired.
Bake 10-15 min. or until crispy, turning if needed to brown evenly. Serve with salsa and sour cream if desired!

Tuesday, July 24, 2012

BLT Sliders with Avocado and Chipotle Camp Sauce

Some days don't you just love a simple recipe?

There's something so satisfying about the combination of flavors in a BLT. Each ingredient compliments the other in delicious, mouth-watering simplicity. Juicy tomatoes, crunchy lettuce, crisp, smoky bacon...add a little creamy avocado and a zingy sauce and you've got it made!

Is "zingy" a word? Well, since spellcheck isn't putting up a fit, I guess it must be! It's the best word I can think of to describe the yummy chipotle sauce that pairs so well with these adorable little sandwiches!


BLT Sliders with Avocado and Chipotle Camp Sauce
adapted slightly from Catz in the Kitchen
makes about 6 small sandwiches (feeds 2-3 people for a meal)

Rhodes (or other brand) frozen dinner roll dough
1 egg white
2 TB water
sesame seeds

approx. 9 slices bacon, cooked until crisp and broken into halves
approx. 2 roma tomatoes, sliced.
several lettuce leaves
1/2 an avocado, sliced

3 TB mayonnaise
2 TB Sweet Baby Ray's Honey BBQ Sauce
1/2 tsp adobo sauce (can be found in a can of chipotle chili peppers), or to taste

Follow directions on roll package, placing dough on greased cookie sheet, several inches apart instead of in a baking pan. After the first hour of thawing (before dough begins to rise), flatten each dough ball with the palm of your hand. Cover again with plastic wrap and allow rising to complete (about 3 more hours). Once dough has risen, prepare egg wash by whisking egg white and water. Brush tops of buns with egg wash, then sprinkle with sesame seeds. Bake according to package directions.
Make sauce by combining mayonnaise, BBQ sauce and adobo sauce.
When buns are cooked and cooled, slice and toast lightly. Spread sauce evenly on each side. Layer bacon, tomato slices, lettuce and avocado in each sandwich. Enjoy!

Note: You can also use regular pre-made dinner rolls or slider buns or your own favorite roll recipe! Catz in the Kitchen suggests King's Hawaiian Dinner Rolls which are also tasty!

Wednesday, July 11, 2012

Strawberry Shortcake Skewers

I have been away too long! I apologize for leaving you recipe-less for over a week, but Hubby and I had a rather unexpectedly full and emotionally tiring week. I cooked {for us} only a handful of times the whole week (4 potlucks were involved in the craziness) and every time I had time I tried to squeeze in a load of laundry or do something totally mindless.


For the fourth, I did manage to make these skewers and a pot of phenomenal baked beans which I will share with you very soon, I promise! Hint: they got rave reviews at our church barbecue!

But back to the skewers.

These adorable little creations are, of course, Pinterest inspired. I was intrigued by Lady Behind the Curtain's idea to put strawberry shortcake on a stick! Genius! Everything is more fun on a stick. In her recipe, she used Grand's refrigerated biscuits, strawberries and Cool Whip. I decided to go a step or two further and use my favorite biscuit recipe and make my own homemade whipped cream (the perfect use for that carton of whipping cream leftover from the strawberry icebox cake!).

So, in the first attempt, I made a double batch of biscuits and, in the spirit of patriotism, cut them out with a cute little star shaped cookie cutter.


These I stacked with thick slices of strawberries and a dollop of whipped cream. For the red-white-and-blue effect, I topped the whole thing off with a blueberry. They were delicious, and very cute, but I'm sorry, I have no pictures. However, there were several problems with these...

1) Whipped cream is very difficult to "skewer"- I imagine Cool Whip would be the same.

2) Due to the whipped cream, the skewers are almost impossible to stack, which makes presentation and preparation difficult.

3) Not enough strawberry.

Going to a potluck the next day, I still had leftover star biscuits, so I decided to try revising the process. I simply skewered a biscuit, topped it with a whole hulled strawberry (end also removed), followed by another biscuit, another strawberry, and finally, another biscuit. They were stackable, transportable, and I served them with the whipped cream on the side for dipping or smearing or what have you. Definitely easier to handle (and better for preparing in advance!). And- more strawberry!! :) Problem(s) solved.


So, try it either way, but do try it! These little gems are so fun for summer get-togethers- my friends couldn't stop talking about them! They are cute and tasty and so unique!

Strawberry Shortcake Skewers
makes about 3 dozen skewers (cut in half if desired)

wooden skewers
doubled recipe for biscuits (or use you own favorite recipe)
sugar for sprinkling
enough strawberries to allow 2 per skewer
blueberries, if desired
whipped cream or Cool Whip for dipping

Make biscuit dough as directed. Roll out to 1/2 in. thickness. Cut out using a 1 1/2 in. cookie cutter in whatever shaped desired. Place on baking sheet. Sprinkle biscuits with sugar. Bake slightly less than directed (since biscuits are small). Cool completely.
Wash and hull strawberries.
To assemble: Skewer a biscuit and slide it down the stick, leaving room for a "handle". Follow this with a strawberry and repeat once, then end with another biscuit. Top with a blueberry if desired.
Repeat for each skewer.
Serve with whipped cream or Cool Whip for dipping.

Saturday, February 4, 2012

Pepperoni Pizza Pinwheels

Looking for a quick snack to take to a game day party? Need something to feed to hungry kids or teenagers? Or just a platter of something tasty to fill up the potluck crowd at church? If the last, I can sympathize. This is the "end of the month" grocery-wise for Travis and I, so I was trying to figure out what I could bring to our church potluck that could materialize out of the limited supply left in my cupboards. From somewhere, suddenly it hit me! A genius idea. Pizza pinwheels! I have seen this idea before and I think it originates with Pillsbury, using their crescent dough or pre-made pizza dough- which would work great! But I decided to use my own favorite pizza crust recipe and experiment a little. Wow. These little guys are fantastic- and I if I can keep hubby from eating them all tonight, I think they will disappear tomorrow!


Start with a basic pizza crust recipe. I doubled mine, which you can find here. I opted to leave out the whole wheat flour and did all white instead, but I'm sure it would be great either way. Allow it to rest about 5 minutes, which gives the yeast time to make the dough stretchy. Roll it out on a floured surface into as large a rectangle as you can without it breaking.

Yes, this is a rectangle...ish.

Spread your favorite pizza sauce on top and sprinkle with cheese and any other toppings you like. I just used pepperoni, but anything would really be fantastic.


Starting at one of the long ends, roll tightly, cinnamon roll style.


Slice into 1/2 in. rounds (I used a serrated knife, and it worked pretty well). Arrange on a greased cookie sheet and bake.


Voila! Cheesy, bubbly, pizza filled swirls of yummyness! 


Pepperoni Pizza Pinwheels
(printable version)
A KitchenJoy original recipe
makes about 36 pinwheels

Doubled recipe pizza crust dough
pizza sauce
shredded cheese
pepperoni (or other toppings)

Preheat oven to 425.
Roll out dough very thin into a large rectangle.
Spread sauce on top, sprinkle with cheese. Top with pepperoni.
Starting at a long edge, roll cinnamon roll style.
Slice into 1/2 in. rounds. Place several inches apart on greased baking sheet.
Bake 10-12 min. Let cool 1-2 min, then remove to wire racks to cool completely.

Saturday, December 31, 2011

Mexican Layered Dip

Happy New Year's Eve everyone! I hope this last day of 2011 finds you reflecting on all your blessings and God's faithfulness to bring us this far. Here's to the grace to face the joys and challenges of 2012 with courage!

This recipe has been a staple at many family parties over recent years and that is why it occurred to me to bring it out for a New Year's Day party we are going to tomorrow. If you have any parties to attend tomorrow (or yet tonight?), this is a VERY quick and VERY easy crowd-pleaser to throw together. And it tastes fantastic. The perfect munching snack with a bowl full of crisp tortilla chips.
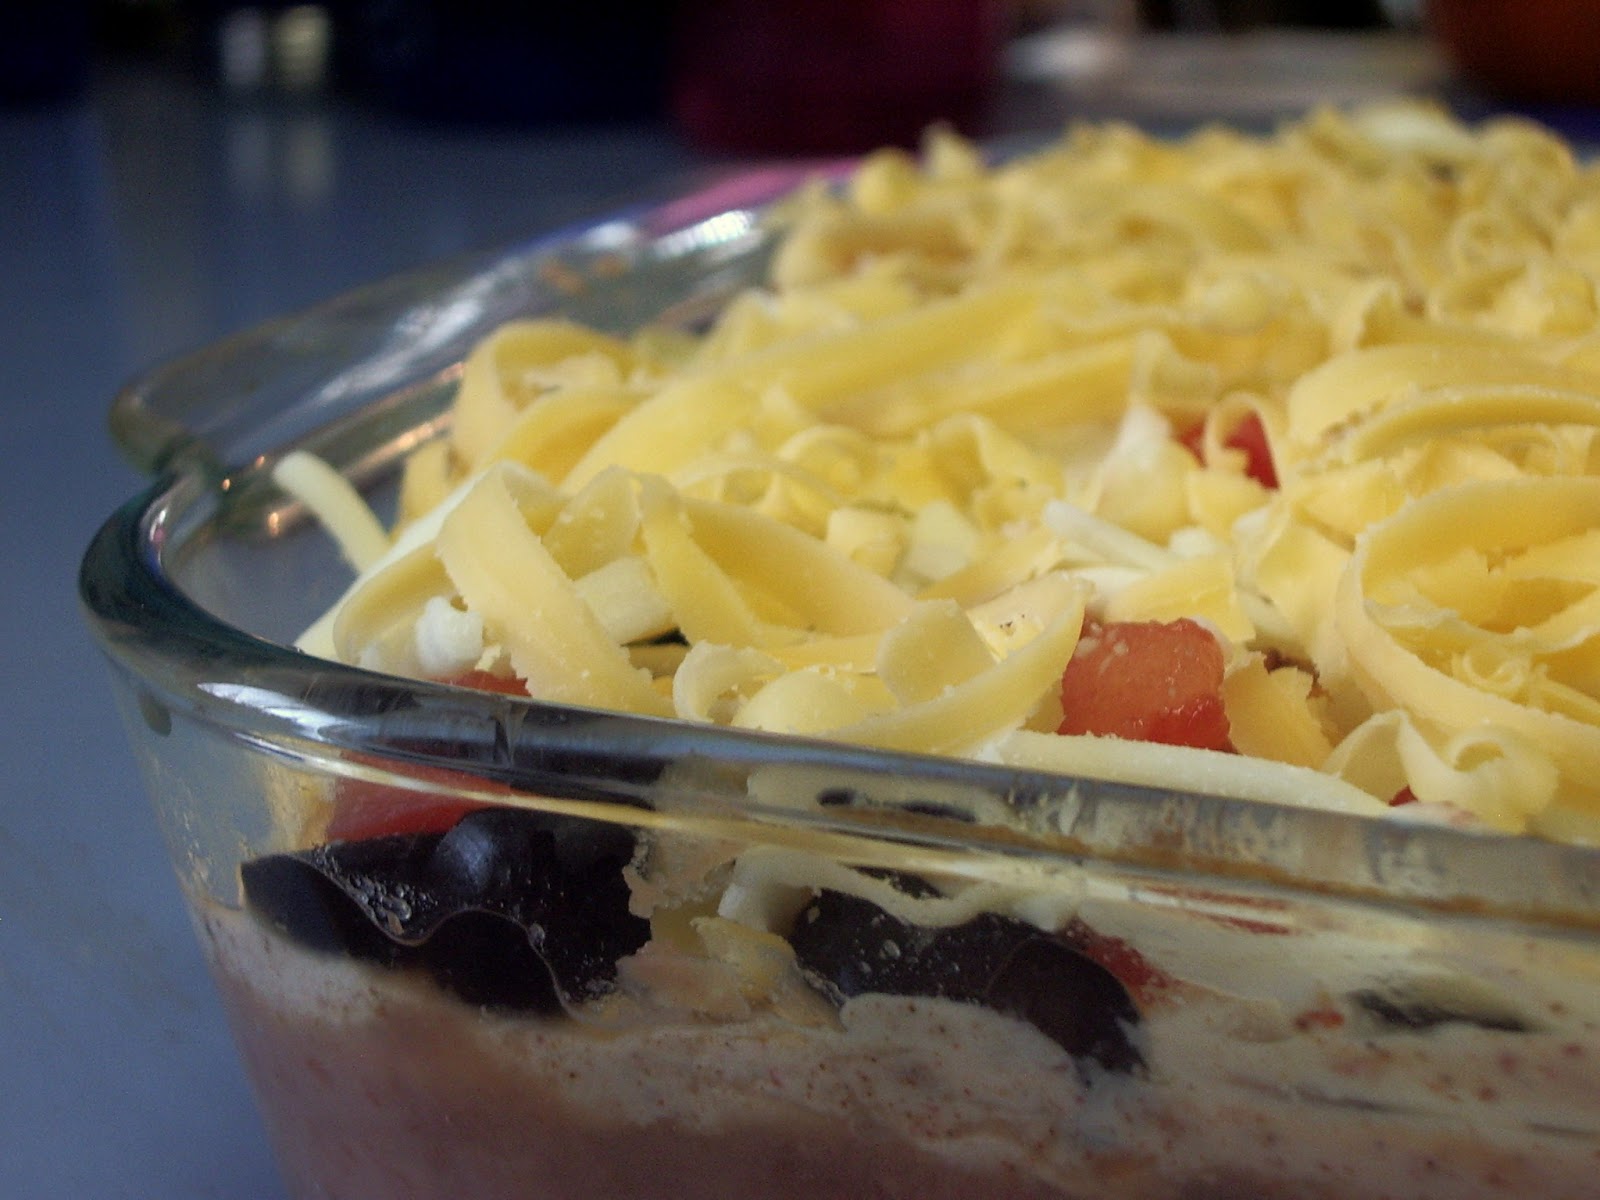
This dip was originally introduced to our family by my Dad's mom, who we kids call Nani. She taught my sister Jessica how to make it, so from then on it has mainly been Jessica's responsibility to prepare it for parties, potlucks, etc...but even more importantly, to remember what order the layers go in! I hope I remembered right, but if not...oh well! There's really no wrong or right way to do it, except...one thing I know. The beans ALWAYS go on the bottom. :)

Start with a couple of cans of refried beans (enough to thickly cover the bottom of whatever size pan you're using- my measurements are what I used for an 8x8).


Next, mix a packet of taco seasoning with a container of sour cream.


Make sure it's well incorporated, then spread it over the beans.


Sprinkle with sliced olives.


Top with diced tomatoes.


Cover generously with cheese (your call on what variety of cheese).


Serve immediately or you can make it ahead if you're really organized. Serve with tortilla chips!


Nani's Mexican Layered Dip
(printable version)
serves....a crowd

2 cans refried beans
8 oz. container of sour cream, mixed with one packet of taco seasoning
large can sliced olives
1 lg or 2 sm. tomatoes, diced
shredded cheese

Layer all ingredients in order listed (or in whatever order you prefer...just be sure you put the beans on the bottom!! :) Serve with tortilla chips.
Related Posts Plugin for WordPress, Blogger...