Showing posts with label vegetables. Show all posts

Wednesday, February 5, 2014

Slow Cooker Black Bean & Lentil Soup {with Smoked Paprika}


Much of the country is going through either a very cold and/or very stormy snap- us included (it was -8 here this morning!)- so it is of course the perfect opportunity for making a crock pot full of warm, hearty soup.

Since I slow-cookerized it, this particular soup is super easy to throw together- it's also very economical! It is vegetarian as well (unless you decide to use chicken broth), but it is not at all lacking in heartiness. Trust me, Hubby liked it. The beans and lentils are meaty, the broth and vegetables become almost creamy once blended a bit, and the smoked paprika...Well, you've just got to try it if you haven't. And if you have, you know what I'm talking about. You know it's a special spice when it's mentioned in the title of the dish. I mean, nobody's going to say, "Black Bean & Lentil Soup with Oregano," right? Just a whiff of the container and you'll know it's not your ordinary paprika. This is, well...smoked! And the smoky quality, both aroma and flavor, comes through very strongly in the flavor of this dish.


The leftovers were phenomenal, by the way! The flavors just seemed to meld and come together even better the second day when we had it for lunch. Bonus!


Black Bean & Lentil Soup with Smoked Paprika
adapted from Haystacks & Champagne
makes about 8 servings

1/2 large onion, chopped
2 larges stalks celery, chopped
3 cloves garlic, minced
2 tsp smoked paprika (not regular paprika!)
2 bay leaves
1 (14 oz.) can fire-roasted diced tomatoes (you can use regular, but the fire-roasted variety really adds to the smoky flavor of the soup)
1 cup dried brown lentils, rinsed and sorted
1 (14 oz.) can black beans, drained and rinsed
2 (14 oz.) cans vegetable or chicken broth
3 cups water
2 tsp dried parsley
salt and pepper to taste

Put all ingredients into the slow cooker. Cook on low 8-10 hours or until vegetables and lentils are tender.
Remove and discard bay leaves. Using stick or immersion blender, blend a few seconds or until consistency is to your liking (it should still be a little bit chunky). Note: if you don't have an immersion blender (although you most certainly should!), you can put about half the soup in your regular blender and blend until combined, but not completely pureed. Then stir into remaining soup for the same effect. This gives the soup a wonderfully creamy feel.
Season with salt and pepper, if desired. Serve topped with shredded Parmesan cheese.

Friday, January 17, 2014

Pasta with {Slightly Skinny} Butternut Parmesan Sauce


A few months ago I was given a few butternut squashes (Is "squashes" correct? Or would that be "squash"? As in "deer"...or "fish"...or "moose"? I give up) from a relative that grows them in her garden- how fun is that- home-grown squash! Lovely, rich, smooth, gorgeously golden squash! 

As you can imagine, I was more than happy to accept her offer of a few to take home and have been on the hunt ever since for something to do with it other than soup (although I absolutely adore butternut squash soup and have tried several delicious recipes!). Recently I came across this pasta sauce recipe on Pinterest (of course) and decided to give it a whirl!

This sauce is really very simple to prepare. The only time consuming part is baking the squash, which could easily be done ahead of time. You can even make large batches of squash puree and freeze them in 3 cup amounts to have on hand when you need a quick go-to sauce for a weeknight meal! How easy would that be?? 

And, as usual, the squash does not disappoint. It is smooth and nutty as always, and combined with the flavors of sage and Parmesan, it makes a delicious addition to your favorite pasta.

Oh, and that amazing side dish you see in the picture? The one with the almonds? And more Parmesan? That's my sis-in-love's fantabulous roasted zucchini that ever since this summer has been my absolute favorite way to eat zucchini. I could seriously eat a whole bowl of THAT for dinner. Oh, now you want the recipe? Well, you're in luck! It just so happens I  know the lady who wrote a blog post about that... ;) You can thank me later.


Pasta with Butternut Parmesan Sauce
slightly adapted from Good Life Good Eats
serves 6

1 butternut squash (about 2 1/2 lb.- if using pre-made puree, this takes about 3 cups)
12 oz. penne pasta (or other favorite!)
1 TB olive oil
1 shallot, chopped (about 1/2 cup)
1/2 cup grated Parmesan cheese
1/2 cup skim milk
1/8 tsp nutmeg
1 tsp ground sage (or use 1 TB fresh!)
1 tsp parsley (or 1 TB fresh! If using fresh parsley, add with lemon juice at the end of cooking)
2 tsp lemon juice
salt and pepper to taste
broth or water as needed to thin sauce

Preheat oven to 350. Cut the squash lengthwise in half (see here for an easy way to do this!) and scoop out strings and seeds. Place squash cut sides down in a glass baking dish and add 1/4 cup water. Bake about 40 min. or until easily pierced with a fork. Cool 10 minutes, then scoop flesh from skins. Puree squash in a blender or food processor or using a stick blender until smooth.
Cook pasta according to package directions.
Meanwhile, make sauce. Heat olive oil over medium heat in a wide skillet. 
Add shallots and cook about 5 min., or until soft and translucent. 
Add squash puree and cook about another minute, stirring to combine. 
Add milk a little at a time, stirring continuously to incorporate.  
Stir in cheese and spices. If needed, add water or broth to thin the sauce to your liking. When sauce is hot, remove from heat and stir in lemon juice (and fresh parsley, if using). 
Serve over hot pasta with extra cheese and herbs if desired.

Tuesday, October 22, 2013

{Slow Cooker} Tuscan Chicken Stew


What makes something "Tuscan"?

Is it the white beans?

Or the tomatoes?

Surely somebody knows.

I don't, but I'll tell you something I DO know:

This stew is YUMMY.

It is full of delicious veggies, tender chicken, spices, oh, and of course those beans and tomatoes!

And it is guaranteed to warm you up if you've been outside at a football game, raking leaves, pumpkin patching, or any of the other outdoor activities people do in the fall.

And the best part is, I slowcookerized it for you (as of now that is officially a word, just so you know), so your slow cooker does all the work while you're out having fun (or in the case of leaf raking, not having fun)!


Slow Cooker Tuscan Chicken Stew
adapted from South Your Mouth
makes 6-8 servings

1-2 lb. chicken pieces (I used skinless thighs)
5 cups chicken broth
1 bay leaf
4 stalks celery, diced
3 carrots, diced
1 lg. onion, diced
5 med. red potatoes, chopped
1 15 oz. can great northern beans, drained and rinsed
1 14 oz. can diced tomatoes, undrained
1 tsp thyme
6 cloves garlic, minced
1/2 tsp paprika
1/2 tsp red pepper flakes
1/2 tsp Italian seasoning

Combine all ingredients in slow cooker. Cook on low 6-8 hours or until potatoes are tender and chicken is cooked through. If using bone-in pieces of chicken, remove bones and chop or shred meat. Remove bay leaf before serving.

Wednesday, October 16, 2013

{Slow Cooker} Butternut Squash & Sweet Potato Soup


One of my absolute favorite fall food items is the butternut squash.

I was only introduced to it a couple of years ago and it changed my world forever! It's creamy texture and delicate, nutty flavor incorporate well into a variety of dishes, but it especially lends itself well to soups. Its bright color is cheery, and pureed into a dreamy smoothness, it banishes the chill of a crisp fall evening in no time!

This recipe makes a huge batch-we had some for dinner, froze enough for another dinner, and had enough leftover for several lunches!

Pro tip: to make your squash easier to cut (these things are notorious for being difficult to get into!), microwave it for 2-3 min. The rind should be somewhat softened so you can slice it in half without cutting off your hand in the process.
Also, before freezing, be sure to let the soup cool completely!


Slow Cooker Butternut Squash & Sweet Potato Soup
(printable version)
adapted from Hamilton Beach
serves 8-10

1 medium onion, chopped
2 TB butter
2 cloves garlic, chopped
1 large butternut squash, peeled, seeded and cut into 2 in. chunks
1 large or 2 medium sweet potatoes, peeled and cut into 2 in. chunks
5 cups chicken broth
1 1/2 tsp. dried sage
1/2 tsp salt
1/4 tsp pepper
1/2 cup half and half or heavy cream

In a skillet, cook onion in butter over medium heat, stirring occasionally, until tender but not browned. Add the garlic and cook 1-2 min. more. Spoon into slow cooker.
Add squash, sweet potatoes, broth and seasonings.
Cover and cook on high 4 hours or on low 6-7 hours.
Let cool slightly, then puree in a blender or using an immersion blender (stick blender) until smooth. Stir in cream.

Saturday, September 28, 2013

Roasted Zucchini, Black Bean & Goat Cheese Enchiladas


Let's face it. Enchiladas really aren't that pretty.

At least, once they come out of the pan.

I think they look adorable all wrapped up and squished together in a pan, covered in sauce and sprinkled with cheese, but after?


Ugh. At least the avocado is pretty.

If you know a good way to get an enchilada out of the pan, intact and looking gorgeous, let me know.

Somehow Sara over at Sprouted Kitchen managed to make them look amazing, but, yeah.

I don't think I have that gift.

That being said, pretty or not, these veggie enchiladas are so delicious. Squishy, gooey, falling apart comfort food usually is. No exception here!

I've recently discovered goat cheese and am loving it! I think, to me, it looks like feta, but tastes like cream cheese. Except saltier. Either way it's pretty amazing. Surprising you with these yummy pockets of ooey gooey creaminess.

MMM.

Glad we're having leftovers tonight because I'm really craving one now.


Roasted Zucchini, Black Bean & Goat Cheese Enchiladas
adapted from Sprouted Kitchen
makes about 10 enchiladas

3 large zucchini, diced into 1/4 in. pieces
3 1/2 tsp olive oil, divided
1 1/4 tsp lemon pepper
1/2 small onion, diced
1 clove garlic, minced
1 15 oz. can black beans, rinsed and drained
3.5 oz. crumbled goat cheese
1/3 cup shredded mozzarella cheese
10 soft taco size flour tortillas (or substitute corn)
1 15 oz. can red enchilada sauce
2 avocados, chopped

Preheat oven to 425. Place the zucchini on a rimmed baking sheet. Drizzle with 2 tsp of the olive oil and sprinkle with lemon pepper. Toss to coat. Spread over 2 sheets if needed to make one even layer without crowding. Roast about 30 min. or until edges are slightly brown. Remove to cool. Turn oven down to 375.
Meanwhile, heat skillet to med-high heat and add 1/2 tsp of olive oil. Add onion, saute 3-4 min. Add garlic and saute 1 min. more. 
In a large mixing bowl, combine the onion mixture, black beans, mozzarella, and all but a few TB of the goat cheese. Add the zucchini and toss gently to combine.
Lightly grease a 9x13 baking dish and pour about 1/2 cup of the enchilada sauce in the bottom to coat. Working with one tortilla at a time, distribute filling evenly into tortillas, rolling each one and placing them seam side down in the dish, squeezing them in tight.
Brush the tops with remaining olive oil and pour remaining enchilada sauce over the top. Sprinkle with remaining goat cheese.
Bake 20-25 min. or until tops are just crisp and sauce is bubbly. Cool 5 min., then serve, topped with chopped avocado.

Thursday, June 20, 2013

Bacon, Cheddar & Kale Frittata


So a couple of months ago I discovered the frittata. Oh, and what a delicious discovery it was!

It also opened the door of my imagination to a whole world of possible frittatas. How easy would it be to swap out the asparagus for some other vegetable? The Gruyere for a different delectable cheese?

Then I woke up one morning fantasizing about the combination of quality bacon with some sauteed kale (both of which happened to be hanging around in our fridge). Let me tell you, it was a winning idea.

I mean really, how can you possibly err when you saute kale and onions in bacon fat? And toss in some unbelievably bright farm fresh eggs. And Tillamook cheddar. I mean, really.


Bacon, Cheddar & Kale Frittata
serves 6

12 large eggs
3 TB half & half
1/2 tsp salt
1/4 tsp black pepper
4 slices bacon
1/2 medium onion, diced
4 cups chopped kale
1/2-1 cup shredded cheddar cheese, depending on preference

Preheat oven to 400.
In a medium bowl, whisk together eggs, half & half, salt and pepper until combined.
In a non-stick, oven safe skillet, cook bacon over medium heat until crisp. Remove and drain on paper towels. Reserve about 1 TB of bacon grease in pan. When drained, chop or crumble bacon and set aside.
Add onions and saute 1-2 min. Add kale and continue sauteing until kale is wilted, about 3-4 min.
Stir cheese and bacon into egg mixture. Pour egg mixture into the skillet with the onions and kale and cook, using a rubber spatula to stir and scrape the bottom. Large curds will begin to form after about 2 min. but the eggs should still be quite wet. Shake the skillet to distribute eggs evenly then allow to cook for 30 seconds without stirring- this will set the bottom.
Transfer the skillet to the oven and bake about 10 min. If the frittata is set but just slightly wet and runny when you cut into it, it is done. 
Remove from oven and let stand 5 min. Loosen edges with spatula, then slide it out of the pan, cut into wedges and serve.

Thursday, November 8, 2012

Easy Butternut Squash Shells and Cheese

Do you remember last year when that one amazing soup totally sent me on butternut squash kick for awhile?


Welllll...I think it's started again. There is just something so irresistible to me about that creamy orange, mildly flavored squash. And when you pair it with ooey gooey cheese? Don't even get me started.

This recipe is no exception. It is very similar in flavor and texture to the awesomely delicious pumpkin macaroni and cheese and fairly easy to prepare. Tackling the squash is, as always, the most difficult part. You'll need a good sharp knife and some elbow grease to slice your way through the tough skin and firm flesh- but it's definitely worth it!


Easy Butternut Squash Shells and Cheese
serves about 6

3 cups uncooked whole wheat pasta shells
4 cups cubed uncooked butternut squash (about 1 medium)- peeled and seeds removed
2 TB olive oil
1/2 tsp salt
1/2 tsp pepper
1/4 tsp nutmeg
3/4 cup chicken or vegetable stock
1 1/2 cups milk
6 oz. shredded cheese (I used Gruyere- fontina was recommended)
4 oz. shredded Parmesan cheese
2 TB brown butter (for "how-to" click here)
2 TB fine bread crumbs
chopped fresh herbs for garnish (I used sage)

Preheat oven to 375. Prepare water for pasta and cook according to package directions. Drain.
While pasta is cooking, heat a large skillet over med-low heat. Add oil, then toss in squash with salt, pepper and nutmeg. Add stock and cover skillet, cooking for 15-20 min., stirring occasionally, until squash is soft and can be easily mashed. Remove cover and reduce heat to low. Mash squash with a potato masher or fork, smoothing it out with a spoon to remove all the chunks.
Add in milk, 4 oz. of the Gruyere or fontina and all of the Parmesan, stirring until melted and smooth, about 5 min. If needed, add more milk a little at a time, stirring until smooth. Stir in brown butter, again mixing for a minute or so until incorporated. Taste and add more seasoning, if desired.
Fold shells into the sauce, coating completely. If not using an oven safe skillet, transfer shells to a casserole dish. Top with remaining cheese and breadcrumbs and bake for 15 min. If a bubbly, golden topping is desired, broil 1-2 min. after cooking. Sprinkle with fresh herbs and serve!

Friday, November 2, 2012

Upside-Down Mexican Pot Pie

You know how a pot pie is just this delectable thing with veggies and tender meat in a creamy, rich sauce topped with a flaky pastry crust?

Well, what if pot pie went Mexican?


What if you had some cheese joining the party...tomatoes and veggies hanging out with some tender ground beef spiced with seasonings and peppers topped off with moist cornbread? That would be all right, wouldn't it?

Oh wait.

Turn that upside down.

Yep, the whole thing.

Now you've got it. If you're gonna turn the whole pot pie idea upside down, you might as well go ahead and turn the whole pot pie upside down.

Right?


At least that's how I explain to myself why this pie is upside down. Besides the fact that it's fun. To say. And to eat.


Upside-Down Mexican Pot Pie
adapted from the Gooseberry Pot Pie Cookbook
serves 6

1 lb. ground beef
1 onion, chopped
2 cloves garlic, minced
1 green pepper, chopped
1 zucchini, chopped
1 can diced tomatoes
1 can corn, drained
1 tsp chili powder
1 tsp salt
1/2 tsp cumin
1 (8.5 oz.) pkg. cornbread mix (will need egg and milk)
1 cup shredded Mexican blend cheese

Preheat oven to 350. Lightly grease a 2 qt. casserole dish.
In a skillet over medium heat, brown beef with onion, garlic, green pepper, and zucchini. Drain. Add tomatoes with juice, corn and seasonings (adjust to taste). Simmer about 5 min.
Meanwhile, prepare cornbread mix according to package directions.
Pour batter into prepared dish. Spoon beef/vegetable mixture over batter. 
Cover with foil and bake 25 min. Uncover and sprinkle with cheese. Return to oven and bake 5-10 min. more or until cheese is melted and bubbly and pie is heated through.

Sunday, October 21, 2012

{Crock-Pot} Cheesy Vegetable Chowder

Do remember a couple of days ago when I was going on about yummy, comforting soup recipes?


Well, here you go!

This soup is not only totally healthy- packed with veggies- but it also contains CHEESE and is thereby amazing. It's sort of a take on broccoli cheddar soup, but with way more vegetables (count 'em- 6!- if garlic counts as a vegetable!) AND I converted it for the crock pot. Of course.


So. Go make yourself some.

Oh, and while it's in the crock pot, get all domestic and whip up some of this fantastically easy Italian bread!


Crock-Pot Cheesy Vegetable Chowder
adapted from Lulu the Baker
serves about 6

2 TB butter
1 med. onion
1 cup chopped carrots
2 celery sticks, chopped
2-3 cloves garlic, minced
2 medium broccoli crowns, chopped into small florets
3 14 oz. cans chicken broth (about 6 cups)
2 large baking potatoes, peeled and diced
1 bay leaf
salt and pepper to taste
1 TB flour
1/2 cup water
1 cup milk
2 heaping cups of cheddar cheese, shredded (I used a blend of extra sharp white cheddar and medium  cheddar)

Melt the butter in a large skillet over medium heat. Add onions, carrots and celery and saute until tender. Add garlic and saute 1 or 2 minutes more. Place onion mixture in crock pot. Add broccoli and potatoes; pour in broth, add bay leaf and salt and pepper. In a small jar, combine flour and water and shake vigorously to combine. Stir into crock pot. Cook on low 6-8 hours.
Before serving, remove bay leaf, then remove about half of soup from crock pot and puree the other half using an immersion or "stick" blender (this can also be done in batches in a blender) to your desired consistency. Stir in reserved soup, milk and cheese and heat until hot and cheese is melted.

Saturday, October 6, 2012

Roasted Cauliflower and Aged White Cheddar Soup

Three important words.

Aged.

White.

Cheddar.


Oh, and Tillamook.

I guess that's four. Oops.

I highly recommend Tillamook Vintage White Extra Sharp Cheddar in this recipe (or in any other possible way you may want to use cheese)! It has long been a favorite of mine...in fact, if the truth be told, when hubby and I were engaged, he gave me a 2 lb. block of Tillamook Vintage White Extra Sharp Cheddar (would TVWESC be a good acronym?) for our first Valentine's Day! Now before you cleverly protest that that's awfully cheesy let it be known that I was extremely pleased to find that my man already knew me so well. I was ecstatic to have a whole 2 lb. of that incredibly sharp goodness to myself and he knew it!!

So anyway, back to the soup. Were we ever talking about soup? Oh, well, we should have been. This soup is amazing.

Almost unreal. Especially since it contains a vegetable I never eat! Again, like the broccoli incident, I think that roasting worked it's magic on the cauliflower. Along with the aforementioned cheese of course.


In any case, hubby (who is not in the broccoli-lover's club by any means) loved it as much as I did- we pretty much slurped up the whole pot of it. Yes, all four servings. Hey, it's veggies, right?


Oh, and also! I got these adorable new soup mugs on our recent trip to Wallowa Lake- one of the gift shops there carried my dining set brand in a beautiful variety of colors. I fell in love with the blue soup mugs and I think they go beautifully with my cream colored plates, don't you?


Roasted Cauliflower and Aged White Cheddar Soup
adapted slightly from Closet Cooking
serves 4

1 head of cauliflower, cut into small florets
2 TB olive oil
salt and pepper

1 TB oil
1 med. onion, diced
2 cloves garlic, chopped
1 tsp thyme
3 cups chicken broth (or veggie broth, if you prefer)
1 1/2 cups aged white cheddar (Tillamook recommended)
1 cup milk or cream (I used a combination of both)
salt and pepper
6-8 slices bacon

Preheat oven to 400. Toss cauliflower florets in oil along with salt and pepper to taste. Arrange in a single layer on baking sheet. Roast 20-30 min., stirring halfway through, or until cauliflower is browning.
Heat the 1 TB oil in a large saucepan on med. heat. Saute onion 5-7 min. or until tender. Add garlic and thyme and saute until fragrant, about 1 min.
Add broth and cauliflower, bring to a boil, reduce heat and simmer, covered, about 20 min. (Slow cooker option: at this point, move onion/garlic mixture to slow cooker. Stir in broth and cauliflower, cook on low 4 hours or until cauliflower is tender...continue to follow regular directions). Meanwhile, cook bacon until crisp, if desired, and crumble.
Puree with a stick blender until soup reaches desired consistency. Mix in cheese and let it melt, adding salt and pepper to taste.
Stir in milk or cream and cook until hot if necessary. Stir in about half the bacon.
Garnish with reserved bacon.

Friday, August 10, 2012

Cheesy Zucchini Rice

Is your garden overflowing with summer squash yet? We didn't plant any this year, but I have bought some zucchini at the store and find myself wishing we had! Zucchini is such a wonderful vegetable and can be used in a variety of ways- it soaks up flavor so well! The latest way I tried zucchini was to put in rice!


Grated into thin strips, the squash practically melts into the rice, and combined with cheese and flavored with broth, this perfect summer side bears a strong resemblance to creamy risotto. It is also an eye-pleaser, being a delightfully bright green!


Cheesy Zucchini Rice
adapted slightly from Buns in My Oven
serves about 4

1/2 TB olive oil
1/2 cup white rice
1 cup chicken broth
1 TB butter
1 med. zucchini, grated
1/2 cup cheddar cheese, grated
1/4 tsp garlic powder
salt and pepper to taste
splash of milk, if desired

Heat olive oil in a saucepan over med. heat. Add rice and stir to coat. Toast the rice, stirring often, until it just begins to turn golden.
Pour in chicken broth, bring to a boil and reduce heat to low. Simmer 15-20 min or until most of the liquid is absorbed.
Remove from heat and add butter, zucchini, cheese, garlic powder and salt and pepper. Stir well to combine. Cover and let sit 5 min.
Stir again and add milk if desired.

Saturday, July 28, 2012

Hasselback Potatoes

When I first saw Hasselback potatoes on Pinterest, I was intrigued! They are a beautiful, flavor-filled version of the baked potato (and I guess the name originated in Sweden).

The method of slicing the potato almost all the way through and then baking produces a texture that is crispy toward the top (almost like chips) and soft nearer to the bottom of the potato. Drizzle a little olive oil on top and stuff some garlic in the cracks...mmmm...

What a great new way to serve potatoes!


Hasselback Potatoes
adapted slightly from Seasaltwithfood
makes as many as you want!

potatoes (I used golden), 1 per person
1 clove garlic per potato, peeled and thinly sliced
olive oil
butter
sea salt
pepper

Preheat oven to 425.
Wash each potato and thinly slice almost, but not all the way, through. 


Stuff slices of garlic in the crevices.


 Place potatoes on a baking sheet and top each one with little bits of butter. Drizzle with a small amount of olive oil and sprinkle with salt and pepper.


Bake about 40 min. or until skin is crispy and flesh is soft.


Sunday, June 24, 2012

Roasted Brussels Sprouts with Pancetta & Garlic

I have recently discovered I have a thing for brussels sprouts. They are such a unique vegetable- I don't even know how to describe the flavor and texture. They resemble tiny cabbages and are a delicious complement to many dishes. My favorite way to prepare them is roasting. It keeps them tender on the inside while resulting in a crispy, slightly charred exterior. My very first introduction to brussels sprouts was a recipe much like this one- roasted with bacon.


In this recipe, I use pancetta, but you can easily substitute bacon, since I know pancetta isn't something everyone has on hand. I happened to have some in the freezer, leftover from the delicious Creamy Tuscan White Bean Pasta...

So- yum! If you haven't already, give brussels sprouts a chance. If you have, try them again. I bet this recipe will make you a believer. After all, who can resist bacon and garlic? It makes everything marvelous.


Roasted Brussels Sprouts with Pancetta and Garlic
makes about 4 servings

1 lb. brussels sprouts, trimmed and halved (to trim a sprout, slice off the very end and remove the tiny outer leaves)
2 oz. pancetta, visible fat removed and pancetta minced (or you can substitute bacon)
1 garlic clove, minced
1/2 TB olive oil
1/4 cup water

Preheat oven to 450.
Toss together all ingredients except water. Season with salt and pepper if desired. Spread in one layer in an 11x7 baking pan.
Roast in upper third of oven, stirring once halfway through roasting, until sprouts are brown on edges and tender, about 25 min. total. Stir in water, scraping up browned bits. Serve immediately.

Monday, March 26, 2012

Creamy Avocado Pasta

I know, I know. Don't tell me. I'm a week late to be making green pasta. Seems like it would be a clever thing to whip up for St. Patty's Day, right? Well, that's taking for granted that you plan ahead. And remember holidays. Which I didn't. So...here's some yummy green pasta...a week(+) late!
This pasta combines flavor from some of the yummiest green foods there are: avocado, lime, jalapeño, spinach and basil. Add garlic and pasta to that lineup and you know you're going to encounter some serious deliciousness.

While the making of the sauce did have me wishing I owned a snazzy food processor (or even a not-so-snazzy one!), my blender accomplished the task eventually. I think it prefers smoothies though.
Though coupling the rather exotic and south-of-the-border flavors with spaghetti seemed a bit unusual, it was a delicious new twist on pasta for me. The flavors blended fabulously and the bright green color was fun! I served it alongside chicken breast which I also pan fried in lime juice- a zesty compliment to the filling and creamy pasta.


Creamy Avocado Pasta
serves 4

1 ripe avocado, pitted
1/2 lime
2 garlic cloves
1/4 jalapeno
1/4 cup packed fresh basil
2 cups spinach, divided
1 tsp salt
pepper
2 TB olive oil
1/4 cup Parmesan
1 lb. whole wheat spaghetti (I did not use this much- only about 1/2 a box)

Cook noodles according to package directions. When you drain the noodles, reserve 1 cup of the cooking water. Put one cup of the spinach in the bottom of a serving bowl; top with drained spaghetti and toss for a few minutes to wilt spinach.
While pasta is cooking, prepare sauce. Combine in food processor: flesh from avocado, zest of lime as well as juice, garlic, jalapeno, basil, remaining cup of spinach, salt, pepper to taste, and oil. Blend until smooth.
Pour sauce over pasta and toss to coat evenly, adding some reserved cooking water as needed to loosen pasta. Top with Parmesan and more basil for garnish.

Sunday, November 6, 2011

Roasted Butternut & Sweet Potato Lasagna

Oh dear. This is my third post about butternut squash in what, 2 weeks? I think I'm in love. It just keeps getting better. First, this incredible soup. Then, it turned traditional pizza on its head. Now...it has invaded the comfortable world of lasagna.


And I love it even more for the intrusion. Not long ago, I wouldn't have dared put a vegetable in my lasagna (besides tomato sauce), but this delectable yellow gourd has turned a lot of my preconceived notions about vegetables and meatless dinner upside down. Even my husband has been blown away by how delicious and filling a meatless entree can be. I'm begging you as a friend to please, please put all your inhibitions aside and make this lasagna. Okay. Now that I've reduced myself to pleading, let's proceed to the "how" of this culinary adventure.
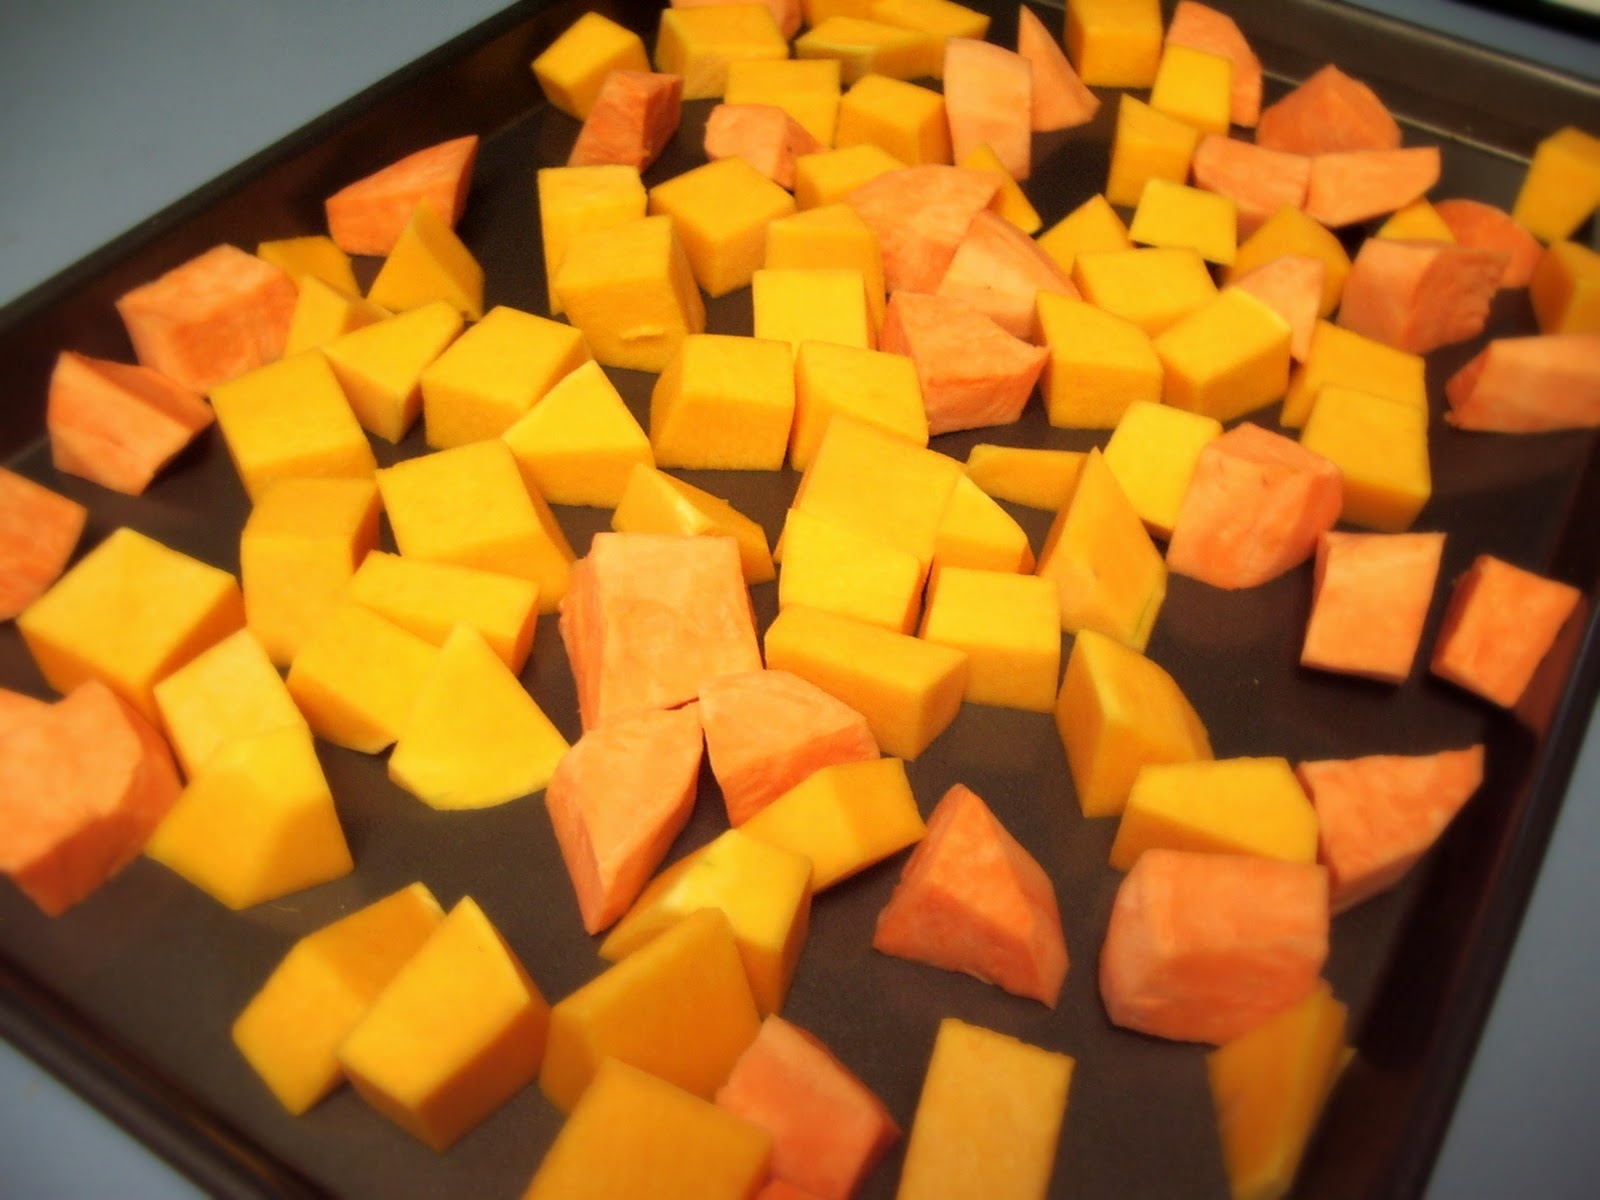
Begin by peeling and dicing a butternut squash and one or two sweet potatoes or yams. Side note: this is not an expensive dish. I purchased a medium sized squash for only a little over $3 and it played a starring role in 3 dinners, plus leftovers! You want to end up with 3 1/2 to 4 cups altogether. Spread them on a baking sheet and drizzle with a bit of olive oil, sprinkle with nutmeg, salt and pepper; toss to coat.


 Roast in the oven until they are slightly crispy and soft enough to poke a fork through.


While the squash is roasting, you can get to work on the cheese filling. The first step in the filling is to cook onions (or shallots) and garlic in brown butter. I didn't have any shallots, so I substituted some sweet onion, which seemed to work fine.


If you haven't browned butter before, you'll find a tutorial here.
The original recipe also called for mascarpone cheese, which sounds amazing, but which I could not find, even at our local Safeway. So, if you can't find it in your area either, you'll find a substitute recipe below. It was delicious. Combine the browned butter, onions and garlic with the mascarpone (or masquerading mascarpone- say that 10 times fast!) and add Parmesan cheese. Set aside.
When the squash and potatoes are done, transfer them to a bowl and mash until smooth with a pastry blender. I whipped them up even creamier with an electric mixer.


Now, you're finally ready to layer!


Some of the comments on the blog I found this recipe on complained that the bottom noodles were crispy, so it was recommended that you put a bit of the squash on the bottom of the pan first- which I did (and it turned out perfect).


Cover that with lasagna noodles. I discovered oven-ready lasagna noodles for the first time on our last shopping trip and had to try them. I must say, I am impressed. They turned out perfectly, no pre-cooking required! Squash mixture goes on top of that, followed by the cheese filling.


Sprinkle a bit more cheese on that, then repeat! This is probably the easiest part of the whole ordeal. :)


Pop it in the oven and wait for delicious aromas to start pouring forth. They will.
Usually you can be fairly alerted to the presence of a tasty meal by the smell. And this dish is no exception whatsoever. I knew I had hit on something good when my husband kept coming in the kitchen, sniffing and saying things like, "Boy, that smells amazing!" It did. We could hardly wait for the pan to come out of the oven and cool long enough to slice. Hubby, hovering, says, "Can we eat it yet?" Good things come to those who wait.
There are so many flavors packed into this hearty dish I don't even know where to start. Which is why, I beg you, please make it for yourself! One thing we remarked to each other as we were eating (pulling our mouths away from our forks long enough to speak was pretty remarkable, come to think of it) was that you could distinguish each separate flavor as you were eating. Squash, smooth and rich. Then tangy and creamy cheese. Nutmeg, aromatic and spicy. Fragrant and pungent garlic. A hint of mellow sweet potato. It was all there. Together, but somehow...separate. Each bite was packed with alternately bursting and mellowing flavors. What an experience! In the words of the blogger who drew me in: "It's like eating a giant plate of autumn." I couldn't have said it better myself.

"I know that this mess of cheesy squash doesn’t look like much, but I gotta tell you that it’s probably the most visually underrated dish I have ever made." - How Sweet It Is blog

Roasted Butternut & Sweet Potato Lasagna
(printable version)
adapted from "How Sweet It Is"
serves 4-6 as main dish

enough lasagna sheets (preferably no-boil) to cover 8x8 pan twice (I used 4 Ronzoni oven-ready sheets)
1/3-1/2 of a medium butternut squash, peeled and cubed (about 2 cups)
1-2 medium sweet potatoes or yams, peeled and cubed (about 1 1/2 cups)
12 oz. mascarpone cheese or substitute (see recipe below)
3 TB butter
1/4 cup finely diced onion
3 garlic cloves, minced
1 1/2 cups grated Parmesan cheese
1/2 cup grated mozzarella cheese
1 tsp salt
1 tsp pepper
1/4 tsp nutmeg
olive oil for drizzling, about 2 tsp.

In shallow baking pan, drizzle squash and potatoes with oil, sprinkle with half the salt and half the pepper and the nutmeg; toss to coat. Roast at 350 for 40-50 min. or until soft and slightly crispy. Cool slightly.
Meanwhile, heat skillet to medium, add butter, onion and garlic. Saute 2-3 min. or until butter is browned, but not burned and onions and garlic are fragrant and transparent. Cool slightly. Combine mascarpone with onions, garlic and butter. Stir in 3/4 cup of the Parmesan.
Mash squash and potatoes until smooth and spreadable. Grease 8x8 in. pan. Coat bottom of pan with small amount of squash mixture. Top with lasagna noodles. Coat with half of remaining squash mixture, followed by half of the cheese mixture. Top this with half of the remaining Parmesan and half the mozzarella. Repeat with remaining ingredients.
Bake in 350 oven for 45 min or until cheese is bubbly and lightly browned.

Mascarpone cheese substitute:
8 oz. cream cheese
1/4 cup heavy cream or half and half cream
2 1/2 TB sour cream

Mix all together until smooth and creamy.

Sources: How Sweet It Is

Friday, October 28, 2011

Butternut Squash Pizza with Chicken and Caramelized Onions

For the last few weeks, our Friday pizza nights have been the same. Pepperoni with olives. Nothing wrong with that combo- but...a little boring after awhile. I had two motives to try something out of the ordinary. 1) I was bored with plain old pepperoni and 2) I had some butternut squash in the fridge begging to be made into something delectable. As I was looking through recipes containing the sweet orange gourd, I happened upon the suggestion of pizza. Squash on pizza? Sounds a little strange. But so many people in various corners of the world wide web were raving about it, so I thought it couldn't be all bad. And after my recent soup experience, I was ready to have an open mind toward this glorious vegetable (or is it a fruit?). I searched for awhile, looking for the perfect combination of ingredients I currently possessed and ingredients that sounded appetizing together. Nothing really fit the bill, so I finally decided to make up my own combo. And, boy, it was a winner, if I do say so myself!

I decided to top a thick and chewy crust with a white, almost Alfredo type sauce, then layer on roasted butternut squash, caramelized onions, chicken, and mozzarella cheese.
This was definitely a much more involved pizza than I'm used to. There were a lot of steps, but, like the soup, it would be well worth it once in awhile.
 The thin, whole wheat crust I usually make is a jiffy, and doesn't require any rising time, so the pizza is usually together in under 30 min. However, for this masterpiece, I decided to try a more traditional, thicker crust, and used Paula Deen's "Basic Pizza Crust"- it was absolutely delicious! But, it required 45 min of rise time, so I got to work on that.
Meanwhile, I also started the squash roasting. I cut it into 1 in. chunks, tossed them in olive oil (the chunks amounted to a little over a cup) and roasted them on a baking sheet at 450 for 20 min.
While the squash was roasting, I started the onions doing their beautiful thing in a shallow pan on the stove top. They sizzled away for a good 30 min in hot butter and a little olive oil, releasing their natural sugars to make a beautifully brown, sweet pan of deliciousness. Even if you are not a fan of onions in general, I urge you to try caramelizing them. They are simply transformed! The harsh, pungent, tangy onion becomes a mellow, sweet, slightly crispy delectable addition to pizzas, sandwiches, burgers, omelets, etc!
While the dough was rising, the squash was roasting, and the onions were caramelizing (this is beginning to sound like a Dr. Seuss book!) I got the white sauce going. Most meals I make (and certainly not pizza) don't have this many "irons in the fire" as it were, but I thought it was sort of fun thing to do on a cold, quiet afternoon.
Anyhow, I simply made up the white sauce in my Better Homes and Gardens Cookbook (the cheese version- using Parmesan cheese), cutting all of the amounts in half. It still made enough to cover two pizzas (the dough also makes enough for two pizzas, so I froze one half of it).
Once the dough had done it's thing, I stretched it out and topped it with the sauce, the squash, the onions, some cubed chicken, and then sprinkled it with cheese (I used a pizza blend containing mozzarella, cheddar and provolone). I really wished I had access to ricotta or feta or something a little more fun, but alas! our little market did not have it. Then I popped the whole thing in the fridge.
When I baked it later, I wanted to try out the new pizza stone my brother and sister-in-law (cooks and fellow bloggers themselves!) gave me for my birthday, but was sadly disappointed when my pizza stubbornly refused to slide off the pizza pan and onto the heated stone. I pulled and tried spatulas, but to no avail. I think I shall have to invest in the famed "pizza peel" or else try freezing the pizza first for easier transportation. However, the pizza baked up beautifully on the pizza pan, and it was delicious!

Disappearing fast...
We ate almost the whole pizza between the two of us, and thoroughly enjoyed the delightful co-mingled unusual flavors. On the whole the flavors were very understated, with the simple white sauce a perfect back drop for the sweet and mellow squash and onion. What a great discovery!


Butternut Squash Pizza with Chicken and Caramelized Onions
(printable version)
a KitchenJoy original recipe (with help)
Makes 1 12-14 in. pizza

pizza dough of your choice
1/2 recipe white sauce (recipe follows)
1-1 1/2 cups cubed peeled butternut squash, roasted
1/2-1 cup diced cooked chicken breast
1 medium onion, sliced and caramelized
1/2 cup or so cheese of choice

Spread pizza dough in pan. Cover with white sauce. Top with squash, chicken and onions. Sprinkle with cheese. Bake according to dough directions.

White Sauce (adapted from Better Homes and Gardens Cookbook)
Makes enough for 2 12in. pizzas
1 TB butter
1 TB flour
dash salt
dash pepper
3/4 cup milk
1/2 cup Parmesan cheese

Melt butter on stove top. Whisk in flour, salt, and pepper; heat till smooth and bubbly. Stir in milk. Heat to boiling; boil 1 min or until thickened. Stir in cheese until melted and smooth. 

Source for dough: Foodnetwork.com

Thursday, October 27, 2011

Butternut Squash & Carrot Soup

Here I am with another soup recipe! Yesterday (Wednesday, my "soup day") I decided to step a bit outside of my comfort zone and my usual routine.


I almost strictly adhere to my crock-pot on Wednesdays, as I don't usually have much time to attend to the kitchen and I need something that can keep for awhile if we get detained at our Kid's Club, Awana (which we don't mind and which usually happens! :). But, after musing on it for awhile, the adventure of trying a squash soup became appealing to me. I have never tried any sort of squash soup before, but last fall and winter, my foray into the world of acorn, spaghetti, and butternut squash (and of course, pumpkin!) convinced me that my former preconceived ideas about squash were likely all wrong. Now I can add squash soup to that list of things I was wrong about! Usually, I hate to be wrong. But when being wrong comes in such a delightful package as a warm, tasty, spicy-sweet (not to mention, healthy!) soup, I can much more cheerfully accept it!
This soup was a bit more work than most soups I make, but once in awhile it would be well worth the effort. Butternut squash is a very versatile squash, being tasty roasted, pureed, grilled, or even microwaved, if you're short on time. It is rather sweet and nutty, very similar in flavor to pumpkin.

Orange seems to be the color of the day
I think if you cooked and mashed it, it could probably be substituted for pumpkin in any recipe. It is also extremely healthy! It is an excellent source of both vitamins A and E, as well as fiber, even making the list of the 10 best foods as compiled by the Center for Science in the Public Interest (right up there with salmon and sweet potatoes)! This delicious, creamy soup also weighs in at a mere 150 calories or less per serving!
The first step is to slice the squash in half and remove the seeds and stringy stuff inside.

Hang onto those valuable little seeds!
But wait! Don't throw those seeds away! Separate them from the strings and wash and dry them to use later. Next you peel the squash, which I accomplished with my vegetable peeler, although I'm not sure it was the best method. After peeling, I diced it into about 1 in. cubes. The recipe called for 3 cups and my squash was about a medium size, so I only ended up needing half of it (which actually amounted to almost 4 cups, but I put the extra in anyway). I'm still dreaming about what to do with the other half. After cubing the squash, as well as slicing up carrots and dicing some sweet onion, I put it all in a big saucepan and sauteed it in butter for about 10 min.


Once the onions were transparent and soft, I added the chicken broth and simmered until everything was tender. After this step, and letting it slightly cool, the recipe called for pureeing everything in batches in a blender. But if you posses the awesome little tool called an immersion blender, I highly recommend you use it here. It is so easy and works like a dream! I use mine quite often- they work very well for blending soups and sauces, as well as dressings and gravy. I simply put the whole pot in the sink (to avoid splatter) and blended everything until almost completely smooth.

See how easy that is? Christmas is coming...

Once smooth and creamy, I stirred in nutmeg, pepper and half and half. Then came the taste test. Mmmm. I couldn't stop dipping my spoon into that beautiful golden-orange soup! It was heavenly! A perfect marriage of sweetness and spice, all wrapped up in a creamy, smooth goodness that slides so warmly down your throat. Tastes (and looks!) like Autumn in a bowl.


I made our soup ahead of time and found it worked well to refrigerate it, then warm it up on low in the crock-pot for 2-3 hours. We had it as a main dish, but if you don't want to go vegetarian (or almost vegetarian, due to the chicken broth) it would also work well as a side or starter to a meatier entree. I served it with an olive and cheese bread from the Brown Eyed Baker's blog.


The bread was beautiful and very tasty, but a little bit too eggy and tasted a little too much like olive oil for my preference. Might be better toasted, or with melted butter or another oil subbed for the olive oil. I love olive oil, but it was just a bit too overpowering for me.


Oh, remember those seeds you saved? Once they are dry, put them on a baking sheet and toast them at 375 for 10-15 minutes (watch closely so they don't burn!) and you have a perfect topping for your soup- no waste here!

Butternut Squash and Carrot Soup
(printable version)
from the Better Homes & Gardens Cook Book
serves 4 as a main dish, 6 as a side

3-4 cups peeled, diced butternut squash
2 cups thinly sliced carrot
3/4 cup thinly sliced leek or chopped onion
1 TB butter
2 (14 oz.) cans chicken broth
1/4 tsp pepper
1/4 tsp ground nutmeg
1/4 cup half and half
toasted squash or pumpkin seeds for garnish

In a large saucepan, cook squash, carrot and onion in hot butter over medium heat for 8 min., stirring occasionally. Add broth. Bring to boiling; reduce heat and simmer, covered, for 25-35 min, or until tender. Cool slightly.
Place one-third of the mixture in blender and process until nearly smooth. Repeat with remaining (or here is where you can simply employ your handy-dandy immersion blender!). Return all to saucepan. Add pepper and nutmeg, bring just to boiling. Add half and half; heat through. Garnish each serving with seeds if desired.
Related Posts Plugin for WordPress, Blogger...