Showing posts with label Italian. Show all posts

Monday, November 4, 2013

Sourdough Pizza Crust


So you remember how I took that sourdough bread class in October?

Well, I've been faithfully feeding my starter on a {fairly} regular basis and it has grown! Or it had grown. I recently gave a couple of cups away to my sisters in Oregon who want to try their hand at sourdough tending and baking. Now I need to work at building it back up again.

But before I gave some away, I was starting to get quite a jar full. So I decided to try making sourdough pizza crust! Even though my starter isn't super sour, I thought it would make a deliciously flavorful crust. It did! What a yummy change for our Friday pizza nights! The sourdough crust was a great blend of chewy and crisp, with a very subtle but rich flavor. I usually make a whole wheat thin crust, but this new crust will definitely be added to the rotation whenever I need to use up a cup of starter!

It is a little time consuming, but worth the effort! I've heard it said that sourdough is a lazy bread. It needs lots of time to rest in between steps. :) This pizza crust is no exception, but the great thing is that it makes two crusts, so if you are a small family or a couple like us, you can freeze the other crust for next week!


Sourdough Pizza Crust
makes 2 thin crust 12" pizzas or 1 thicker crust 14" pizza

1 cup sourdough starter (straight from fridge, unfed)
1/2 cup hot tap water
2 1/2 cups flour
1 tsp salt
1/2 tsp instant yeast

Spoon starter into a mixing bowl. Add hot water, flour, salt and yeast. Mix to combine, then knead till smooth and slightly sticky, about 7 minutes at medium speed using a stand mixer fitted with dough hook. Place the kneaded dough in a lightly greased container and allow to rise until just about  doubled in size. This might take 2 to 4 hours, depending on how vigorous your starter is.
For two thinner pizzas, divide the dough in half and shape each half into a flattened disk. Drizzle two round 12 in. pizza pans with olive oil, tilting to coat. Place one half in each pan. Cover and let rest for 15 min.
Gently press dough towards the edges of the pans. When it starts to shrink back, cover and let is rest again, about 15 min. Finish pressing the dough to the edges of the pans.
(For 1 thicker crust pizza, follow directions above without dividing dough in half and using a jelly roll pan or 15 in. pizza pan.)
Cover pan(s), let dough rise until it's as thick as you like (mine was fine without rising any longer, but you may find you want to let yours rise for an hour or more).
Preheat oven to 400.
For thin crust, prebake the crust about 4 min. before topping. Top, then bake until cheese is bubbly, about 8 min. For thicker crust, prebake about 8 min. Top, then bake about 10 more minutes.
Remove from oven, let cool slightly before slicing and serving.

Saturday, January 5, 2013

{Easy} Chicken Marsala


So remember my new commitment to no mushrooms left behind? Starting over? No awkward glances and all that?

Well, I decided that if I was to really be an adventurous, willing-to-taste-anything kind of cook, then mushrooms and I better start working on our relationship. For real. So you know what I did? I chose a dish packed with mushrooms. It can't get much more mushroomy than chicken Marsala, right?

And oh, my gosh. I was blown away. This dish is not only simple, not only elegant, but it is so amazingly delicious! And rather than being delicious in spite of the dreaded fungus, it seems to, suspiciously enough, be because of them! How do you like them apples? Er...mushrooms?

The chicken is deliciously moist and the sauce is out of this world. As a suggestion, I believe the Marsala sauce was invented to swim atop a pile of homemade mashed potatoes. Just sayin'.


So I'd say we're better friends now. I mean, not like the kind of friends who have sleepovers and tell all their deepest, darkest secrets...but at least I think we're more than acquaintances. Though really, you'd have to ask the mushroom.


Chicken Marsala
Serves 4

2 chicken breasts, split and pounded to 1/4 in. thick
Salt and pepper to taste
1/2 cup flour (or corn starch for gluten free)
Up to 1/2 cup olive or vegetable oil
8 oz. mushrooms, sliced and cleaned
2 TB butter
1/2 cup Marsala wine
1/4 cup chicken broth
1/4 cup sherry or dry white wine
Optional: 2 TB heavy cream
Garnish with chopped parsley or oregano if desired

Season chicken with salt and pepper and dredge in flour.
Heat oil over medium-high heat. Fry chicken 3-4 min. on each side or until they are golden brown. Remove and place on a serving platter and cover with foil. Carefully soak up any excess oil in pan with paper towels.
Reduce heat to medium and add butter and mushrooms. Sauté mushrooms for 4-5 min., making sure to season them with salt and pepper lightly. Add Marsala wine, sherry, cream, and chicken stock, allowing the liquid to reduce slightly- about 3 min. Pour mushrooms and sauce over chicken and serve. Enjoy!

Thursday, September 13, 2012

Pork n' Penne Skillet

I have been enjoying a recent library rental cookbook called the Taste of Home Busy Family Favorites. It has many tested, quick, easy and delicious meals for days when you're on the go or simply don't have time to be in the kitchen for an hour or more. All the recipes take about 30 minutes to make, and this one has the added bonus of being a "one-pan" skillet supper! Sometimes it's nice not to have a stack of dishes to wash when you're done cooking (I'm sure my husband thinks so- he's usually the dish washer)!

That being said, this yummy dish is not only quick, but it's delicious! Tender strips of pork, penne, mushrooms (yes, I said mushrooms...we'll get to that in a moment), peppers and onions, all simmering in a creamy tomato sauce...this is some serious comfort food.


So, about the mushrooms.

If you know me very well, you know that mushrooms are a food I ignore.

I'm not on an active campaign to destroy them, I just avoid them.

And, if they happen to be included in something I want to order, the menu and I exchange awkward glances and I order something else.

Or sometimes I boldly order previously mushrooms laden entrees sans mushrooms.

That's all.

But...this year on Mother's Day we had steak at my in-law's house and Mom sautéed these gorgeous mushrooms in butter and served them with the steak. WOW. I was intrigued.

It was enough to convince me to give mushrooms a chance. I had never cooked with fresh mushrooms before, so maybe it wasn't fair, this avoidance of mine.

So...I bought some.

And put them in this skillet.

Then I ordered a meal at Applebee's that featured mushrooms with chicken. I ate them.

Then I put them on pizza.

All instances were very tasty! Needless to say, I think my frigid relationship with mushrooms is over. While we still aren't BFF's, I am definitely letting them into my life.

No more awkward glances.

Pork n' Penne Skillet
from Taste of Home Busy Family Favorites
serves 8 (I halved it for us)

2 TB flour
1 tsp chili powder
3/4 tsp salt
3/4 tsp pepper
1 lb. boneless pork loin chops, trimmed and cut into strips
2 cups fresh sliced mushrooms
1 cup chopped onion
1 cup chopped red sweet pepper
1 tsp oregano
1 TB oil
1 TB butter
1 tsp minced garlic
3 cups milk
1 can (15 oz) tomato sauce
2 cups uncooked penne

In a large resealable plastic bag, combine flour, chili powder, salt and pepper. Add pork, a few pieces at a time, and shake to coat.
In a large skillet, cook the pork, mushrooms, onion, pepper and oregano in oil and butter over medium heat for 4 to 6 or until pork is browned. Add garlic, cook 1 min. longer.
Add milk, tomato sauce, and pasta. Bring to a boil. Reduce heat; simmer, uncovered, for 15-20 min. or until meat is tender and pasta is done.

Wednesday, March 7, 2012

Spaghetti with Mozzarella-Stuffed Turkey Meatballs and Chunky Marinara {a Crazy Cooking Challenge}

Wow. I think I set a personal record for the longest title yet! And rightly so. If any, flavor-packed dish is deserving of a long, drawn out title, this delicious spaghetti is.


When I heard that the March cooking challenge would be spaghetti, I was delighted. Spaghetti, how I love thee...let me count the ways:
1) Plain and simple: easy, ground beef simmered in sauce out of a jar, over plain noodles.
2) Quick homemade sauce with Italian sausage, over whole wheat thin spaghetti or angel hair
3) Mom's recipe, chicken simmered in red sauce all day in the crock-pot, served over rotini.
4) Always, always!! With sour cream and shredded cheese. Yes. Ah, comfort food.
5) WITH THESE MEATBALLS- I mean, hey! They are stuffed with cheese for goodness' sake!! What more can you ask?? Bacon, you say? Bacon and cheese stuffed meatballs?? Hmm, that is an idea worth considering. Moving right along...

Photobucket

 I can't even begin to tell you how much flavor is packed into these little round balls of meat. Also known as meatballs. When I stumbled upon this recipe on Lauren's Latest, I knew I had found my ultimate spaghetti. But, alas! There was no sauce recipe, so I searched the web for the perfect sauce to compliment such a magnificent concoction as cheese stuffed meatballs. Moist, flavorful, cheese stuffed meatballs. Chunky Marinara from For the Love of Food caught my attention. It is chock full of tomatoes and onions and is just perfect for a gal like me who doesn't like to drown her pasta in red sauce.

Now, normally incredible yummyness is accompanied by a heaping serving of guilt. HOWEVER...take a moment to calculate with me... Turkey meatballs + Vegetable-laden-sauce + Whole wheat spaghetti = Healthy! Yay! Devour the incredible yummyness and throw the guilt out the window!

Anyhow, long story short, I combined recipes from these two fantastic bloggers, and it magically transformed into one delicious meal.


Spaghetti with Mozzarella-Stuffed Turkey Meatballs and Chunky Marinara
combined and tweaked by Jenn
Original recipes by Lauren's Latest and For the Love of Food
serves 4-6

whole wheat spaghetti noodles, or noodles of your choice

For meatballs:
1 slice white bread
1/4 cup milk
1 1/4 lb. ground turkey
1/2 cup finely diced onion
2 cloves garlic, minced
1 TB ketchup
1 egg
3/4 tsp salt
1/2 tsp ground black pepper
1/2 tsp dried basil
1/4 tsp dried oregano
1 tsp dried parsley
24 1/2 in. cubes mozzarella cheese

Preheat oven to 375. Grease or line baking sheet with parchment paper. Tear bread into chunks and place in large bowl. Pour milk over bread and let it soak while you chop onions and garlic. Add the remaining ingredients (except cheese) to the bread/milk mixture and mix thoroughly. Scoop mixture by the tablespoon into your hand and push one cube of cheese into the center. Press meat mixture around cheese to completely cover and place on baking sheet. Repeat until all meat mixture is used. You should have 24. Bake 20-23 min. or until meat is thoroughly cooked. Serve with marinara atop spaghetti.

For marinara:
1 med. yellow onion, diced
1 garlic clove, minced
1 can diced tomatoes
1 tsp dried Italian herbs
1 tsp dried basil
2 TB red wine vinegar
1 TB olive oil
salt and pepper to taste

Saute onions in olive oil about 5 min or until translucent. Add garlic and saute several minutes, until fragrant. Add the rest of the ingredients and simmer at least 5 min. Serve with spaghetti and meatballs.

Saturday, March 3, 2012

{Light} Lasagna Soup

I'm serious when I say that this soup really tastes like lasagna. I had my doubts about whether or not it would follow through on it's claim, but taste like traditional lasagna it does AND the amazing part is it tastes like the classic Italian comfort food while weighing in at only approx. 225 calories a serving!! I converted this recipe from the Deen Bros. to a slow-cooker version, which was much more convenient for me and worked out perfectly.


If you are craving the combined flavors of noodles, cheese, tomatoes and hearty Italian sausage, but feel guilty about piling on the calories, this soup will be a perfect remedy for your comfort-food fix!


Lighter "Tastes Like Lasagna" Soup
adapted from the Deen Bros. recipe via Pinterest
serves 4-6

2 tsp olive oil
1 lb. Italian turkey sausage, casings removed
1 onion, chopped
3 cloves garlic, minced
1 (32 oz.) container of chicken broth
1 (15 oz.) can tomato sauce
1 (14.5 oz.) can petite diced tomatoes
1/2 tsp salt
1/4 tsp crushed red pepper
4 oz. broken lasagna noodles (about 4 noodles)
1 tsp dried basil
3 TB grated Parmesan cheese
1/2 cup shredded mozzarella cheese

Heat the oil over med-high heat in a large skillet. Add the sausage, onions and garlic. Cook, stirring occasionally, until the sausage is crumbled and browned.
In slow cooker, combine broth, tomato sauce, diced tomatoes, salt, red pepper and basil. Stir in sausage mixture. Cook on low about 6 hours.
When ready to serve, cook noodles "al dente" according to package directions. Stir into soup. Stir in Parmesan and mozzarella. Top with sour cream if desired.

Thursday, March 1, 2012

Creamy Tuscan White Bean Pasta

This amazing pasta dish requires quite a few ingredients I do not consider "staples", and it was probably one of our more expensive dinners, but for a treat and something out of the ordinary, it was WAY worth it! I absolutely love the combinations of all the vegetables with the creamy sauce and pasta, complimented by delicious white beans. As far as I can remember, I have never had beans in pasta before- it was awesome! I used whole wheat shells, and the beans sort of hid inside the shells, giving the pasta a new, rich flavor and texture. Mmm, mmm!


The first step of this delicious meal from "How Sweet It Is" is to roast a red pepper- something I had never done before! It was super easy and provided fantastic results! The roasted pepper lent an incredibly smokiness to the whole dish. It's so simple, you don't even need a recipe. Just preheat the broiler of your oven, slice the pepper and lay skin side down on a baking sheet. Broil about 10 min. or until the pepper skins start to get good and blackened. Immediately remove peppers from the sheet with tongs and put into a Ziploc bag. Seal and let them "steam" for 20-30 min. Peel the skins off if they're really charred. It really is that easy!! Can I get a "YUM!"? Now that I know this amazing trick to roasting my own red peppers, I will definitely be looking for recipes including them. I bet they would be awesome on pizza...

The other amazing vegetables included in this dish account for the "Tuscan" title: spinach, sun dried tomatoes and artichoke hearts. What a winning combination!


And the only thing that can make all this even better? If you said bacon, you are absolutely correct (really, could there be another answer to that question?)! Pancetta, also known as Italian bacon, adds a delightful, smoky flavor to the pasta, especially since the onions are cooked in the grease...

And the glue that holds it all together...a creamy, light Parmesan white sauce. What a perfect compliment to an outstanding meal.


Creamy Tuscan White Bean Pasta
adapted from How Sweet It Is
serves 4

2 cups whole wheat shells or other pasta
1/4 cup chopped pancetta
1/2 onion, chopped
3 garlic cloves, minced
4 cups fresh spinach
1 roasted red pepper, chopped
1/4 cup sliced sun-dried tomatoes
5-6 artichoke hearts, chopped (about 1/3 cup)
1 can white beans (I used Great Northern)
2 tsp dried basil
1 TB butter
1 TB flour
1 (15 oz) can skim evaporated milk
1/2 cup low-fat milk
3 TB Parmesan cheese
salt and pepper to taste

Boil water and prepare pasta according to package directions.
Heat large skillet over med-high heat. Add pancetta and cook until crispy and fat is rendered; remove and drain on a paper towel. Reduce heat to med-low and add onion, stirring to coat. Cook 3-5 min or until softened. Add garlic and spinach and stir until spinach is wilted. Add in peppers, tomatoes, artichoke hearts, beans, and basil, stirring to mix. If pasta is done, add it as well. Reduce heat to low and stir every few minutes while you make the sauce.
Heat a small saucepan over low heat and add butter. Once sizzling, whisk in flour and cook until golden and fragrant. Add in milks, allow to come to full boil while stirring continuously. Reduce to simmer and stir another 5 to 7 min until it thickens a bit. Reduce to low and add Parmesan cheese. Taste and season with salt and pepper.
Pour cream sauce into skillet with vegetables, pasta and beans, then add in bacon. Stir to mix, then transfer to a large serving dish. Enjoy!

Wednesday, November 30, 2011

Chicken-Cheese Lasagna Roll-Ups

Name the #1 most irritating thing about otherwise divine lasagna:
(I'll give you a hint: it has nothing to do with ingredients)


*pause*


If you're like me, you said "Keeping all the layers together when you cut and serve it!" While I am not an expert on solutions to that problem, I did recently find a recipe that took ALL the work out of slicing up an inviting pan of lasagna. In fact, there's no slicing required at all! This "lasagna" comes in individual servings! What I'm talking about is a lasagna "roll-up"- all the deliciousness of lasagna rolled into a convenient and beautiful little package. I recently discovered Pinterest (which, by the way, is incredibly addicting!) and that is where I first spied this idea (by the way, you can follow me on Pinterest by clicking that red button over there...just sayin'). They looked so intriguing, I had to give it a try! I'm so glad I did.
This recipe is a little different than traditional lasagna because it uses chicken instead of a traditional meat sauce, but now that I've tried this once I can't stop thinking of other ideas- definitely more traditional, vegetarian, Alfredo, you name it! You could wrap all sorts of tasty things up in these gorgeous noodles!
The first step if you don't have any pre-cooked chicken on hand is to bake some chicken breasts. While the chicken is baking, go ahead and boil the lasagna noodles according to the box directions for "al dente".
Once the chicken is done, dice it up and combine with the cheeses, milk and pepper. Yes, three yummy cheeses. ricotta, feta, and Parmesan.

Can you have too much cheese? I think not.

Can't have too much cheese! However, I found this particular blend of cheeses to be a little dry, even with the addition of milk. I think I might swap the Parmesan or feta out for mozzarella next time to add a little more moisture and gooeyness.
Spread some spaghetti sauce in the bottom of a pan (I found an 11x7 was about perfect, but if you don't want them so cozy, a 9x13 would work well also).


Lay the lasagna noodles out flat, working one at a time. Put about 1/2 cup of the mixture (or just divide it into eighths) onto each noodle and spread it down the length of the noodle, leaving about 1 inch at the end empty (this helps with sealing).


Then roll the noodle loosely toward the empty end. If your noodles are still warm, they will seal easily.

Aren't they pretty?
Place the roll seam side down on top of the spaghetti sauce. Repeat with the remaining noodles and cover with more sauce. Cover and bake!


I served ours with a green salad and it was a delicious meal. I loved how the rolls were so easy to remove from the pan, no mess, no slicing. And it tasted a lot like traditional lasagna, just in a more convenient form!


Chicken-Cheese Lasagna Roll-Ups
(printable version)
serves 4-8 (depending on your appetite!)

3 cups chopped cooked chicken
1 cup ricotta cheese
1/4 cup feta cheese
1/4 cup Parmesan cheese
1/4 cup milk
1/8 tsp white pepper
8 lasagna noodles, cooked and drained
2 cups spaghetti sauce

Preheat oven to 375.
Combine chicken, cheeses, pepper and milk. 
Spread 1 cup of the spaghetti sauce in bottom of pan.
Spread 1/2 cup chicken mixture on each noodle; roll jelly roll fashion.
Arrange rolls, seam side down, on top of sauce in pan.
Cover and bake 30 min. or until hot.
Serve, if desired, with additional Parmesan cheese.

Sources: iVillage, Pinterest

Sunday, November 6, 2011

Roasted Butternut & Sweet Potato Lasagna

Oh dear. This is my third post about butternut squash in what, 2 weeks? I think I'm in love. It just keeps getting better. First, this incredible soup. Then, it turned traditional pizza on its head. Now...it has invaded the comfortable world of lasagna.


And I love it even more for the intrusion. Not long ago, I wouldn't have dared put a vegetable in my lasagna (besides tomato sauce), but this delectable yellow gourd has turned a lot of my preconceived notions about vegetables and meatless dinner upside down. Even my husband has been blown away by how delicious and filling a meatless entree can be. I'm begging you as a friend to please, please put all your inhibitions aside and make this lasagna. Okay. Now that I've reduced myself to pleading, let's proceed to the "how" of this culinary adventure.
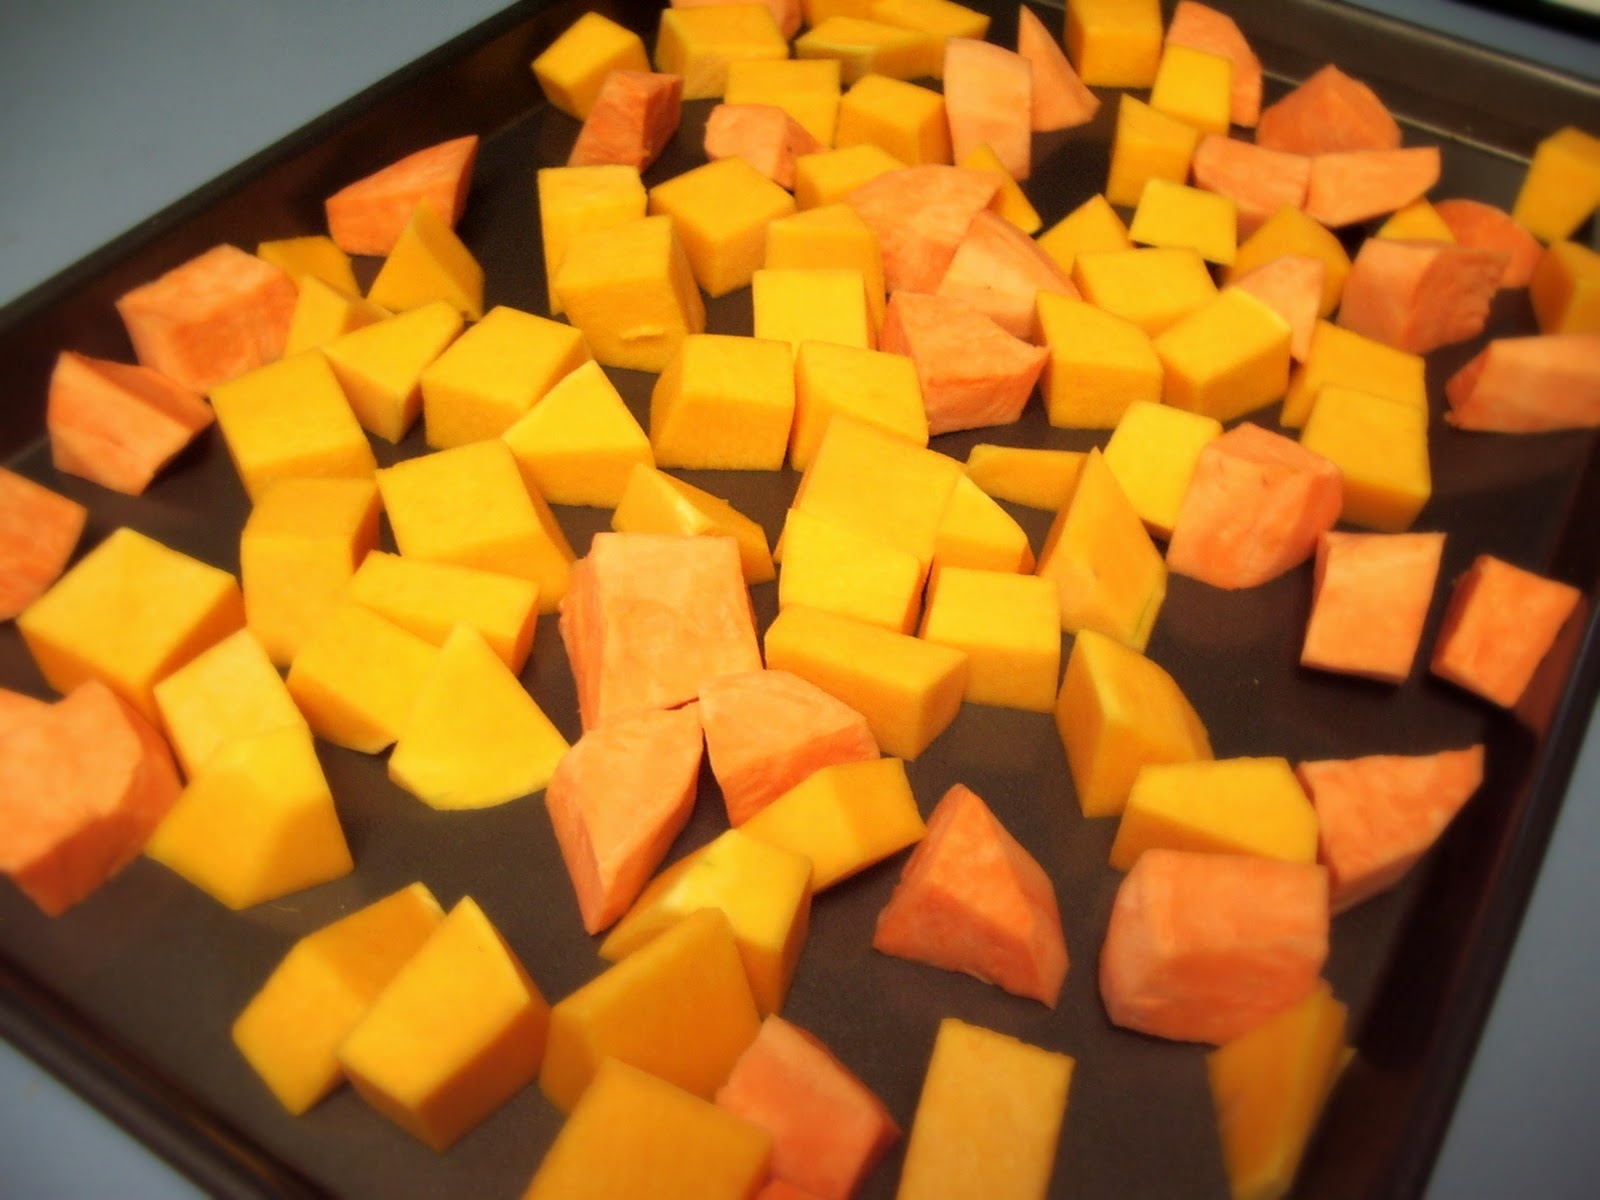
Begin by peeling and dicing a butternut squash and one or two sweet potatoes or yams. Side note: this is not an expensive dish. I purchased a medium sized squash for only a little over $3 and it played a starring role in 3 dinners, plus leftovers! You want to end up with 3 1/2 to 4 cups altogether. Spread them on a baking sheet and drizzle with a bit of olive oil, sprinkle with nutmeg, salt and pepper; toss to coat.


 Roast in the oven until they are slightly crispy and soft enough to poke a fork through.


While the squash is roasting, you can get to work on the cheese filling. The first step in the filling is to cook onions (or shallots) and garlic in brown butter. I didn't have any shallots, so I substituted some sweet onion, which seemed to work fine.


If you haven't browned butter before, you'll find a tutorial here.
The original recipe also called for mascarpone cheese, which sounds amazing, but which I could not find, even at our local Safeway. So, if you can't find it in your area either, you'll find a substitute recipe below. It was delicious. Combine the browned butter, onions and garlic with the mascarpone (or masquerading mascarpone- say that 10 times fast!) and add Parmesan cheese. Set aside.
When the squash and potatoes are done, transfer them to a bowl and mash until smooth with a pastry blender. I whipped them up even creamier with an electric mixer.


Now, you're finally ready to layer!


Some of the comments on the blog I found this recipe on complained that the bottom noodles were crispy, so it was recommended that you put a bit of the squash on the bottom of the pan first- which I did (and it turned out perfect).


Cover that with lasagna noodles. I discovered oven-ready lasagna noodles for the first time on our last shopping trip and had to try them. I must say, I am impressed. They turned out perfectly, no pre-cooking required! Squash mixture goes on top of that, followed by the cheese filling.


Sprinkle a bit more cheese on that, then repeat! This is probably the easiest part of the whole ordeal. :)


Pop it in the oven and wait for delicious aromas to start pouring forth. They will.
Usually you can be fairly alerted to the presence of a tasty meal by the smell. And this dish is no exception whatsoever. I knew I had hit on something good when my husband kept coming in the kitchen, sniffing and saying things like, "Boy, that smells amazing!" It did. We could hardly wait for the pan to come out of the oven and cool long enough to slice. Hubby, hovering, says, "Can we eat it yet?" Good things come to those who wait.
There are so many flavors packed into this hearty dish I don't even know where to start. Which is why, I beg you, please make it for yourself! One thing we remarked to each other as we were eating (pulling our mouths away from our forks long enough to speak was pretty remarkable, come to think of it) was that you could distinguish each separate flavor as you were eating. Squash, smooth and rich. Then tangy and creamy cheese. Nutmeg, aromatic and spicy. Fragrant and pungent garlic. A hint of mellow sweet potato. It was all there. Together, but somehow...separate. Each bite was packed with alternately bursting and mellowing flavors. What an experience! In the words of the blogger who drew me in: "It's like eating a giant plate of autumn." I couldn't have said it better myself.

"I know that this mess of cheesy squash doesn’t look like much, but I gotta tell you that it’s probably the most visually underrated dish I have ever made." - How Sweet It Is blog

Roasted Butternut & Sweet Potato Lasagna
(printable version)
adapted from "How Sweet It Is"
serves 4-6 as main dish

enough lasagna sheets (preferably no-boil) to cover 8x8 pan twice (I used 4 Ronzoni oven-ready sheets)
1/3-1/2 of a medium butternut squash, peeled and cubed (about 2 cups)
1-2 medium sweet potatoes or yams, peeled and cubed (about 1 1/2 cups)
12 oz. mascarpone cheese or substitute (see recipe below)
3 TB butter
1/4 cup finely diced onion
3 garlic cloves, minced
1 1/2 cups grated Parmesan cheese
1/2 cup grated mozzarella cheese
1 tsp salt
1 tsp pepper
1/4 tsp nutmeg
olive oil for drizzling, about 2 tsp.

In shallow baking pan, drizzle squash and potatoes with oil, sprinkle with half the salt and half the pepper and the nutmeg; toss to coat. Roast at 350 for 40-50 min. or until soft and slightly crispy. Cool slightly.
Meanwhile, heat skillet to medium, add butter, onion and garlic. Saute 2-3 min. or until butter is browned, but not burned and onions and garlic are fragrant and transparent. Cool slightly. Combine mascarpone with onions, garlic and butter. Stir in 3/4 cup of the Parmesan.
Mash squash and potatoes until smooth and spreadable. Grease 8x8 in. pan. Coat bottom of pan with small amount of squash mixture. Top with lasagna noodles. Coat with half of remaining squash mixture, followed by half of the cheese mixture. Top this with half of the remaining Parmesan and half the mozzarella. Repeat with remaining ingredients.
Bake in 350 oven for 45 min or until cheese is bubbly and lightly browned.

Mascarpone cheese substitute:
8 oz. cream cheese
1/4 cup heavy cream or half and half cream
2 1/2 TB sour cream

Mix all together until smooth and creamy.

Sources: How Sweet It Is

Thursday, September 1, 2011

Mother Hubbard's Spaghetti Sauce

Even though it's September 1st, I'm at the end of my grocery month. The cupboards are getting bare, the refrigerator is hollowing out, and even the freezer is mostly occupied by...cold air. We are going grocery shopping tomorrow- yay! So tonight's dinner was a bit of an experiment and a last hurrah. I knew I wanted to make spaghetti (a good, last minute, throw together meal), but I didn't have any spaghetti sauce...at least not pre-made, in a jar. So, I made my own. I have made my own spaghetti sauce many times in a pinch, but it comes out different every time I think- usually because I hadn't planned on it and I use what I have on hand. What did I have on hand today? 1 can of diced tomatoes, 1 can of tomato paste, onions, 3 tiny cloves of garlic and the usual herbs. So, I put it all together while trying to decide what kind of meat to add. I have some frozen chicken breasts, but we've eaten a lot of chicken lately. I have 1 lb of hamburger left, but I want to save it for chili for our potluck on Sunday. I had almost decided to defrost the hamburger anyway when I had a flash of inspiration- the 2 sweet Italian turkey sausages leftover from a BBQ in the freezer! Perfect. After defrosting, I split the casings open and sauteed the meat inside with onions and the little bit of garlic I had. After mixing the meat with the sauce, I put it in the crock pot to simmer for a few hours (and of course, infuse the house with an amazing smell!). Ladled atop whole wheat spaghetti (and a bit of penne mixed in to make it stretch, haha), and served alongside garlic bread and salad it made a delicious and hearty meal!


I have to say, I think this is the best sauce yet. Thankfully, I took down my measurements just in case it came out well.  The "recipe" is as follows- tweak it how you like!


Mother Hubbard's Spaghetti Sauce
(printable recipe)
a KitchenJoy original recipe
makes 4-6 servings

1 can petite diced tomatoes
1 can tomato paste
1/2 cup water
1/2 tsp oregano
1/2 tsp basil
1/4 cup finely diced onion
2 garlic cloves + 1/4 tsp garlic powder (use all fresh garlic if you have enough)
2 sweet Italian turkey sausages, casings removed (substitute other meat if desired)

Mix tomatoes, paste, water and herbs. Set aside.
Saute onions, garlic and sausage until meat is browned and onions are transparent.
Stir meat into tomato mixture. Simmer on stove-top for at least 15 minutes or simmer in crock-pot on low for about 4 hours.
Serve atop spaghetti or other pasta.

Friday, October 8, 2010

Welcome to My Pizzeria! (Whole Wheat Pizza Crust)

I love pizza! I don't know very many people who don't love pizza, come to think of it... :) My family used to have pizza and movie nights every Sunday when I was growing up (and I think they still do!) and for many years my sisters and I made our own homemade pizza crust. I have tried many recipes for crust, all of which were good. But a few months ago, I think I stumbled on my favorite crust yet. I was on a diet (still should be, haha!) and looking for a low calorie, thin crust I could use with some healthy toppings. I can't remember where I found it, actually, so I'm not sure who to give the credit to! But the last two times I've made it, I have gone the healthier route and used whole wheat flour, which I think improved it even more- not only is it good for you, but the whole wheat gives it a great flavor! If you haven't tried a homemade crust, and you like your crust a bit on the thin side, you've got to give this recipe a try. It's easy and tastes fabulous with any toppings! We have tried ham & pineapple (for all you Hawaiian fans!), pepperoni with or without olives, and I've even used leftover sloppy Joe or taco meat for a topping- yum! It depends on what I have between the cupboard and the freezer! But I think our favorite is the ever-being-modified chicken pizza. But I need to start at the beginning!
First things first- as all good recipes start: preheat the oven! This is the only recipe I have ever made where you heat the oven to 500. Yeah. That's hot. :) While the oven is warming up to this insane temperature, I mix the yeast and sugar with warm water and let it sit while I mix the flours and salt together and cook the chicken. After about 8 minutes, I pour the yeast mixture over the flour and stir with my favorite wooden spoon. Then I form the dough into a ball and knead it for about 2 minutes, then press it into a semi-round shape. Then comes the fun part! You can do it however it seems to work for you, but I like to hold the dough in my hand and keep turning it around and around while I gently pull the edges out. I usually do this until it starts to tear a little, then I put it on the greased pizza sheet and begin pressing it out toward the edges of the pan (if you make it pretty thin, it will fit one 15" pizza sheet, but you can go smaller if you like it a bit thicker- experiment!). If any holes appear, just pinch them shut with your fingers!
Next, spread your sauce of choice on top. I like Ragu Homemade style (since we are going homemade here...). Chicken pizza is also delicious with white garlic sauce, but I haven't tried that at home yet. Spread as generously as you like (I go pretty thin- I don't like really saucy pizza), but don't forget to leave the edges sauce-free for the crust! Cheese goes on top of this, of course, and again you can choose your preference! I usually go with all mozzarella for the chicken pizza, and a blend of mozzarella and cheddar for pepperoni, Hawaiian and other varieties. I have also used a blend of mozzarella and feta for the chicken pizza, which is also very yummy. However, feta isn't something I usually have on hand!
The last step in the pizza-building process is the toppings! I think my chicken pizza turns out just a bit different every time, depending on what I have around to add to it!
Tonight's version included: one diced chicken breast, pan-fried in olive oil and sprinkled with Pizza seasoning (a mixture of oregano, basil, marjoram & garlic) and garlic powder, two fresh diced Roma tomatoes, a can of sliced olives, and generous amounts of fresh spinach. A note on the spinach: add this last and don't be afraid to cover pretty much the whole pizza with it. It shrinks lots during cooking, so if you don't put on very much, you'll regret it. If you cover the whole thing, it shrinks up to be just the right amount. This is what our pizza consisted of tonight, but don't be afraid to experiment with your own favorite flavors!
Once all the toppings are situated, pop that pizza in the oven! The blazing 500 degrees cook it in only about 10-12 minutes (or maybe less, depending on your oven!).
One of the best things about making pizza at home is getting your creative juices flowing and creating your own masterpiece! Experiment with flavors. Cheeses, meats, veggies. The possibilities are endless! This is the stuff traditions are made of.

Homemade Whole Wheat Thin Pizza Crust
(printable version)
(if you don't want whole wheat, just use all white flour)
makes 1 pizza

1 .25 oz. package of active dry yeast
1/4 tsp sugar
3/4 cup warm water
1 cup whole wheat flour
3/4 cup white flour
1/2 tsp salt
1/2 tsp Italian herbs

Preheat oven to 500 degrees. In small bowl, dissolve yeast and sugar in warm water. Allow to rest for 8 min. Mix flours, salt and herbs in another bowl. Pour yeast mixture over flour and mix with sturdy spoon. On lightly floured surface, knead dough for about 2 min. Allow dough to rest covered with a cloth about 5 min. Press into a 12" circle. You may also lift off of counter and rotate in hands, pulling dough gently into a circular shape. Place on lightly greased pizza sheet, stretch and press dough to edges. Spread with sauce and add desired toppings. Bake 8-12 min. or until edges are golden brown. Enjoy!

Wednesday, March 24, 2010

Just When I Thought it Was Safe... (Pumpkin Macaroni and Cheese)

Macaroni and cheese. What comes to mind when you read those words? If you're like me, you probably suddenly felt oddly calm and warm just picturing the familiar cheesy, steaming noodles. A sense of safety and comfort, maybe even some soft childhood memories surface. I love tradition. I grew up in a happy, big family with LOTS of traditions. Traditions for birthdays, Mother's Day, Valentines, Thanksgiving, 4th of July, Sunday nights, bedtime, weddings, and of course, Christmas. I love our traditions, and, like all good traditions, they have to be done right. Macaroni and cheese is like a good tradition. Comfortable, warm, gooey, cheesy, and you can count on it to always be the same. At least that's what I thought.

A few months ago, I encountered a recipe that challenged my beliefs about good ol' Mac. Pumpkin Macaroni and Cheese. Just the title tells you something is terribly wrong. Someone put pumpkin in my mac?! And looking further down the list of ingredients I was appalled to find no mention of that favorite and familiar cheese...cheddar! It just wasn't there, and in its place was the frighteningly foreign "Gouda." I did have some leftover pumpkin in the freezer though...I saved the recipe to my computer, hoping that someday I might be courageous enough to try it, though a nagging voice kept telling me I'd be betraying the standby.

A few weeks ago, however, when making out my meal list, before I could change my mind, I quickly wrote "Gouda" on my shopping list. And, at the store, I hesitated again. Gouda wasn't so expensive, but still my hand hovered over the cold case...I'd never bought a round cheese encased in red wax before. My husband encouraged me to go for it, and it was done.

Yesterday afternoon, on the way home from a friend's house, I stopped at our general store for some milk. My mac n' cheese recipe also called for Red Cayenne Pepper, which I did not have and intended to leave out, seeing as I don't like spicy things and there was only 1/8 of a tsp anyway. But, I decided to check the spice aisle just in case. Now, mind you, my husband and I live in a very rural area, and our little general store really just carries the basics. The closest real grocery store is about 17 miles away. I highly doubted Cayenne pepper would be in much demand here. Lo and behold, however, two dusty little canisters sat neglected on the shelf, not even priced. I inquired about this, and the shopkeeper couldn't find the price either, so he sold it to me at $1.99, which I have no doubt was quite a steal! It was meant to be! :)

I decided to make the dish in the afternoon, ahead of time, so I could have plenty of time and room for my experiment. I love trying new things, so my mood was almost giddy! It makes me so happy just to be in the kitchen, creating!
The first step was to whirl chunks of bread in the blender. Sounded funny to me, but what I got were beautiful fine crumbs, so perfect that I had to laugh- I never would have thought to use the blender for that! These I mixed with Parmesan cheese. I was a little wary of the bread crumb idea, having had only one experience with crumb-topped macaroni. The dish I had ordered that way had seemed dry and crunchy- not at all my idea of perfect mac n' cheese! But, setting aside the crumbs for later, I also decided to set aside my misgivings. Then I began to multi-task. Those of you who cook know that you can hardly escape multi-tasking. Cooking perfects your ability to do so! This simmering here that broiling there, chopping up something for the next step, washing a vegetable, and watching the clock all the while! So, while the pumpkin puree and chicken broth simmered on the back of the stove, I chopped onions and got them bubbling in some butter...grating the Gouda in between stirs.


Now, Gouda is a little more difficult to grate that cheddar, as it is a softer cheese. I couldn't resist nibbling a bit- my first taste of Gouda! I have been trying since yesterday to describe the flavor. It is entirely different than cheddar- mild, yet strikingly rich, with maybe just a slight tang. It is a lovely mellow orange color. The aroma of the onions, butter, flour and milk simmering away was heavenly!

While the pasta boiled on the back burner, I mixed in the cheeses, spices (a seemingly odd combination of nutmeg and the cayenne pepper...) and the pumpkin mixture to create a delightful orange sauce. After draining the macaroni, I poured it into a 11x7 glass dish, pouring the sauce over all. After mixing enough to coat, more grated Gouda went on top, then, in true Italian style, I finished it off by sprinkling the pasta with bread crumbs. It looked beautiful.
I popped it into the fridge for later. And promptly forgot to take my frozen roll dough out of the freezer to rise. So, in lieu of lovely fresh-baked rolls we had toast with our adventurous dinner. Oh, well. Guess sometimes you just can't do it all! :)

The macaroni smelled wonderful as it was cooking, and because I refrigerated it, it took about twice the prescribed 20 minutes. But when I set it on the table, it looked wonderful!

The crumbs had turned a perfect golden brown and I was starving! It was delicious! My first bite was fabulous, but subsequent bites were even better as I sorted out the flavors and savored them. Travis doesn't share my same passion for macaroni and cheese in general, so I don't think it had quite the same bewitching effect on him, though he did pronounce it very good. I usually take the second helping as a good sign... ;)
The pumpkin flavor was not strong, in fact my first few bites, I didn't taste it at all. But then every now and then I could catch it. The flavor in general was very mild, not having quite the sharpness that we're used to when we stand by the old familiar cheddar, but possessing something of a mellowed spiciness. The pasta was deliciously moist and I surprised myself by absolutely loving the fine crumb topping!
I have a new respect for macaroni and cheese...one that is not wrapped in tradition, but in new and unique flavors! I've always had a weakness for homemade mac, and this one was-or I should say, is (yay for leftovers!)- a pleasure. Thank you, macaroni, for lending yourself to adventure!


Pumpkin Macaroni and Cheese
(printable version)

Serves 4 to 6

1 slice sturdy white bread,crusts removed
1/2 cup grated Parmesan cheese, divided
1 can (15 ounces) pumpkin purée
1 cup chicken broth
12 ounces pasta shells
1 1/2 tablespoons butter
1/2 cup minced onion
1 1/2 tablespoons all-purpose flour
1 cup whole milk
2 cups shredded Gouda cheese, divided
1/2 teaspoon salt
1/8 teaspoon ground nutmeg
1/8 teaspoon cayenne pepper

1. Preheat the oven to 350°F. Tear the bread into chunks and whirl in a blender until fine crumbs form. Mix with half of the Parmesan cheese and set aside.

2. In a small saucepan, over medium heat stir the pumpkin purée and broth together. Bring to a simmer, stirring occasionally. Cover and keep warm.

3. Bring a large pot of lightly salted water to a boil. Add the pasta and cook until
al dente, 8 to 10 minutes. Drain well and pour into a 2-quart baking dish.

4. Melt the butter in a large pot or Dutch oven over medium heat. Add the onion and cook, stirring frequently, until softened but not browned, about 5 minutes. Stir in the flour and cook for another minute. Slowly whisk in the milk and bring the mixture to a simmer; cook, whisking frequently, until the sauce thickens, about 3 minutes. Remove from the heat.

5. Stir in half of the Gouda, the remaining Parmesan, and the salt, nutmeg, and
cayenne, and whisk vigorously until melted and smooth. Slowly pour in the
pumpkin mixture, whisking until well blended.

6. Pour the pumpkin-cheese sauce over the pasta and stir gently to coat. Sprinkle with the remaining Gouda and then the breadcrumb mixture. Bake until the crumbs are golden, about 20 minutes.

Saturday, February 20, 2010

Spaghetti Pie

Well, to start us out...tonight I made a Spaghetti Pie (Better Homes and Gardens Cookbook). Very different than anything I have ever done with spaghetti. For several reasons. The spaghetti was mixed with egg (weird!) and then used as a "crust" (which it adapted to better than I thought it would...). Then cottage cheese and a meat sauce were layered in that. I thought it looked very interesting, so I had to try it! My favorite part of the whole process was still what is usually my favorite part of cooking...frying up the meat with the onions and garlic (except this time it added green peppers, which I don't particularly care for)...ahhhh, always smells so heavenly! Anyway, the "pie" turned out kind of funny, because, though cooked in a pie plate, it doesn't hold together very well, so you can kind of throw out any thoughts of pretty presentation (which I had!) or even just getting it to stay in wedges. It just kind of falls apart and looks like a cross between mixed up spaghetti and mixed up lasagna. :( But, on the brighter side- it tastes good! It is certainly not exceptional, and I haven't decided if it's good enough to earn a place on my "keeper" list, but it is rather tasty, especially for a girl who salivates over all things Italian!

Anyway, I hope to use this blog as an outlet for myself and to inform you of my raptures over a particularly marvelous recipe or experiences in the kitchen as I learn the art of really cooking, lament a dish that didn't quite turn out to be just what I expected, and maybe even mistakes I make (if I'm brave enough to share!).
Related Posts Plugin for WordPress, Blogger...