Showing posts with label sisters. Show all posts

Wednesday, April 23, 2014

Nutella Swirl Cheesecake Bars {Baking with Sisters, Part 7}


Well, friends, the blogging bug bit me today and I realized I haven't shared with you some of the delicious creations my sisters and I tried out when they were here...over a month ago...

Anyway, just to give you a run-down, here is my evaluation of the pass/fail status of each of the dishes we tried (in no particular order):

1) Nutella Swirl Cheesecake Bars (EPIC SUCCESS! Hence this post- we couldn't stop nibbling at them!)
2) Zucchini Chips (EPIC FAIL...seriously, we ruined two of my cookie sheets)
3) Thai Peanut Sauce Noodles with Veggies and Chicken (MODERATE SUCCESS- veggies were a bit soggier than I had hoped for and the sauce needed something)
4) French Toast Roll-Ups with Nutella and strawberries (SUCCESS- the girls surprised us with these for breakfast and they were to die for!)
5) Sweet Potato and Black Bean Taquitos (SUCCESS- easy, healthy and full of flavor!)
6) Chocolate Chip Cookie Dough Truffles (EPIC SUCCESS! Thankfully they took half the batch home with them or I would have been an elephant by the end of the week)
7) Honey Mustard Mozzarella Chicken (EPIC SUCCESS! I think this easy recipe has earned a coveted spot on all our dinner rotations)
8) Braided Cinnamon Wreath (EPIC FAIL/SUCCESS- it was atrociously ugly (not at all like the picture) and the dough was incredibly dense (don't know where we went wrong)...but it tasted good!)
9) Traditional English Crumpets (MODERATE SUCCESS- I'm on the fence about these. They were incredibly salty (could the the 3 tsp be a typo?), but toasted and smothered with jam, they are just the thing to nibble on while watching hours (and I do mean hours) of Downton Abbey)
10) Slow Cooker Chicken Tostadas (EPIC SUCCESS- of course almost anything in the taco realm is generally amazing...I used my own recipe for salsa crock-pot chicken which I really should share with you one of these days)

So there you have it. Pretty much our menu for the week. And if you're wondering, yes, I did gain weight.


My lovely sister, Jewelissa, tackling the spreading of the Nutella


But back to the Nutella Bars....oh, my, if you love cheesecake, graham cracker crusts, and Nutella to boot, you will be all over these yummy bars. They're easy too! Or at least I think they were easy. I had 3 helpful young ladies in my kitchen. Oh, well. If you think these look too hard, recruit yourself a few helpful young ladies because seriously, you're going to need someone to help you finish them. Or to state the case more truthfully, you're going to need someone to restrain you from finishing the whole pan yourself. Think of it like a safeguard.


Jessica, looking longingly at bars that still have to cool for. three. hours.


Sally from Sally's Baking Addiction says she thinks the hardest part of these bars is swirling the Nutella (which is rather tongue in cheek since that is not difficult at all really), but I think the hardest part is waiting during the 3 1/2 hrs of chilling time!!!

Oh, and as a side note, Hubby accidently picked up cinnamon flavored grahams for me instead of regular and it added this amazing flavor to the crust! So there's an option for you. Accidental discoveries are the best!


Nutella Swirl Cheesecake Bars
makes 16 bars

Crust:
12 full sheet graham crackers, finely crushed (or 1.5 cups crumbs)
6 TB melted unsalted butter
1/3 cup sugar

Filling:
16 oz. cream cheese, room temperature
1 egg
1/4 cup sugar
2 tsp vanilla
1/3 cup Nutella, slightly warmed (makes it easier to swirl)

Preheat oven to 350. Line an 8x8 baking pan with foil and spray lightly with cooking spray. Set aside.
Make the Crust:
In a medium bowl, mix graham cracker crumbs, melted butter, and sugar. Press into lined pan. Bake 5 min. Allow to cool as you prepare the filling.
Make the Filling:
Beat cream cheese, egg, sugar, and vanilla with a hand blender or stand mixer until smooth and creamy, about 3 min. Spoon filling onto the crust and spread out evenly. Drop large spoonfuls of Nutella on top of the filling and swirl gently with a knife.
Bake 30-35 min. or until the cheesecake has set up and the edges are lightly browned. The bars will be very puffy, but will sink slightly as they cool. Allow to cool for 30 min. at room temp. on a wire rack and then chill in the refrigerator at least 3 hours. 
Lift foil out of pan carefully and cut into bars. Store covered in the refrigerator if you have any leftovers (ha!).

Saturday, March 23, 2013

Caramel Apple Cheesecake Bars {Baking with Sisters, Part 6}

When planning our "baking together" menu, the girls and I knew we needed one special treat that would be over the top. As we scrolled through the yummies on our Pinterest boards, the one recipe that kept calling "pick me!" (okay to be honest there were about 20 calling that, but we only had so much time you know!) was the one for Caramel Apple Cheesecake Bars.


Do you see why? With such a promising name, along with a scrumptious, caramel-drizzled photo from The Girl Who Ate Everything, how could we resist?


We decided not to.


It may sound like a fall dessert, but you can typically get Granny Smith apples and Hershey's caramel sauce anytime of year in America.


And Starbucks Iced Coffee, apparently...

We've provided chilly weather, dismal outdoor scenes, a cozy indoor environment and four (no make that five with Hubby...or maybe he counts as two...) healthy appetites...who really needs leaves floating down from trees?


Anyway, we decided it sounded perfect, fall or no.

The recipe was perfectly divided into four parts for us- Crust, Cheesecake Filling, Apples, and Streusel Topping. Oh and for the record, my computer is trying to tell me that streusel is not a word. How about substituting "stressful"? Thanks for the help, but no. No Stressful Topping for me, thank you. The thought of the calories is stressful enough. A little more stress sprinkled on top? No. Streusel will be just fine.


See? Streusel. Not Stressful.

But I'm getting off topic.

Working beautifully as a team, of course, we assigned ourselves each a role.

I made the crust...


Jessica manned the KitchenAid (a new experience for her!) to make the cheesecake filling...


Jewelissa chopped the apples and added spices (the girls had a blast with my "amazing" apple peeler!!)...


Armed and dangerous...to apples, of course.

...and Janell ground out a beautiful streusel topping!


Four hands (oh wait, that's eight hands) sure made the load lighter and the time in the kitchen immensely more fun and the bars were assembled in no time! We played cards while it was baking and lovely smells were wafting out of the kitchen before long.


A game of "Nerds", anyone?

Now the recipe advises chilling the bars and serving them cold, and surely you should store them cold, but don't pass up an opportunity to sneak few bites while they are warm! We certainly couldn't wait and practically before the lid was on the caramel jar little (okay, large) warm forkfuls were disappearing.


Conclusion? The layers of buttery crust, creamy, sweet cheesecake, bursts of tart apple and cinnamon and crumbly topping, all finished off with a drizzle of delectable caramel are simply irresistible. Add the fun of goofing off in the kitchen with your three sweet, adorable and silly sisters, and you're in heaven!


Caramel Apple Cheesecake Bars
makes about 16 bars

Crust:
2 cups flour
1/2 cup packed brown sugar
1 cup butter, softened

Cheesecake Filling:
2 (8 oz.) packages cream cheese, softened
1/2 cup sugar
2 lg. eggs
1 tsp vanilla

Apples:
3 Granny Smith Apples, peeled, cored, and finely chopped
1/2 tsp cinnamon
1/4 tsp nutmeg
2 TB sugar

Streusel Topping:
1 cup packed brown sugar
1 cup flour
1/2 cup quick cooking oats
1/2 cup butter, softened

Drizzle:
1/2 cup caramel topping

Preheat oven to 350.
Crust: In a medium bowl, combine flour and brown sugar. Cut in butter with a pastry blender until mixture is crumbly. Press evenly into a 9x13 pan lined with foil and lightly greased. Bake 15 minutes or until lightly browned.
Cheesecake Filling: In a large bowl, beat cream cheese with sugar with an electric mixer at medium speed until smooth. Then add eggs, 1 at a time, and vanilla. Stir to combine. Pour over warm crust, spreading evenly.
Apples: In a small bowl, stir together chopped apples, sugar and spices. Spoon evenly over cream cheese mixture.
Streusel Topping: In a small bowl, combine all ingredients, using a pastry blender or your hands to get everything very well incorporated. Sprinkle over top of apples.
Bake bars 40-45 min. or until filling is set. Drizzle with caramel topping and let cool. Serve room temperature or cold. Store in refrigerator.

Thursday, March 21, 2013

Soft Pretzel Bites {Baking with Sisters, Part 5}

One of the things my sisters and I love to do together is shop. We all have different shopping styles. Jewel and Janell tend to be zippy shoppers, casing the store in a matter of minutes and assessing the merchandise instantly, spending the rest of the time waiting on a bench outside sipping lattes. I take a little more time, not wanting to miss any item on a sale rack, touching all the pretty fabric I know I can't afford, and stockpiling "maybes"- leery of having to take more than one trip to the fitting room. Jessica is a champion browser, circling the store numerous times to be sure nothing has escaped her notice and deliberating over the question of "to buy or not to buy." Although our styles of shopping differ greatly, there is one thing we always agree on when we make trips to the mall.


Pretzels. There's nothing quite like the aroma of a soft, buttery pretzel after the "hard work" of shopping. Or sometimes it's just the fuel you need to get you in "the zone." Whether enjoyed before, after or during the shopping trip, a mall pretzel is a necessary addition to any girl's day out!

However, this time around, we didn't end up having the time to make the hour-long trek to Spokane for our shopping day, so we decided the pretzels would come to us- in the form of homemade soft pretzel bites!

Teamwork made the task easy and fun and the end result was a delicious pile of warm, chewy, buttery, salty bites of pretzely goodness!

Once the dough was made, Jewel scooped spoonfuls of the bites into boiling baking soda water.


Janell slathered melted butter on the bathed bites and Jessica sprinkled them with Kosher salt.


Then into the oven they went! When they came out we slathered on a little more melted butter for good measure and popped them into our waiting mouths- so delicious! They were the perfect snack to go with an afternoon of Downton Abbey and a hair curling party!!


*Note: we tried dipping our bites in melted Velveeta, but it didn't work so well, so please follow the link to "Smells Like Home" to find a recipe for a homemade cheese dipping sauce!


Soft Pretzel Bites
(printable version)
makes a lot!

1 1/2 cups warm water (110-115 degrees)
1 TB sugar
2 tsp Kosher salt
2 1/4 tsp instant yeast
approx. 4 1/2 cups flour
1/4 cup butter, melted
oil
10 cups water (plus more)
2/3 cup baking soda (plus more)
2 TB butter, melted
more salt (for sprinkling)

In the bowl of a stand mixer fitted with the paddle attachment, mix water, sugar, salt and yeast on low speed for 10 seconds. Switch to the dough hook and add the butter and flour. Mix on low speed until well combined. Change to medium speed and knead until the dough is smooth and pulls away from the side of the bowl, 4 to 5 minutes. If necessary to prevent sticking, add more flour 1 TB at a time. Remove the dough from the mixer bowl and transfer to a well-oiled bowl. Turn dough to coat. Cover the bowl tightly with plastic wrap and set in a warm place for 50-55 minutes or until the dough has doubled in size.
Preheat oven to 425. Grease 2 large baking sheets or line with parchment paper. Set aside.
Bring the 10 cups of water and baking soda to a rolling boil in a wide saucepan.
In the meantime, turn the dough onto a lightly oiled surface and divide into 8 equal pieces. Roll each piece into a 24 in. rope. Slice each rope into 1 in. pieces. Place a slightly damp towel over pretzel pieces to prevent them from drying out while you cut the other pieces.
Using a slotted spoon, lower a handful of the pretzel pieces into the water and boil them for about 30 sec., flipping them around in the water with the spoon a couple of times. Remove the pieces from the water with the spoon and drain them on towels as best you can. Place them on the baking sheets. Repeat with remaining dough, adding more water and a pinch or so more of baking soda as needed (some of the water will boil away as you work).
Brush the top of each pretzel with melted butter and sprinkle with salt. Bake until dark golden brown, approx. 10-12 min. Brush with remaining butter before serving. Serve warm.

Tuesday, March 12, 2013

Muddy Buddies {Baking with Sisters, Part 4}

Some of you may remember a 3-part series I did last year called "Baking with Sisters"- well, I'm adding to it! It has become a tradition for my four sisters and I to have a get-together every year (I think this was our fourth year) and no sister time is complete without getting into the kitchen and trying out some new recipes.

In this instance, however, it isn't a new recipe, but rather an old one, and one you likely know well. We call it "Muddy Buddies" but some may know it as "Puppy Chow". This is the original Chex version that we grew up with and it is a classic that holds its own! How can you go wrong mixing creamy peanut butter, smooth chocolate, crunchy cereal and a dusting of powdered sugar? It's the ultimate sweet snack that's perfect paired with a chic flick or a Downton Abbey marathon!


Two of my sisters, of course, fought over who got to "shake the bag" (the fun part!!) so we divided it in half.


If you've never given this classic favorite a try, there's no time like the present to make some culinary memories with your kids (or sisters)! It comes together in a matter of minutes and will certainly satisfy your sweet-tooth snack craving!


Chex Muddy Buddies
makes a lot

9 cups Chex cereal (feel free to mix varieties)
1 cup chocolate chips
1/2 cup peanut butter
1/4 cup butter
1 tsp vanilla
1 1/2 cups powdered sugar

Measure cereal into a large bowl.
Combine chocolate chips, peanut butter and butter in a microwave safe bowl. Microwave 1 min. Stir. Microwave about 30 sec. longer or until smooth. Stir in vanilla.
Pour mixture over cereal and stir until evenly coated.
Pour into resealable 2 gal. plastic bag (or two 1 gal. bags). Pour in powdered sugar, seal bag, and shake until all pieces are coated. When cool, store in an airtight container.

Friday, April 13, 2012

Baked Spiced Cake Donuts {Baking with Sisters, Part 3}

The third and final treat my sisters and I baked during their visit was a batch of baked donuts. I foolishly ordered a donut pan right at a time when I was trying to start losing weight (I know, what was I thinking?) so, mustering all my self control, when it came I stashed it away and didn't look at it again. However, when the girls came, I thought it would be fun to give it a try (we'd already indulged in cinnamon rolls and scones, what could a donut hurt? And besides, they're baked so they're...less unhealthy...). We decided the safest route to go would be to try the simple recipe for spiced cake donuts on the back that had come attached to the pan. They proved to be super easy and delicious! And, the donut pan worked like a dream! The donuts came out looking absolutely perfect and round.


We whipped up the batter in no time and piped it into the pan. The recipe notes that a pastry bag or plastic bag with a corner cut off works best to fill the pan- and they were right. A Ziploc bag with the corner cut out worked perfectly!
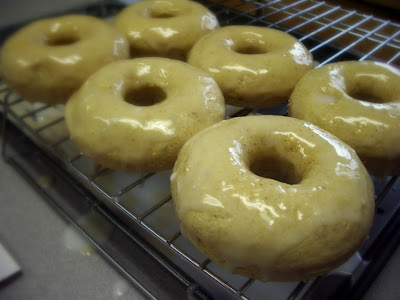
Once the donuts were baked and cooled (and after the mishap we won't talk about where a certain chef dumped the second pan of donuts into the bottom of the oven), we decorated them. Half the batch was appointed to be coated with the recommended glaze from the donut pan recipe (and some leftover scone glaze), the other half we decided to split evenly between being dipped in melted butter, cinnamon and sugar and  the others being "frosted" with Nutella and finished up with sprinkles. All the donuts were delicious and beautiful, and were certainly a hit with the rest of the family who came up to visit that evening! They were spongy and soft and the toppings were yummy!


And now that this chapter is closed, I look forward to the next opportunity I'll have to bake with my beautiful sisters!


Baked Spiced Cake Donuts with Glaze
(printable version)
from a NORPRO pan
makes 12 donuts

2 cups flour
3/4 cup white sugar
2 tsp baking powder
1/4 tsp nutmeg
1/4 tsp cinnamon
1 tsp salt
3/4 cup milk
2 eggs, beaten
2 tsp vanilla
1 TB shortening

Preheat oven to 325.
Lightly grease donut pan. In a large bowl, mix flour, sugar, baking powder, nutmeg, cinnamon and salt. Stir in milk, eggs, vanilla and shortening.
Pour batter into pastry bag or plastic bag with the corner cut off. Fill each donut cup approx. 3/4 full.
 Bake 8 to 10 min. or until donuts spring back when touched. Allow to cool slightly before removing from pan.
When donuts are cooled, frost, glaze or dip in melted butter followed by a cinnamon-sugar mixture (or other topping of your choice- get creative!).

To make glaze: mix 1 cup powdered sugar with 2 TB hot water until smooth. Pour over cooled donuts or serve on the side for dipping.

Monday, April 9, 2012

Petite Vanilla Scones {Baking with Sisters- Part 2}

Another recipe my sisters and I tackled while they were visiting was a Pinterest find- Petite Vanilla Bean Scones. I cross the "Bean" out because we were not in possession of a vanilla bean at the time, unfortunately. So, these are the non-bean adaptation. If you'd like the original bean-included version, follow the link to the recipe on the Baking Bites blog! These tiny scones are soft and cakey, infused with vanilla flavor and delicately drizzled with a sweet glaze. If you are fortunate enough to have ever snagged a few at your local Starbucks, you are likely drooling about now and are eager to discover if they are easy enough to make at home. Well, get to the kitchen, because they are incredibly simple and fast to make and you probably have all the ingredients on hand! Between the three of us, we whipped these darling treats out in no time flat and were ready to move onto the next treat (which you'll read about in Part 3)! They baked up beautifully and looked even more adorable when coated with the shiny, vanilla colored glaze. They are a perfect portion size, too- a fantastic compliment to a cup of coffee or tea, and they would be equally at home on a breakfast tray or as an after dinner treat.


Petite Vanilla Scones
makes 20 small scones
adapted from Baking Bites

2 cups flour
1 1/2 tsp baking powder
1/2 tsp salt
1/2 cup butter, room temperature
1/3 cup sugar
2 tsp vanilla extract
1/2 cup milk

Preheat oven to 400.
Line a baking sheet with parchment paper. In a medium bowl, whisk together flour, baking powder and salt.
In a large bowl, cream together butter and sugar until light. Add vanilla and beat to incorporate. Add in half of flour mixture, followed by the milk. Stir in remaining flour mixture until dough comes together in a firm, slightly sticky mass.
Divide dough into 5 equal pieces and roll into tennis ball sized rounds. On lightly floured surface, press each ball into a disk about 1/2 in. thick. Cut each disk into quarters and place on prepared baking sheet.
Bake 11-15 min. or until lightly browned. Cool before glazing.

Vanilla Glaze
2 cups powdered sugar
4 TB milk
2 tsp vanilla extract

Beat together all glaze ingredients until very smooth and of pour-able consistency. Add extra sugar if too thin, extra milk if too thick. Pour over cooled scones.

Friday, April 6, 2012

Nutella Cinnamon Rolls {Baking with Sisters, Part 1}

Last week, two of my three younger sisters came for a visit- we had such a fun time laughing, playing games, and doing one of our favorite things: baking. So...I threw my "diet" out the window and we had a blast in the kitchen, baking up a storm of sweet things. The first of those was a delectable batch of Nutella Cinnamon Rolls. I had been hankering for a pan of cinnamon rolls, needed something to take to our Ladies Bible Study, and had inadvertently picked up a container of Nutella. I first googled the idea of Nutella cinnamon rolls to see if they even existed. Of course, they did. It seems the cooks of this world have come up with any and every possible use for the irresistible hazelnut spread! (As a side note, this was my first experience with Nutella- if you have not yet enjoyed the wonder that is chocolate hazelnut spread, I invite you to do so without delay! I am hooked!) The particular blog I found this recipe on, Adventures in Food, has many of her own delicious looking Nutella creations.The rolls were much like other cinnamon rolls, a yeasty dough, rolled out and slathered with butter and sprinkled with cinnamon and sugar...but the addition of a rich layer of Nutella in the middle and a creamy Nutella-infused frosting generously drizzled on top truly transformed them into a thing of beauty. Beauty of taste anyway.


Anyhow, the unusually filled cinnamon rolls were a hit with our Bible study group (and also my husband, who enjoys any departure from my "diet" which brings him baked goods)- and we girls devoured a few extra ourselves while watching "Emma" and feeling incredibly girly and indulgent. Nothing brings out the silliness like baking, a jar of Nutella, and sisters.


Nutella Cinnamon Rolls
makes approx. 16 cinnamon rolls

1 pkg. quick rise yeast (2 1/2 tsp)
1/4 cup warm water
1/4 cup milk
1/4 cup butter, melted
2 tsp vanilla
1/2 tsp salt
1/4 cup sugar
1 egg, beaten
3 3/4 cups flour

2 TB butter
2/3 cup Nutella
3 TB brown sugar
1/2 tsp cinnamon

In the bowl of your mixer, combine yeast and water, allow to rest 5 min. Add milk, butter, vanilla, salt, sugar and egg and mix well.
Add 3 1/2 cups flour and mix until dough comes together, adding remaining flour a tablespoon at a time until dough forms a slightly sticky ball. Knead on a floured surface or using the dough hook of your mixer until dough is smooth and elastic.
Grease a large bowl and place dough inside, turning once to coat. Cover and allow to rise in a warm place 1-2 hours. Dough is ready when doubled in size and indentations remain when you press your fingers into it.
Preheat oven to 350.
Roll dough out onto a lightly floured surface into a 9x18 in. rectangle. Brush with the 2 TB melted butter. Spread Nutella evenly across the surface of the dough. Combine brown sugar and cinnamon and sprinkle over Nutella.
Starting at a long side, tightly roll up the dough, pinching the ends to seal. Using a serrated knife, slice dough into 1 1/2 in. rounds. Place into two greased pie pans. Let rolls rise in pans 15 min.
Bake 12 min. or until lightly browned. Allow to cool slightly while you prepare the icing.

Nutella Icing

2 cups powdered sugar
2 TB Nutella
2 TB butter, melted
3 TB milk

Whisk all ingredients together in a small bowl until smooth, then pour over cinnamon rolls while still warm.
Related Posts Plugin for WordPress, Blogger...